

My 6-month old started sleeping a lot better through the night when we started to play a “shhing” YouTube video. You might think that is crazy, but the results speak for themselves (at least so far).
We started off by using an old Android phone plugged in overnight just playing the video. This got to be a bit annoying though as the phone would crash and lock up sometimes and that’s the last thing you want to deal with when you are trying to put an infant to sleep.
I then built an ESP8266 MP3 Sound Machine so that I could play the same audio using a simpler and more robust interface. The device can play any MP3 from an SD card and integrates with Home Assistant so I can trigger it starting his bedtime routine!
The main goals for the project:
- Play an MP3 loaded on an SD card in loop
- A local button to turn the device on/off
- Control the sound machine in my Home Automation hub (Home Assistant in my case)
For use in our nursery, we only need to loop a single MP3 that helps our son fall asleep. (I extracted the MP3 from the “shhh-ing” YouTube video). The hardware I use in the project would enable you to have full playback control (play/pause/stop/next) over any number of MP3s as well, you would just need to improve the software. Luckily the software library for the DFPlayer is fairly robust so it should be straightforward to add this functionality if you need it. Some other neat ideas you could use it for:
- DIY security system playing dog barks or voice recordings
- Smart alarm clock controlled by your Home Automation platform
- Smart Speaker to play announcements to your smart home
Hardware
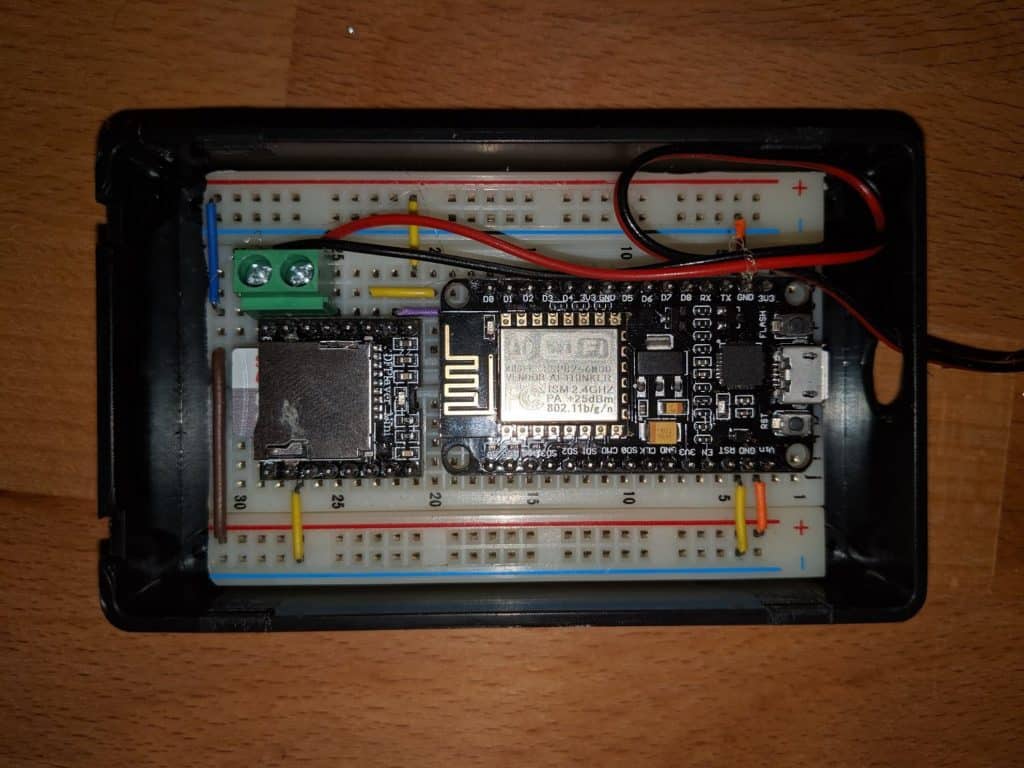
The hardware is actually relatively simple. The main controller is the ESP8266 NodeMCU development board and it communicates with DFPlayer Mini over asynchronous serial. The DFPlayer chip takes care of all the complicated aspects of reading MP3s from an SD card and converting to an analog signal for the speaker. You don’t need to write any MP3 codecs or worry about reading from the filesystem. That’s all handled in hardware on the DFPlayer Mini board.

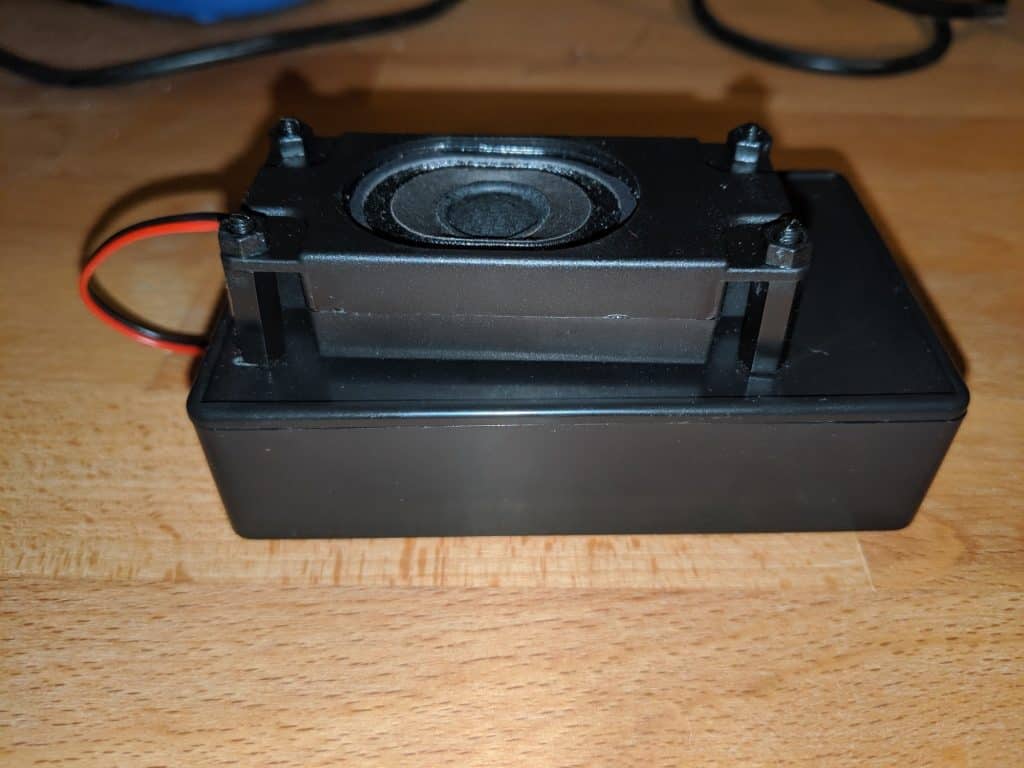
The DFPlayer board supports driving a 3 Watt 8 Ohm speaker. This was loud enough for my use case. But if you are looking to drive a higher power speaker you may need to hook the DFPlayer to an amplifier.
I also used a button to add some local control. The button essentially toggles the music on and off.
Prepping the SD Card
The DFPlayer Mini has some basic restrictions on the SD card that is used. You have to format the card as FAT16 or FAT32 so that it can read from it successfully. You are allowed to have folders and files on the card. The DFPlayer will play the songs in a deterministic order. Most people using the DFPlayer rename their songs as 0001.mp3, 0002.mp3, etc… so they can easily control the order in which the songs play.
I’m only playing a single song so I formatted the drive as FAT32 and put a single MP3 (0001.mp3) on the card.
Software
If you’ve seen some of my other blog posts using ESP8266 NodeMCU you’ll notice I’m a big fan of using ESPHome to develop my devices. I decided to use ESPHome for this project as well. Check out the ESPHome getting started documentation to learn more about installing and running ESPHome.
ESPHome
While there is not a “DFPlayer” module on the ESPHome listed components page, we can essentially build one using the Custom Output component. Before that though, let’s take a look at everything else in our sound machine yaml file.
|
1 2 3 4 5 6 7 8 9 10 11 12 13 14 15 16 17 18 19 20 21 22 23 24 25 26 27 28 29 30 31 32 33 34 35 36 37 38 39 40 41 42 43 44 45 46 47 48 49 50 51 52 53 54 55 56 57 |
--- esphome: name: sound_machine platform: ESP8266 board: nodemcuv2 includes: - mp3_player.h libraries: - DFRobotDFPlayerMini@1.0.5 wifi: ssid: !secret wifi_ssid password: !secret wifi_password status_led: pin: 16 # Enable logging logger: # Enable Home Assistant API api: ota: output: - platform: custom type: binary lambda: |- auto mp3player_output = new MP3PlayerOutput(); App.register_component(mp3player_output); return {mp3player_output}; outputs: id: mp3_player # Switch to control sound playing switch: - platform: output id: sound_machine name: Sound Machine output: "mp3_player" # Physical button for local override binary_sensor: - platform: gpio name: Button internal: True pin: number: 5 mode: INPUT_PULLUP filters: - delayed_on: 10ms - delayed_off: 10ms on_release: then: switch.toggle: sound_machine |
The main interesting portions of this configuration are the physical button for switching on/off the sound and the custom output using the DFPlayer mini.
The physical button is done using the binary_sensor component. Here we use a GPIO with a pull-up and wait for an on_release event to happen. We can use the filters attribute to do some filtering to eliminate any mechanical noise when pressing the button. When the button is released the sound_machine switch is toggled. The sound_machine switch isn’t actually a physical switch, it’s just a software switch to model the sound machine playing or not.
The switch’s output is linked to the mp3_player output component which controls the DFPlayer Mini.
Some other nice things I’ve enabled in the configuration are ota for updating the device over WiFi instead of USB and the status_led for blinking the LED on the NodeMCU while the device is booting up.
Custom ESPHome Output
Finally, the most complicated part on the software side of the project was integrating the DFPlayer with ESPHome. For that, I used the Custom Output component of ESPHome. This allows you to write some C++ code to integrate with your YAML file. I created an mp3_player.h file with the following contents:
|
1 2 3 4 5 6 7 8 9 10 11 12 13 14 15 16 17 18 19 20 21 22 23 24 25 26 27 28 29 30 31 32 33 34 |
#include "esphome.h" #include "SoftwareSerial.h" #include "DFRobotDFPlayerMini.h" using namespace esphome; // Receive Pin: 14 (D5) // Transmit Pin: 4 (D2) SoftwareSerial softwareSerial(D5, D2); DFRobotDFPlayerMini dfplayer; class MP3PlayerOutput : public Component, public BinaryOutput { public: void setup() override { softwareSerial.begin(9600); if (!dfplayer.begin(softwareSerial)) { while(true){ delay(0); } } dfplayer.volume(30); } void write_state(bool state) override { if(state) { // Loop playing mp3 number #1 dfplayer.loop(1); } else { dfplayer.stop(); } } }; |
Let’s break down what’s happening in this file:
First off, we include some header files from the libraries we need. The esphome.h header file is needed to write custom ESPHome components. SoftwareSerial.h and DFRobotDFPlayerMini.h are needed to interact with the DFPlayer module. To get the DFRobotDFPlayerMini.h you need to include the DFRobotDFPlayerMini library in your YAML file. Check my configuration from the last section to see how I included the library.
We then setup some global variables. The softwareSerial global takes two pins to use for receive and transmit which are connected to the DFPlayer Mini. You could also move this into the class constructor so it’s not as hardcoded. That way the pins could be chosen when instantiting the class.
The setup method of the class is called to initialize the output component. Here we begin the serial connection and boot up the DFPlayer Mini. We then set the volume to 30, which is the max value.
Finally the write_state method is responsible for starting and stopping the DFPlayer Mini. For my use-case, I just loop the first track, but you could do other things here as well. When the state is false the sound is just stopped.
Back in the YAML file we instantiate the class by creating a new object and giving the output an ID that is linked to the switch.
|
1 2 3 4 5 6 7 8 9 |
output: - platform: custom type: binary lambda: |- auto mp3player_output = new MP3PlayerOutput(); App.register_component(mp3player_output); return {mp3player_output}; outputs: id: mp3_player |
After flashing the device, you get a switch entity in Home Assistant to control the device.
![]()
Going to Production
Now how do you go about putting this “in production”. I didn’t do anything fancy, I used a breadboard, some precut wires, and a project box to get all the components inside an enclosure.
I also drilled some holes on the cover of the project box for standoffs for the speaker and the button to go through. The speaker uses plastic screws and standoff to be mounted and the button is just hot-glued to the cover.
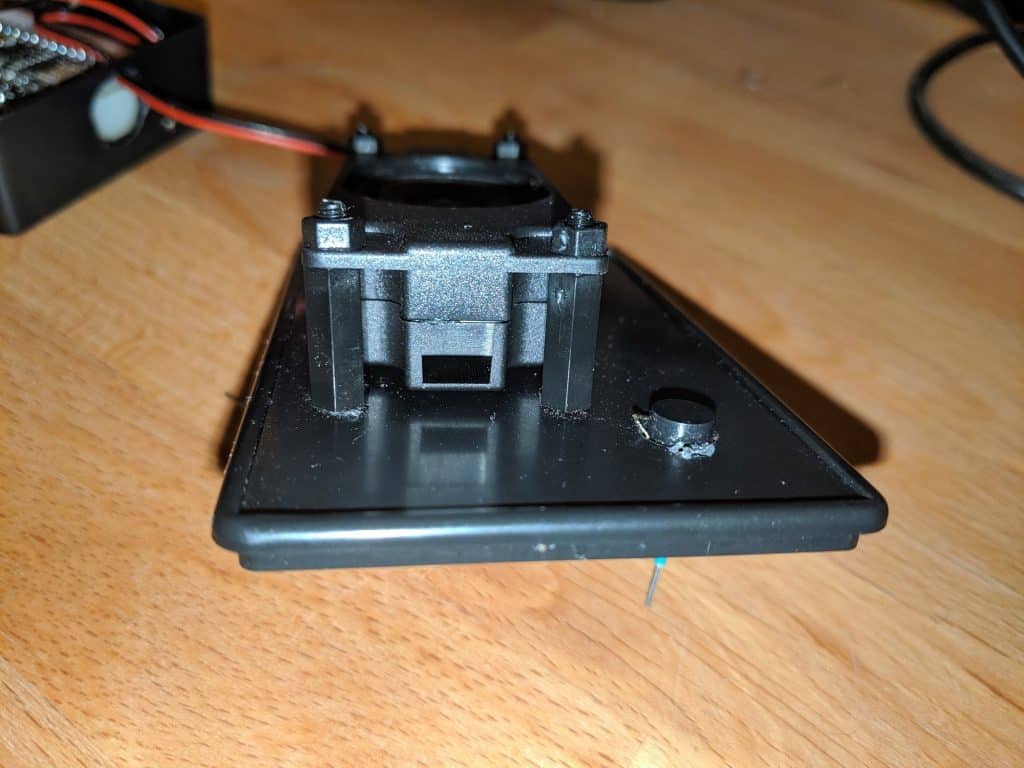
Finally there is a hole drilled on the side for power and the speaker wire. The speaker wire is terminated just using terminal block connectors.
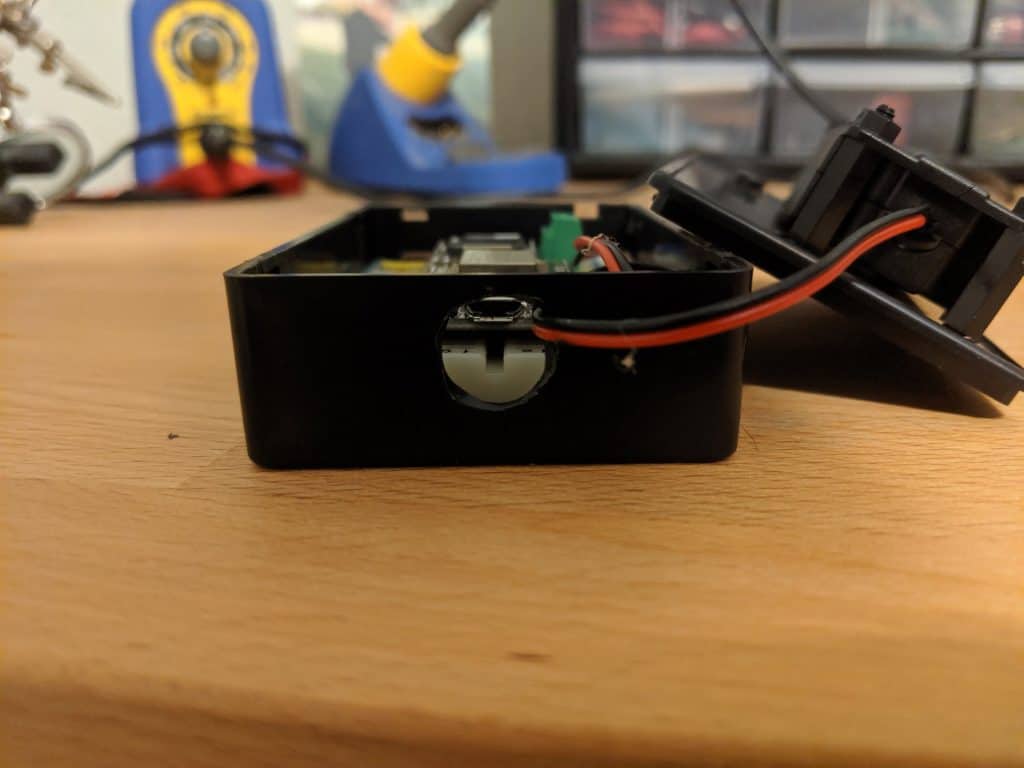
Would be great to 3D print a better enclosure in the future, but I haven’t pulled the trigger on a 3D printer yet. Overall though it’s a small box that can sit in a discreet location as long as the speaker is in a good place to fill the room.
Parting Thoughts
If you’re looking for a way to remotely/automatically start and stop MP3s the DFPlayer Mini is a great piece of hardware that can be used to simplify the software. The provided library allows you to do all the typical media controls you might expect. Using the custom output component of ESPHome it’s fairly easy to get it working within an ESPHome project using the NodeMCU as well.
Thanks for reading my tutorial on how to create your own Smart Home Sound Machine. If you like ESP8266 based projects you might like these other articles on my blog:
- Chair Presence Detection using Ultrasonic Distance Sensor
- DIY WiFi Sprinkler Controller using ESP8266
- Automating a Multi-Speed Ceiling Fan with Home Assistant
Please consider supporting the blog by joining my mailing list, following the blog on social media or directly through Buy Me a Coffee. Thanks for reading!