

The office in my house just doesn’t cool down as fast as the rest of the house. It’s far away from its thermostat and doesn’t get good circulation. Wouldn’t it be great if you could automatically start to cool it down when it reached a certain temperature? Even better, shouldn’t it start at a low speed and ramp up as the room got hotter and hotter. Today’s article will be looking at automating a multi-speed smart fan to automatically cool a room using Home Assistant.
If you’re looking at hooking up your ceiling fan to Home Assistant in the first place, check out my article on Convert Your Pull-Chain Ceiling Fan to Z-Wave using the GE Z-Wave Smart Fan Controller. If you don’t already have real-time temperature data for the room you want to cool down, this article starts with a mini-tutorial on how to create a cheap WiFi temperature sensor using an ESP8266 NodeMCU, a DHT22 sensor, and esphome.
Room Temperature
If you’ve already got a way to get the temperature of a room in Home Assistant, go ahead and skip over this section.
Hardware
There are plenty of ways to read temperature data from a room and get it into Home Assistant. Everything from Z-Wave multisensors, ZigBee solutions, and of course DIY alternatives. A cheap but very robust solution is using an ESP8266 NodeMCU with a DHT22 sensor. I love this combination for building cheap WiFi enabled temperature sensors for my home. On the software side, I’ll be using esphome to create the firmware and communicate with Home Assistant.
Hooking up the DHT22 to the ESP8266 is very straightforward. The DHT22 comes with 3 wires: GND, 5V, and data. You can tie GND to any GND pin on the ESP8266 and the 5V line must go the VIN pin on the ESP8266. Finally, I’m using pin 14 for data communication.
Software
Once you’ve got it hooked up, it’s time for the software side. I’m using esphome for this project. you can find the installation instructions in their documentation. I’ve been starting to use esphome lately and have been really been impressed with the software. Not only is it really easy to get started, but it creates a very robust connection with Home Assistant that takes into all the edge cases that come with embedded programming. The over the air update feature built into the software means you can flash updates to devices without having to plug them into your computer. Of course, you can do the same thing writing your own Arduino or MicroPython code if you prefer those frameworks.
To use esphome you need a yaml file declaring your configuration for the device. Since we are just using a DHT22 the yaml file is pretty basic and can be seen below:
|
1 2 3 4 5 6 7 8 9 10 11 12 13 14 15 16 17 18 19 20 21 22 23 24 25 26 27 28 29 30 31 32 33 |
esphome: name: office platform: ESP8266 board: nodemcuv2 wifi: ssid: my_ssid password: my_wifi_password status_led: pin: 16 sensor: - platform: dht pin: 14 temperature: name: "Office Temperature" humidity: name: "Office Humidity" model: DHT22 update_interval: 60s # Enable logging logger: # Enable Home Assistant API api: ota: text_sensor: - platform: version name: esphome_office_esphome_version |
Some interesting pieces from the configuration:
- Make sure you change the temperature/humidity name fields to match the room the device is for
- You can change the sensor reporting interval, 60 seconds seems plenty often though
- Enabling the
status_ledcomponent will blink the led on the device if it’s disconnected from WiFi or can’t read from the DHT22 - Enabling the
otacomponent allows you to flash the device over WiFi for easier future updates - Enabling the
apicomponent uses a direct connection to Home Assistant, so you don’t need to run an MQTT broker
Once you’ve got your esphome configuration file written, you can generate the firmware and load it onto the device using the command esphome run office.yaml. You’ll need to enable the ESPHome integration within Home Assistant. There are easy instructions in the Home Assistant documentation.
Automating the Fan
Like a lot of Home Assistant automations, there are multiple ways to accomplish the same task. I’ll use the Generic Thermostat component in Home Assistant to accomplish it today.
Single Speed Fan Automation
For my first implementation, I just used the generic thermostat to trigger the ceiling fan when the target temperature is met. The Generic Thermostat platform takes care of all the necessary automation to actually turn on the fan when the room temperature is reaching the target temperature. A basic example of the generic thermostat component using a ceiling fan might be:
|
1 2 3 4 5 6 7 8 9 10 |
climate: - platform: generic_thermostat name: Office heater: fan.office_fan target_sensor: sensor.office_temperature ac_mode: True target_temp: 78 initial_operation_mode: auto cold_tolerance: 2 hot_tolerance: -2 |
ac_modeis set toTruebecause we’re cooling down a room. The default behavior is heating.cold_toleranceandhot_toleranceare set to2and-2respectiavely, this is because I want the fan turn on when it’s within 2 degrees of the target temperature, and turn back off when the room temperature is 2 degrees colder than the target temperature.
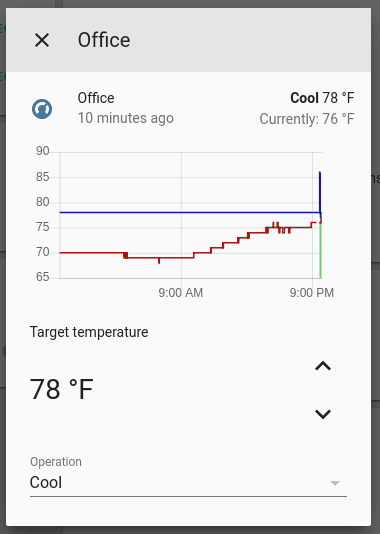
This gives you a thermostat interface for your Home Assistant frontend.
This works great if your ceiling fan has only one speed. However, if you have a multi-speed ceiling fan, it just turns on high speed whenever the target temperature is reached. Continue on if you want to make the fan even smarter and slowly ramp up the speed depending on the room temperature.
Multi-Speed Fan Automation
If you used the GE Z-Wave Smart Fan control, like I mentioned in my Convert Your Pull-Chain Ceiling Fan to Z-Wave article, your ceiling fan actually supports three speeds. We’re now going to look at improving the automation to slowly ramp up the speed for the ceiling fan based on the current and target temperature. We’ll still leverage the generic thermostat component so that the user interface remains the same, but we’ll improve the automation.
There is a bit of plumbing we have to do first. We want our fan speed to react to the temperature in the room changing or something changing the target temperature of the thermostat. To depend on the target temperature of the thermostat, we must get the temperature as it’s own sensor. This way, we can trigger the automation whenever the target temperature changes. To do that, make a template sensor that just reads the target temperature attribute of the generic thermostat.
Here is what my template sensor looks like for extracting the target temperature from my office generic thermostat.
|
1 2 3 4 5 6 7 8 9 10 |
--- # Extract the set temperature from the generic thermostat from the office platform: template sensors: office_temperature_target: friendly_name: "Office Target Temperature" unit_of_measurement: '°F' value_template: "{{ state_attr('climate.office', 'temperature') }}" |
Now, we have a new sensor with an entity_id of sensor.office_temperature_target that always follows the target temperature of the thermostat.
Next, we need to make a switch that the thermostat can trigger when the fan needs to be turned on. For this, we’ll use a Template Switch for our custom switch.
|
1 2 3 4 5 6 7 8 9 10 11 12 13 14 15 16 |
--- # Switch used by office thermostat to turn on and off the fan platform: template switches: office_thermostat_switch: value_template: "{{ is_state('automation.office_fan_turn_on', 'on') }}" turn_on: service: automation.turn_on entity_id: automation.office_fan_speed turn_off: - service: automation.turn_off entity_id: automation.office_fan_turn_on - service: fan.turn_off entity_id: fan.office_fan_switch_level |
When the switch is turned on, it simply enables the office_fan_speed automation (which we’re about to write). When the thermostat turns the switch off, it turns off the automation and calls a service to turn off the fan.
Writing the Automation
Next, we can write our automation to adjust the speed of the fan based on the target temperature and current temperature.
|
1 2 3 4 5 6 7 8 9 10 11 12 13 14 15 16 17 18 19 20 21 22 23 24 25 26 27 |
--- alias: Office Fan Speed initial_state: false trigger: - platform: state entity_id: sensor.office_temperature - platform: state entity_id: sensor.office_temperature_target condition: - condition: state entity_id: timer.office_fan_cooldown state: 'idle' action: - service: fan.turn_on entity_id: fan.office_fan_switch_level data_template: speed: >- {% if (((states('sensor.office_temperature_target') | float) - (states('sensor.office_temperature') | float))) >= 1.0 %} low {% elif (((states('sensor.office_temperature_target') | float) - (states('sensor.office_temperature') | float))) <= -3.0 %} high {% else %} medium {% endif %} - service: timer.start entity_id: timer.office_fan_cooldown |
Let’s break down this automation:
- It triggers whenever the current temperature of the office changes, or something changes the target temperature of the thermostat
- Since the temperature could be changing often, we’ll use a timer to ensure we don’t keep changing the fan speed constantly, more on that later. But for now, we check that the timer is currently not running before changing the fan speed.
- Finally, the action takes the difference between the current temperature and target temperature and sets the fan speed. For my setup, I want the fan speed to be low if the current temperature is 1 or more degrees less than the target. I want it to be at high speed if the temperature is 3 degrees higher than the target. If it’s in the middle, use the medium speed.
- The automation ends with a call to start the cooldown timer. This is just to ensure that the automation doesn’t continually trigger.
- The
initial_stateof the automation is set tofalseso that the automation doesn’t start running when Home Assistant boots up. Instead, our thermostat will trigger the template switch, which will then turn on this automation.
Cooldown
The automation we wrote triggers whenever the room temperature or the target temperature changes. If your room temperature reading is changing every minute, you might not want the fan speed to be constantly changing. It could create noise on your Z-Wave network, clutter your Home Assistant logbook or just annoy whoever is sitting in the room if the fan speed is constantly changing. That’s why we create a cooldown timer, to limit how often the automation runs.
Using the Timer component you can make a cooldown timer, I’m just using a simple 5-minute cooldown.
|
1 2 3 4 5 6 |
--- # Timer used to control how often the speed of the office fan is updated office_fan_cooldown: name: "Office Fan Cooldown" duration: '00:05:00' |
Updating Generic Thermostat
Finally, we need to make some minor updates to our generic thermostat instance. All that has really changed is we are now using switch.office_thermostat_switch as the switch to trigger when the room temperature is within our bounds of the target temperature.
|
1 2 3 4 5 6 7 8 9 10 11 |
--- platform: generic_thermostat name: Office heater: switch.office_thermostat_switch target_temp: 78 target_sensor: sensor.office_temperature initial_operation_mode: auto cold_tolerance: 2 hot_tolerance: -2 ac_mode: True |
Closing Thoughts
The best Home Automation projects are the ones that actually automate your house to be smarter. By converting your fan to be wirelessly controlled and writing a little bit of Home Assistant configuration you can automatically cool any room in your house. Home Assistant is a very powerful piece of software and using Template Sensors, Template Switches, Timers and the Generic Thermostat component you can create a really smart automated ceiling fan.
Would you accomplish this another way? Let me know in the comments! I’d love to hear about alternative solutions.