
Have a fan in your home you want to turn on automatically? Right now controlled by a light switch or pull chain? In today’s article, I’m going to be converting my ceiling fan from being controlled by a wall switch and pull chain to being controlled by Z-Wave switches.
My main goals for the project were to:
- Be able to control my ceiling fan speed and light from my Home Automation system
- Automatically turn on the fan when the temperature reaches a certain level
- Control the fan locally with the switch when needed
My home office never cools down or warms up enough. I wanted to get the ceiling fan into my Home Automation system so I could automatically turn it on during hot days or mornings before I come to work in the office.
Hardware
I’ve already invested in several Z-Wave devices in my home (check out my dimmer switch tutorial) so I settled on using the GE Z-Wave Plus Smart Fan Speed Control (3-Speed) to control the fan. This is an in-wall switch that controls the fan speed by controlling the amount of energy that flows to the fan. Think of it as a sort of light dimmer for fans.
If your fan is already remote controlled via RF you might look at giving BOND a try for integration into your Home Automation system, I haven’t personally tried it but it came up when doing some research for this article. If there are other ways you’re controlling your fan please let me know in the comments!
Disclaimer: If you’re not comfortable working on electrical systems, hire a professional. Permits may be required for electrical work in your area.
Fan Circuits
There are several ways a ceiling fan can be wired up in your home. It can be wired up to a dedicated switch on the wall, it can be tied to the light switch or there can even be no switch and the pull chains control the light and fan speed. There is an excellent article at Pro Tool Reviews showing the different circuit configurations.
What I wanted was to have two separate switches, one for fan speed and one for lighting. This essentially means I need to convert the ceiling fan to this circuit:

In this structure, the fan power and light power connect to separate switches. The only difference to this circuit and my setup is that my power supply is coming into my wall switch box instead of to the fan box.
Materials
Let’s quickly break down what we need for this project. In my case, I’m converting the already existing switch to 2 separate Z-Wave switches. These will control the fan and lighting independently.
| Item | Comments |
|---|---|
| GE Z-Wave Plus Fan Controller | The fan controller for the ceiling fan |
| GE Z-Wave Light Switch | Light switch to toggle the fan's light. Not needed if your fan doesn't have a light. |
| 2-Gang Box | Old work gang box to convert single switch to 2 switches (fan/light) |
| Wire Nuts | Wire nuts to make connections in electrical box |
| Wire Conectors | Wire connectors to make connections in electrical box |
Removing the Existing Switch
First off, turn off the power at your breaker box for the switch and fan. I like to use one of these Non-Contact Voltage Testers to triple check that the circuit I’m working on is really off. You simply point the tester at the light switch and it only beeps if it detects power.
After turning off the breaker I removed the wall plate to expose the switch.
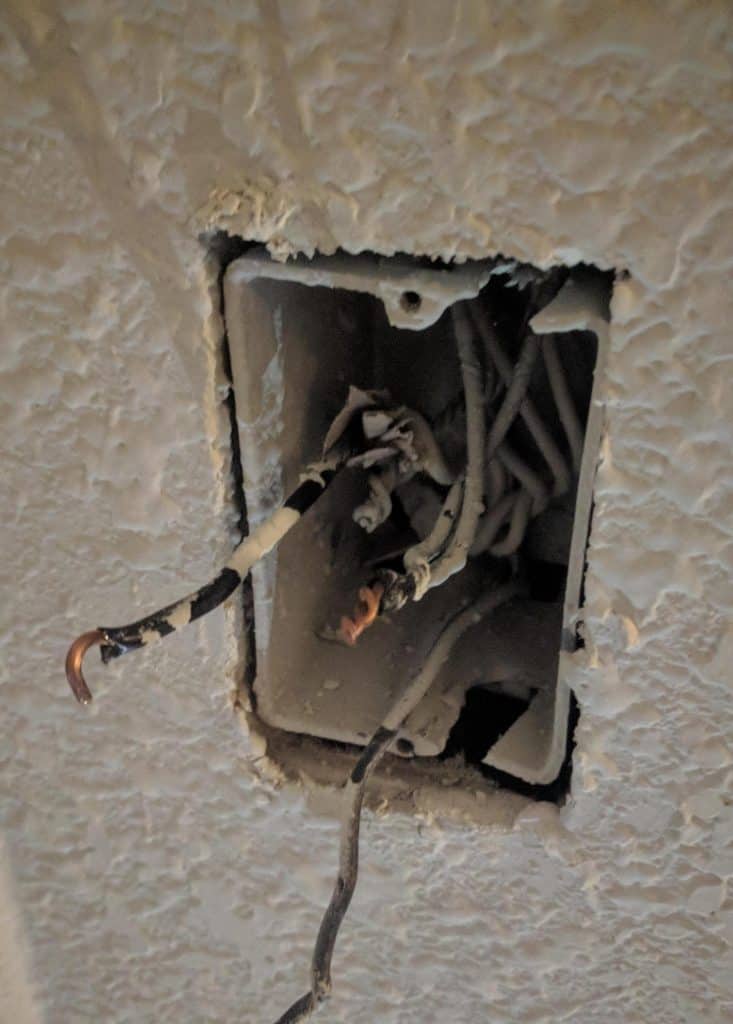
Now, I was expecting to see two cables in the box. One from the power supply and one to the fan, connected through the switch. After I took off the box, I realized two sets of outlets were also wired through this box. This doesn’t change anything in how to wire the fan. Make a note though so other outlets continue to work after finishing the new wiring. It’s also going to make the box a little more cramped because of the extra wiring and connectors needed.
Removing the Box
Next, because I want to have two switches I need to take out the existing single gang box and replace it with an old work 2-gang box. The existing box was nailed into the stud of the wall. So I cut a larger hole for the 2-gang box and used a prybar to remove the old box.
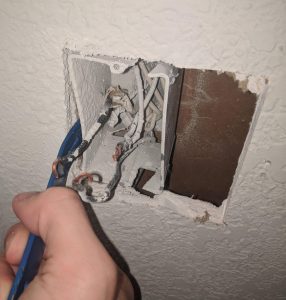
With the box out you can now see all the wires broken out. To reframe, there are 4 sets of wires coming into this box:
- 1 from the breaker box that is the power supply
- 1 going to my ceiling fan
- 2 going to other outlets in the room
To get the fan wired up, we need to add another set going from this box to the fan so that separate switches control the light and fan speed.
Wiring the Fan
Next up, we need to run a new electrical cable from the fan down to the switch. This probably involves getting in your attic (which is no fun). You’ll still need the breaker off while working on the fan. First, unscrew the top part of the fan to expose the electrical connections and get a better look.
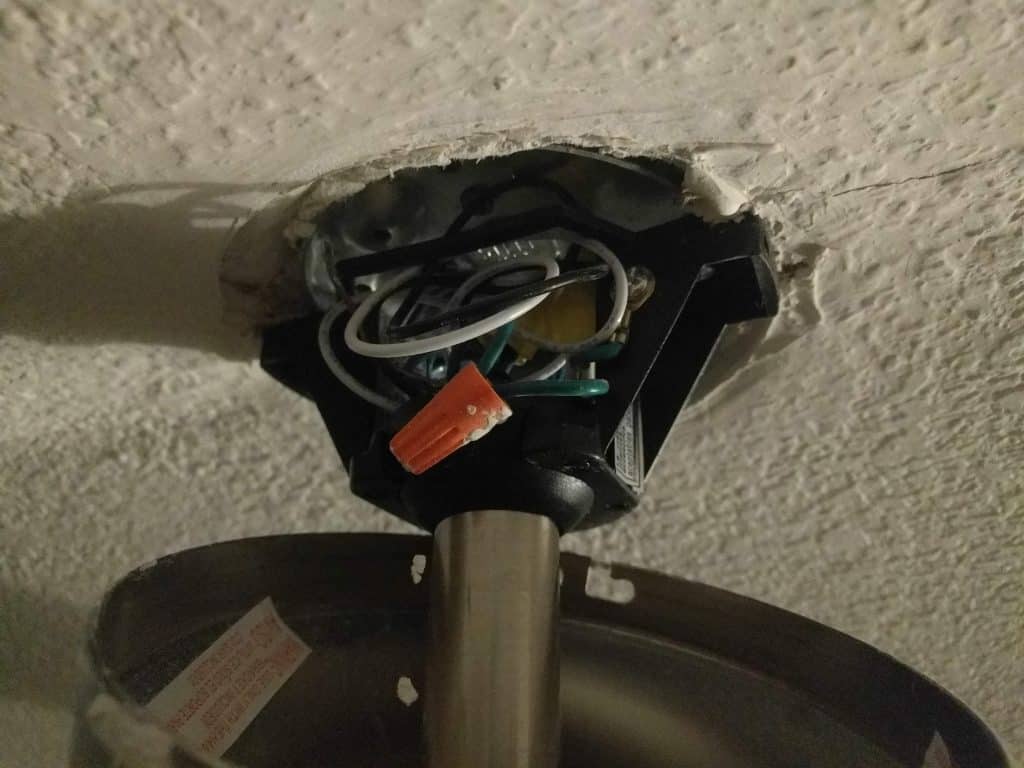
Run the additional Romex wiring to the fan from the switch box. Push it through one of the knockouts in the box for the ceiling fan. Then, you’ll need to rewire the fan so that the hot (black) is connected to the black on the ceiling fan to control the fan speed. The hot from the line that goes to the old wall switch stays connected to the blue line to control the light. Connect all the neturals together and connect all the grounds together. Refer back to the circuit diagram at the beginning of the article to get a better visual.
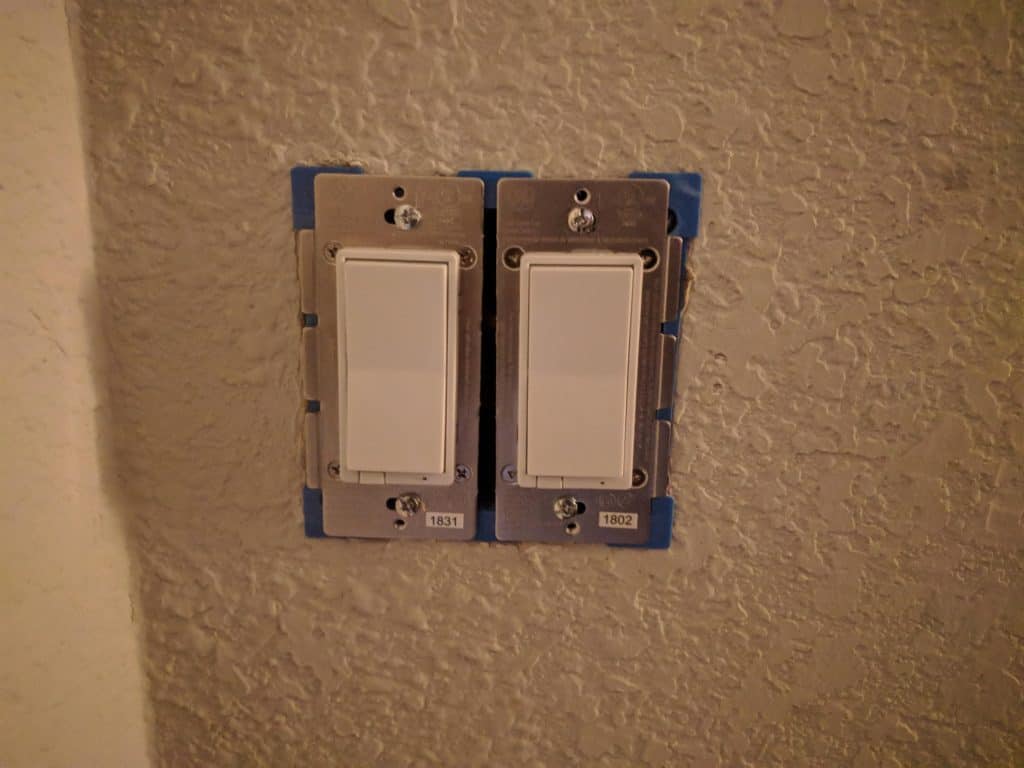
Putting in the New Switch
I recommend getting the largest “old work” 2-gang box that will fit in your opening. Most of these smart switches are pretty bulky so having the extra space in the box will be helpful to get all of our wires connected correctly. 34 cubic inches vs 25 cubic inches will be worth the premium in my opinion.
When adding the switches to the box, you’ll need to break off the tabs on the sides so they can fit nicely in the box. These are meant to be broken off and don’t change any of the electrical properties.

Cut your drywall to fit the new 2-gang box and fish your wires through the new box. The light switch should connect to the existing light wire as the load. The new wire you ran to the fan should connect to the load of the 3-speed fan controller.
This takes more time than you would think to get all your connections nicely wired together. Especially if outlets are connected through the box like in my case. Using a combination of wire nuts and push-in connectors you should be able to get it wired up and back in the box.
At this point, you could disconnect the pull-chains from the ceiling fan if you want. If someone were to pull one of the chains, your wall switches wouldn’t act properly because the power is turned off at the fan. I decided to keep mine on, my wife can’t easily reach them anyways.
Software Setup
Adding to your network
It’s best to refer back to your Z-Wave Plus gateway device’s documentation to see how to include new devices to your network. I’m using the Aeotec Z-Stick Gen 5 and to connect the switches to my network all I had to do was:
- Press the button the Aeotec Z-Stick to start the pairing mode. The LED on the stick starts to blink slowly
- Press the top part of the fan switch
- The Z-Stick should start to blink fast as it discovers the fan switch
- The Z-Stick eventually goes back to blinking slowly
- Press the top part of the lighting switch
- The Z-Stick should start to blink fast as it discovers the fan switch
- The Z-Stick eventually goes back to blinking slowly
- Press the button again to get out of pairing mode.
Now your Z-Wave network knows about your new devices.
Home Assistant
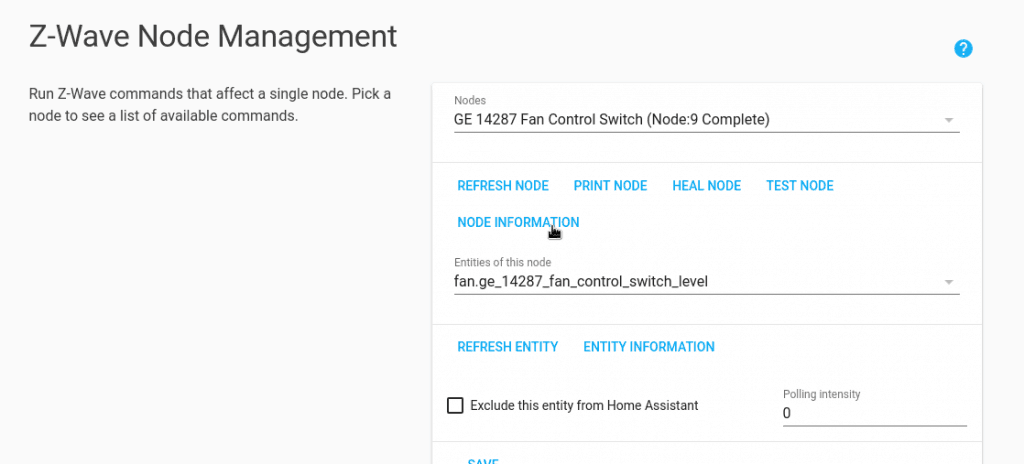
There isn’t a lot that you need to do after adding your device to the Z-Wave network and restarting Home Assistant. You can rename the devices so they show up with better names in Home Assisant using the Z-Wave config menu.
Rename the node and entity by clicking the “Node Information” button in the Z-Wave configuration menu.
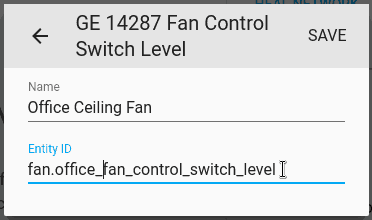
You can do the same thing for the entity. This “Entity ID” will be the entity ID for adding the new switches to any groups.
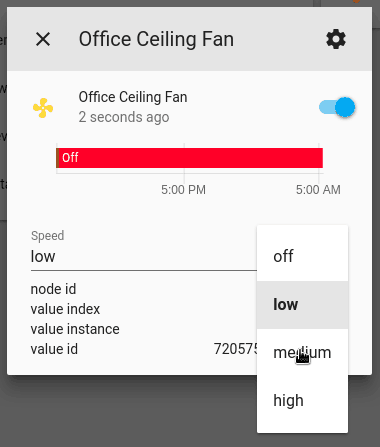
Add the new entities to a group to display them nicely in the Home Assistant UI. The lights can switch on/off and the fan speed goes between three levels (low, medium and high) when turned on.
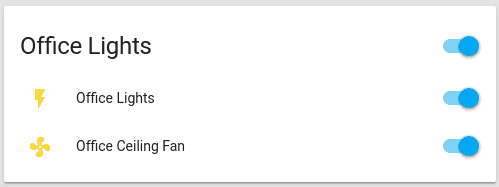
When clicking the fan you can then choose the speed in Home Assistant.
You can automate the ceiling fan by using the fan.turn_on service. Once I have a temperature sensor in my office, I plan on automatically turning on the ceiling fan when the room reaches a certain temperature. The light can be controlled via the light.turn_on service.
Summary
While a project like this always seems easy in concept, it usually takes longer than imagined. In my case, the room with the ceiling fan doesn’t cool down easily with my A/C system. So integrating this ceiling fan into my Home Automation system allows me to cool it down automatically on hot days. While the electrical work may seem daunting at first, if you have experience wiring an outlet or light switch it’s essentially the same type of circuit. The GE Z-Wave Smart Fan control fit the bill perfectly to update my old ceiling fan.
Have another way you’re automating your fans? Let me know in the comments or social media!