
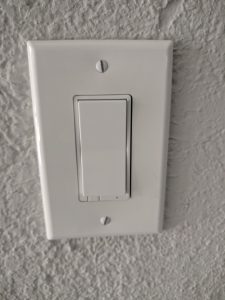
Automating your lights are a great place to get started with Home Automation. In today’s article, I replaced a traditional light switch with a Z-Wave Plus dimmer switch (GE 14294). Using Home Assistant, my lights automatically dim when someone starts playing content on the Chromecast in my Living Room after sunset. We find it useful to have a very dim light on during the movie so that we can still get up without stepping on stuff and still be able to see what we’re eating.
Some supplies I used:
- Z-Wave Plus Dimmer Switch from GE. Model 14294.
- Dimmable Light Bulbs (I used these)
- Ideal Connectors (optional, but these make it easier)
- A Z-Wave Plus Hub (I use the Aeotec Z-Stack Gen 5)
Wiring up the Switch
I’m not going to go into details about how to wire up the switch because there are plenty of high-quality guides on the internet (see Additional Links at the bottom of this blog post for some I like). Some general tips though:
- Always verify your breaker is off before touching/removing the switch.
- Take a picture of how your switch is currently wired up, just in case things go south and you need to back out of the installation.
- Notice which wires are the “line” and the “load”. (See tip #2 in case you forget to notice)
- Most Z-Wave or other “Smart” switches are bigger than their traditional counterparts. I like using some Push-In Wire connectors to try and save space and make it easier to push all the wires back into the box.
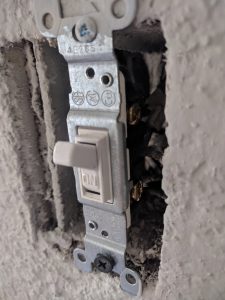
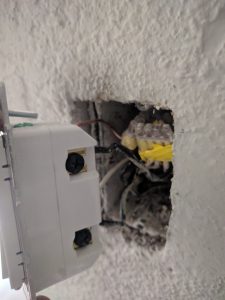
Here are a couple pictures of the progress:
Connecting to Z-Wave Network
Z-Wave switches use mesh technology to join your network. I’m using the Aeotec Z-Stick Gen 5 for my Z-Wave network. To connect it to my current mesh network all I did was:
- Bring the Z-Stick close to the light switch
- Press the button on the Z-Stick to start the pairing mode. The LED on the stick starts to blink slowly
- Press the light switch on. This causes the Z-Stick blink fast as it discovers the new switch and adds it to the network
- The Z-Stick eventually goes back to blinking slowly. Press the button again to get out of pairing mode.
Now the device should be added to your Z-Wave network.
Configuring in Home Assistant
If you use Home Assistant, it’s now time to add the new switch to your Home Assistant configuration. If you haven’t read the Z-Wave Getting Started Guide from Home Assistant I recommend that to get started using Z-Wave in your configuration.
An outline of the steps are:
- Restart Home Assistant with the Z-Wave stick plugged in
- Wait for Home Assistant to notice the new device and update the
entity_registry.ymlfile - Rename the entity in the
entity_registry.ymlfile and restart Home Assistant - Add the entity to a group.
For example, in my setup, I added lights to my Living Room. After Home Assistant added it to my entity_registry.yml file I edited it to have the following entry (your unique_id will probably be different):
|
1 2 3 4 |
light.living_room_dimmer: name: platform: zwave unique_id: 4-72057594109853697 |
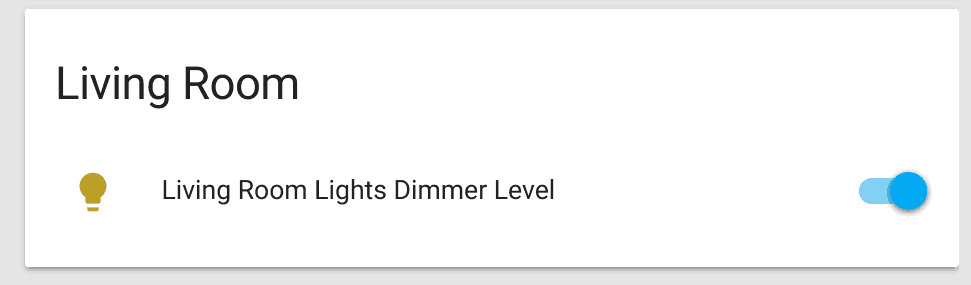
Afterward, I added it to a group, so it would show up in my UI:
|
1 2 3 |
Living Room: entities: - light.living_room_dimmer |
This connects the UI to the Z-Wave device so it’s shown correctly in the interface.
Automating the Scene
The main reason why I wanted to do a dimmer switch in my living room was to automatically dim the lights when something starts playing on the Chromecast in the room.
A Home Assistant “Scene” contains a list of states of several entities. For example, a “Romantic” scene sets the lights to a low dim, locks the dors and starts playing music…
For my living room, I’m going to make a simple scene that sets the lights to about 20% dim. I’ll trigger this scene when someone starts playing something on the Living Room Chromecast after sunset.
First I’ll create a new scene with my lights. This sets the living room lights on and to 150 brightness. The transition attribute defines the time in seconds to fade the brightness to the new brightness.
|
1 2 3 4 5 6 7 8 |
--- - name: TV Time entities: light.living_room_dimmer: state: on transition: 10 brightness: 150 |
This will be a new file in a scene directory in the same directory as my configuration.yaml. To include scenes, I modified my configuration file to include everything from the scene directory.
|
1 |
scene: !include_dir_merge_list scene |
Finally, I want to add an automation to trigger the scene. For my purposes, I want to trigger the scene when someone starts playing content on the Chromecast in the living room after sunset.
Automations have three different components:
- Triggers: An event that causes the automation to run
- Conditions: A condition to check to ensure the automation should be run
- Actions: Actions to perform for the automation
In my case, I want the trigger to be if media starts playing on the Chromecast or if the sun goes down. The condition checks that both of these events are occurring, and if so launches the action which turns on the scene.
|
1 2 3 4 5 6 7 8 9 10 11 12 13 14 15 16 17 18 19 20 21 |
--- - alias: TV Time trigger: - platform: state entity_id: media_player.living_room_tv to: 'playing' - platform: state entity_id: sun.sun to: 'below_horizon' from: 'above_horizon' condition: - condition: state entity_id: sun.sun state: 'below_horizon' - condition: state entity_id: media_player.living_room_tv state: 'playing' action: - service: scene.turn_on entity_id: scene.tv_time |
That’s it! After rebooting Home Assistant we have a new automation setup that automatically dims the lights once the TV is in use after sunset.
What are some next steps to go from here? Automatically turn off the lights when you leave? Set the lights to a dim if someone wakes up in the middle of the night? Give me other good ideas in the comments!
Additional Links:
- YouTube Video Installing Smart Switch
- Automation Docs in Home Assistant
- My Home Assistant Config
- Z-Wave Getting Started Guide from Home Assistant