
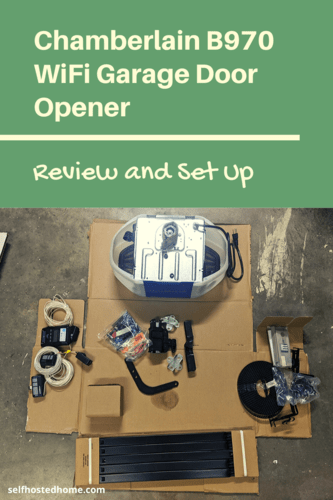
There’s nothing worse than when an appliance you depend on every day suddenly breaks down. That’s what happened to me at the beginning of the year when my garage door opener stopped working. After reading reviews I bought myself the Chamberlain B970 to get my garage door functioning again. In this post, I’ll be going through my set up process and my thoughts on the Chamberlain B970.
I chose the Chamberlain B970 for a few reasons:
- Lots of reviewed mentioned how quiet the belt system was. Including a garage door professional I talked to beforehand. I can definitely confirm this.
- It looked fairly straightforward to DIY install
- WiFi access made it really easy to integrate with Home Assistant (my smart home platform)
If you’ve never installed a garage door opener before, don’t worry. It’s a relatively straightforward process and hopefully between my instructions/pictures and the instruction manual you’ll be able to figure it out. I had never installed one before this and it wasn’t too bad. Furthermore, I recommend this be used in conjunction with the actual instruction manual. I hope my additional pictures and descriptions will help clear up anything not clear from the manual.
Overall, I’m really happy with the garage door opener. Check out the last section for how I integrate it with Home Assistant and some ideas for automations.
Set Up the Chamberlain B970
Prepping Your Area
Before you even get started, you need to ensure that your garage door is properly balanced. When you open your garage door manually halfway, it should stay halfway open without any help. If your garage door doesn’t do this, you’ll need to contact a garage door specialist to balance your door. It requires some specialized tools and skills and it’s not recommended to do that yourself.
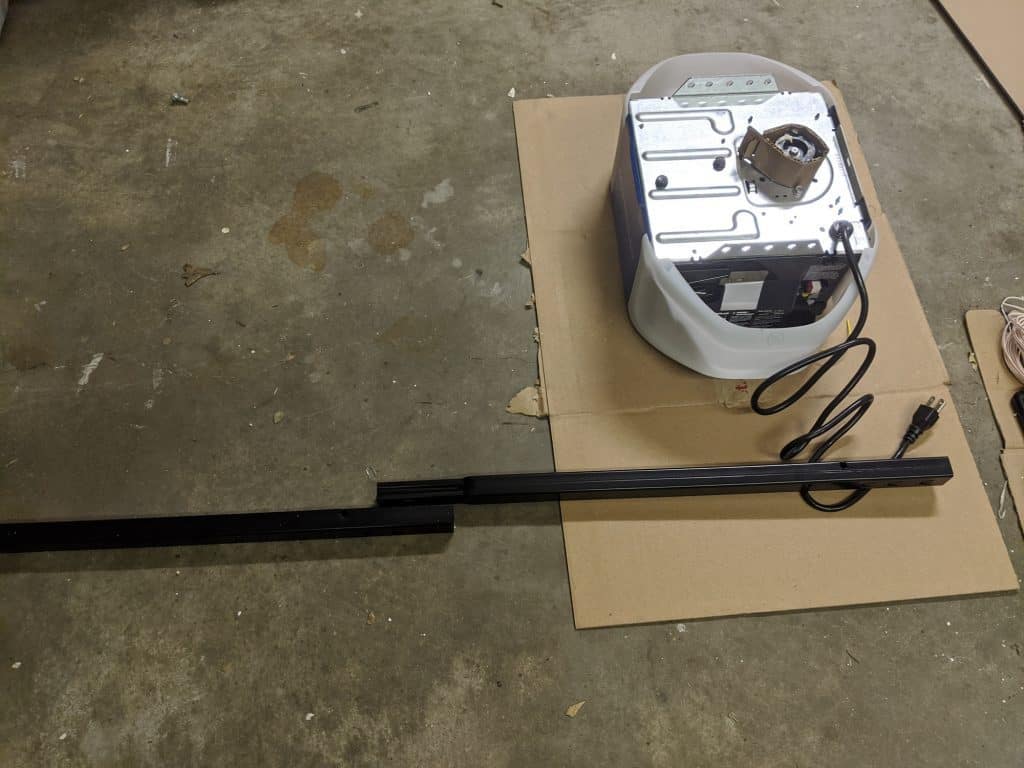
Putting together the Chamberlain B970 can take some time but still a very doable DIY project. You’ll start by unpacking everything and laying it out so you can quickly find things later.
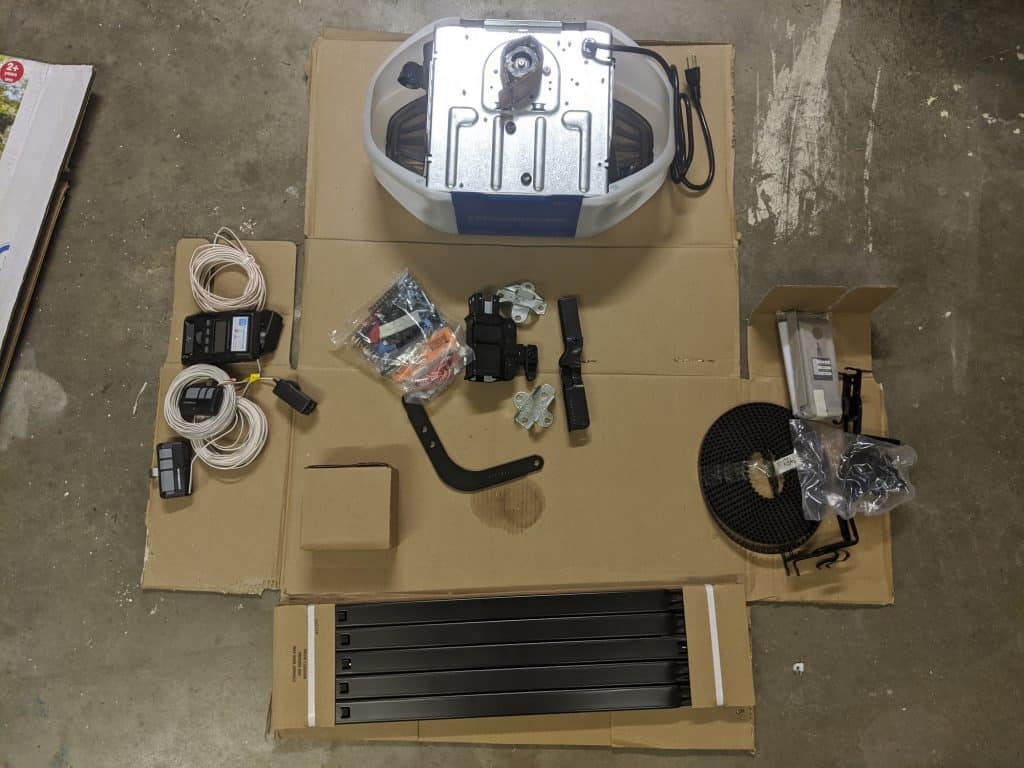
I used the box the garage door opener came in as a surface to store the parts. In hindsight, that size box would be perfect for a later step so it might be worth keeping the box in one piece and grabbing another box as a staging surface.
Building the Track
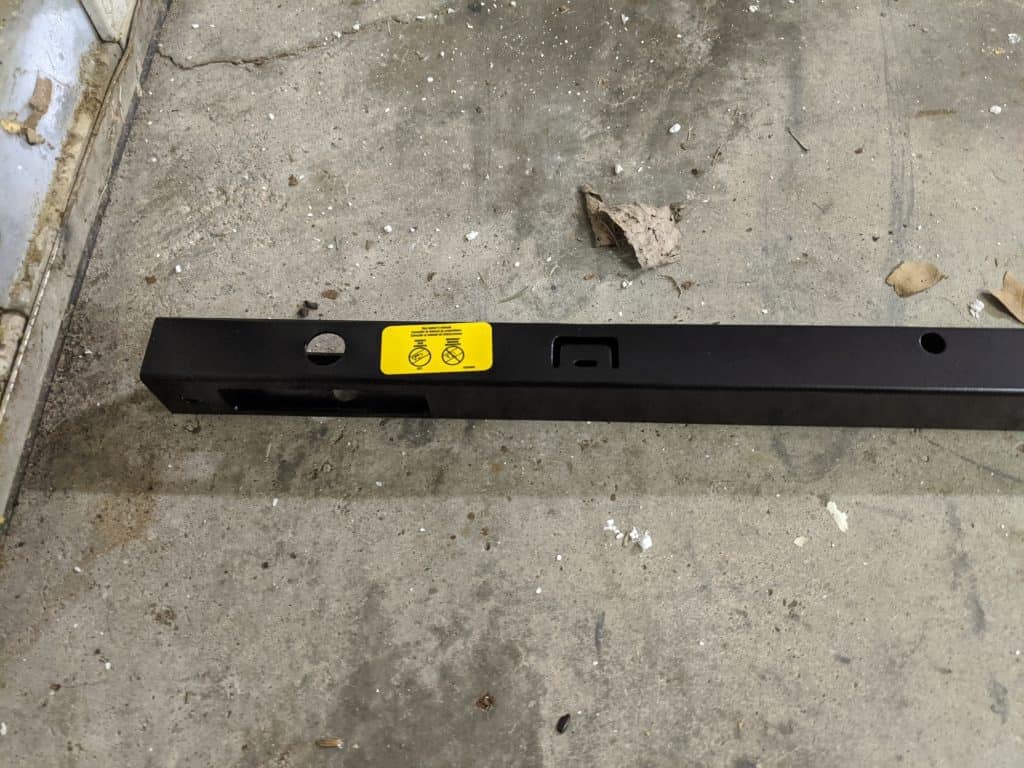
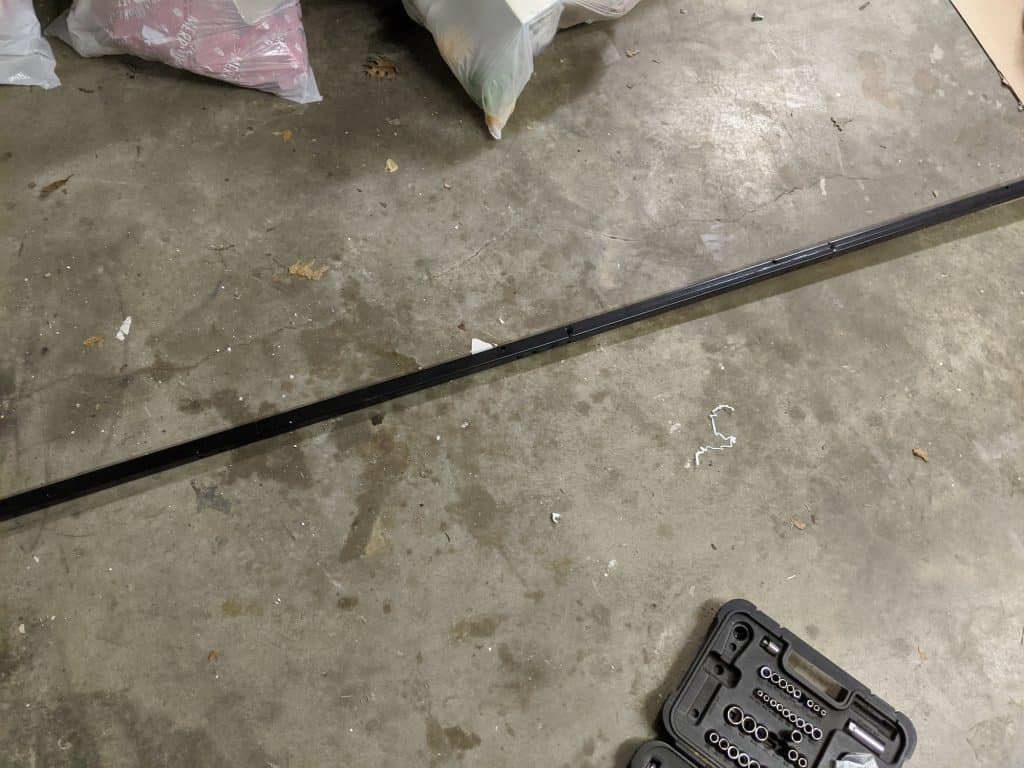
You’ll notice a set of 5 rods that when connected, will connect from the wall above your garage door to the opener itself. Lay them out side by side going from the garage door to the middle of your garage. The rail closest to your garage will have a yellow sticker that you should point upwards.
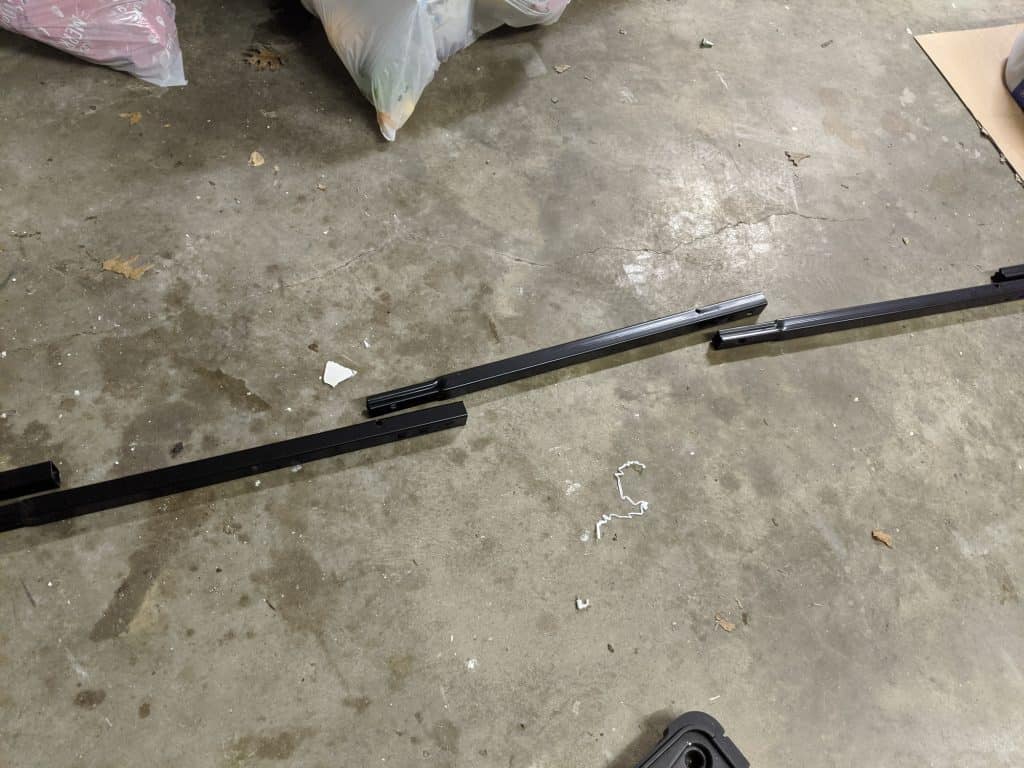
After laying them out and getting the distance right, go ahead and put the pieces together. If you have trouble sliding any pieces together, you can use a rubber mallet to get them into place.
Connecting the Track to Opener
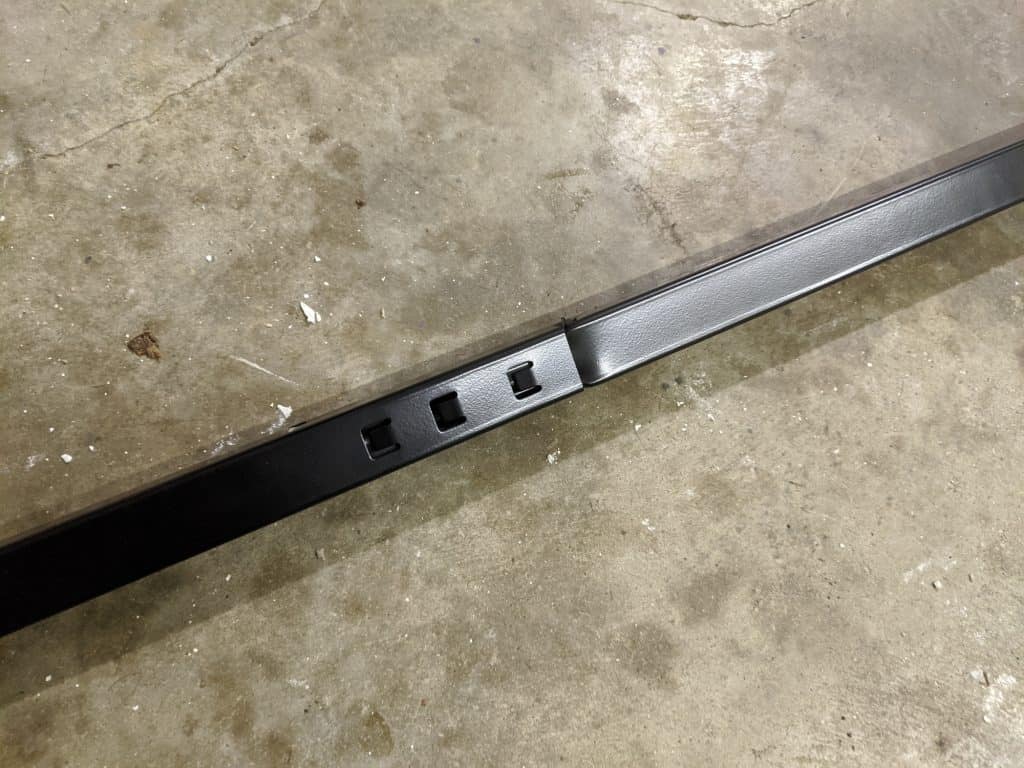
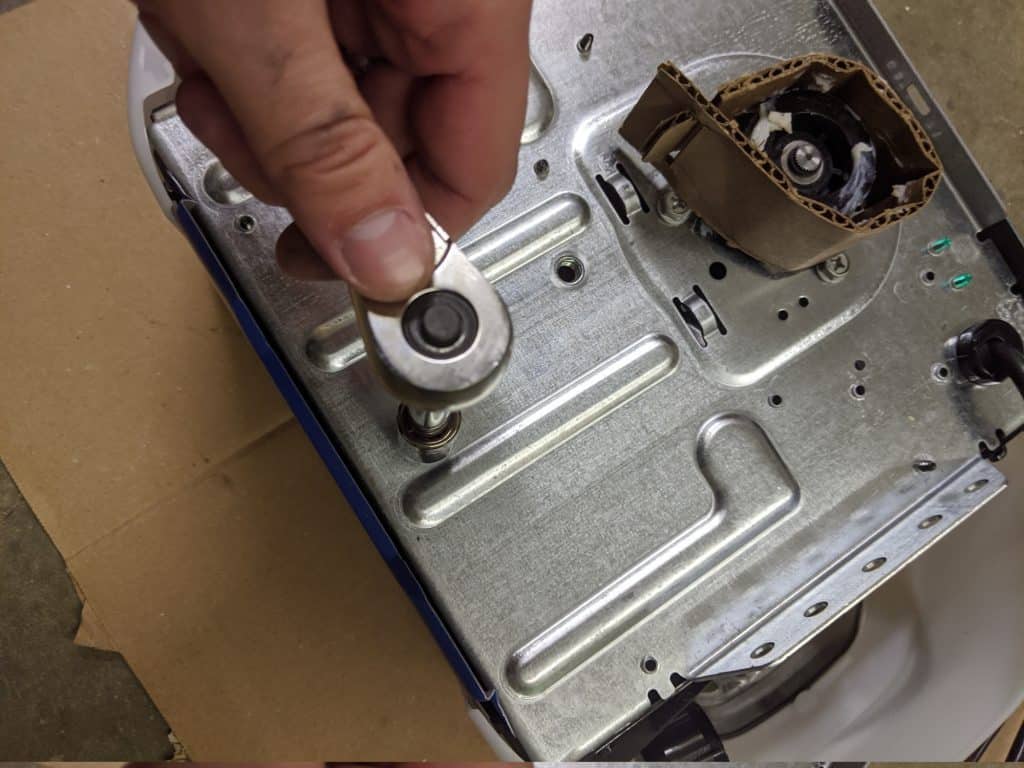
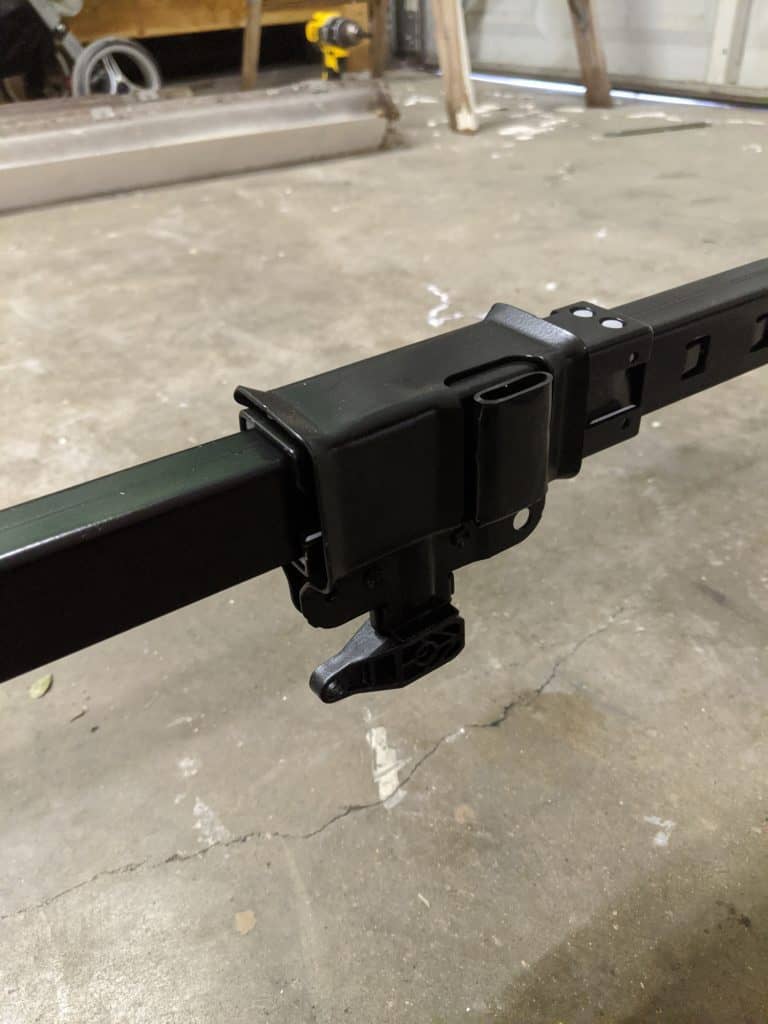
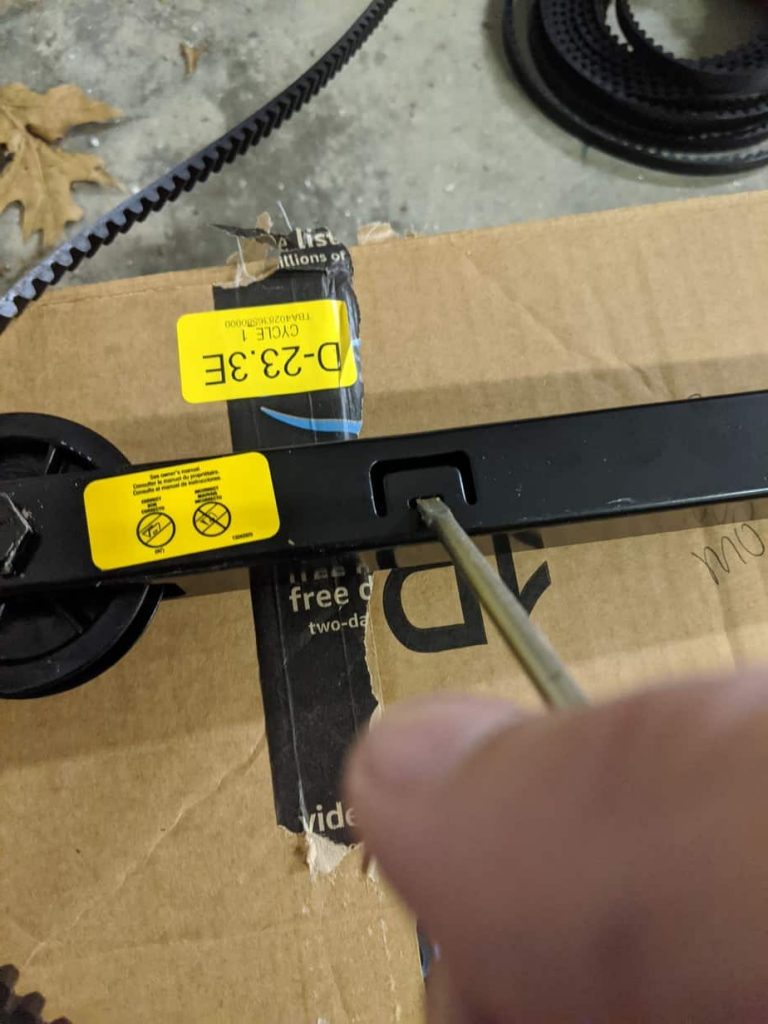
After connecting the rods, find the other black metal end piece that will connect the rods to the garage door opener. Slide it into the end of the rod closest to the garage door opener. There is a notch that will stop you, so don’t try to push it in farther than that notch.
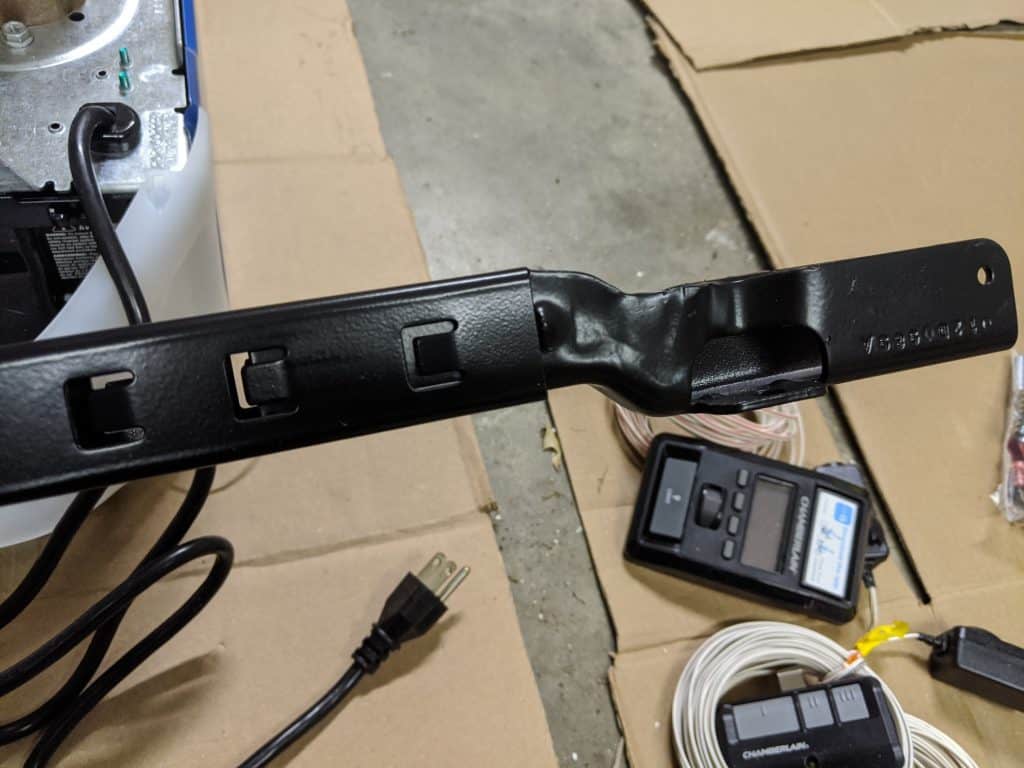
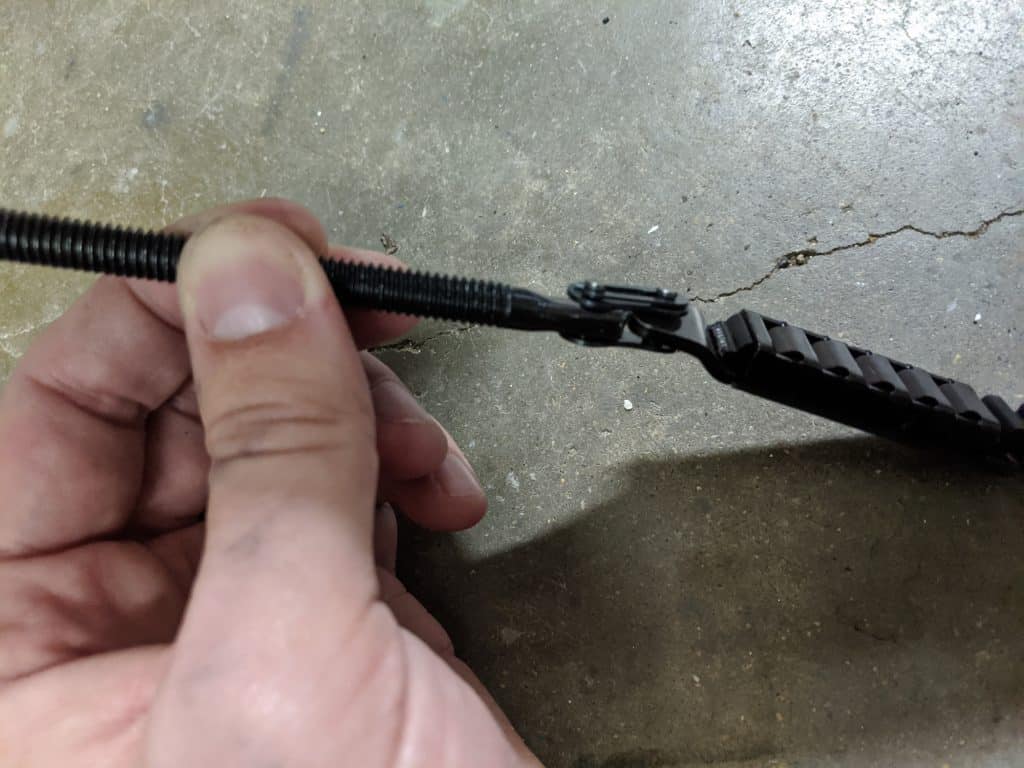
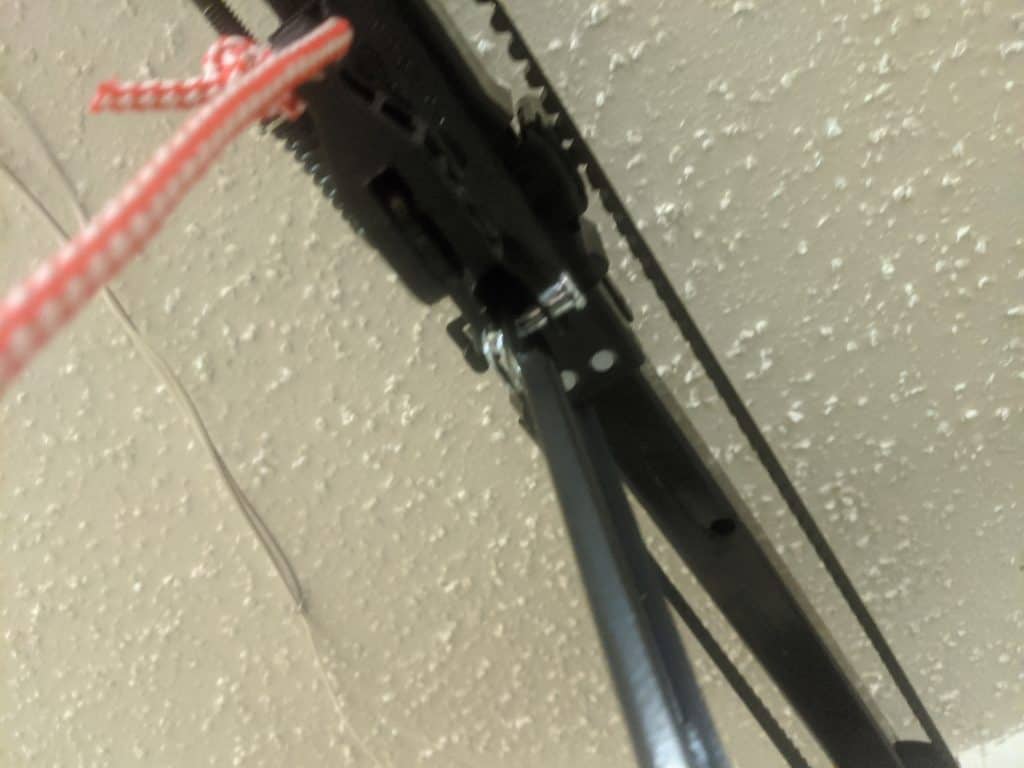
Now, line up the end connector piece you just connected with the holes on the garage door opener like seen below. You’ll first need to remove the already installed screws so you can line up the connector piece with the screw holes. Tighten the screws to the garage door opener but don’t use power tools. Just use hand tools to tighten.
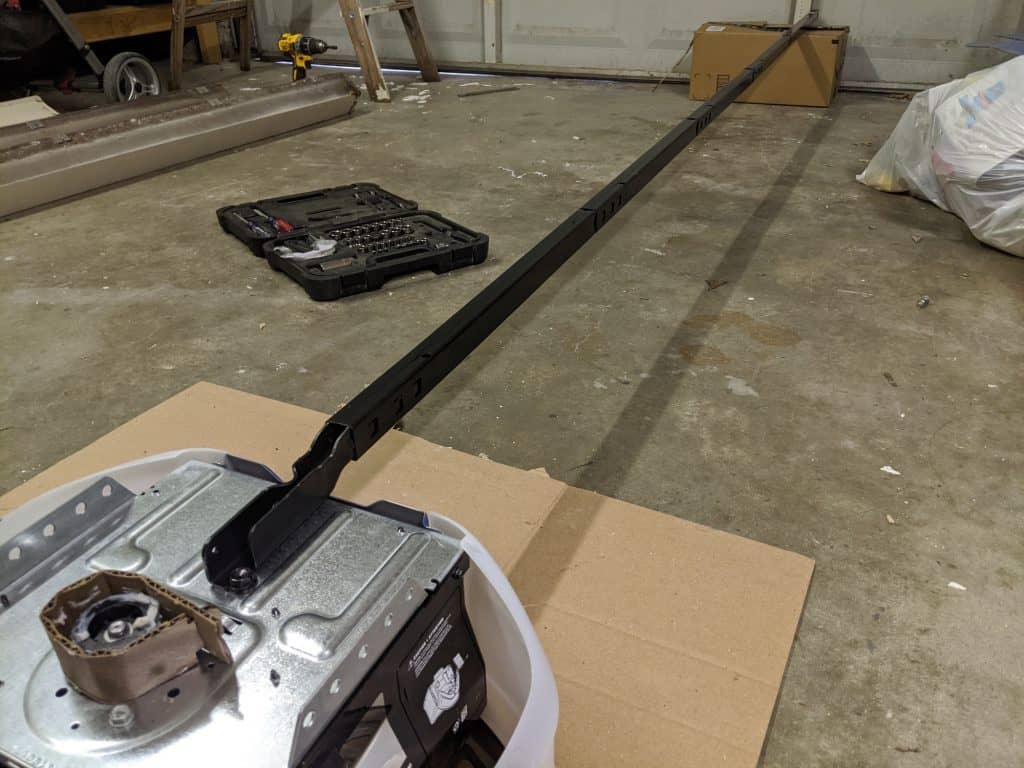
Now, find an extra box you have lying around (or the original) and prop up the rail so it sits fairly level.
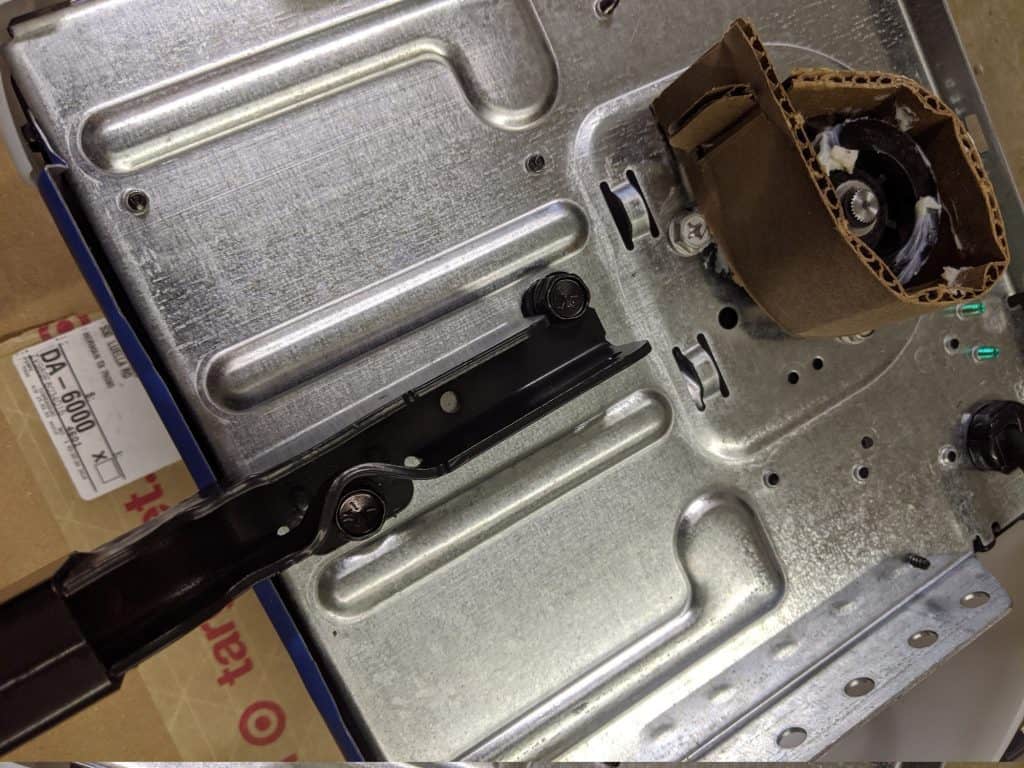
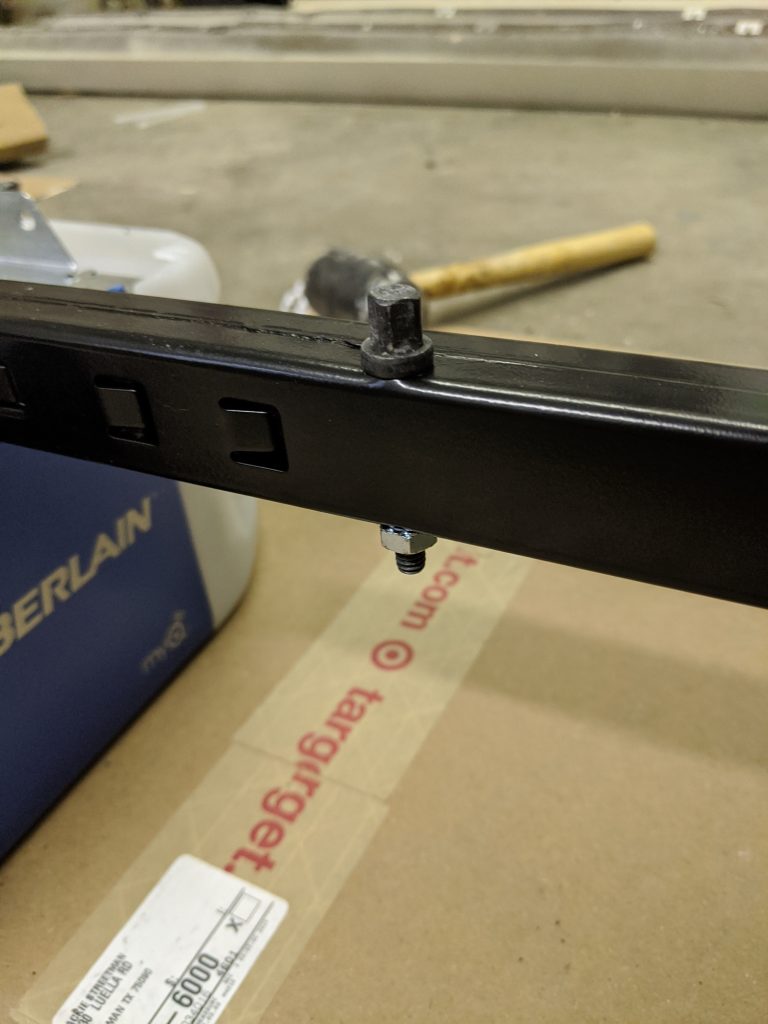
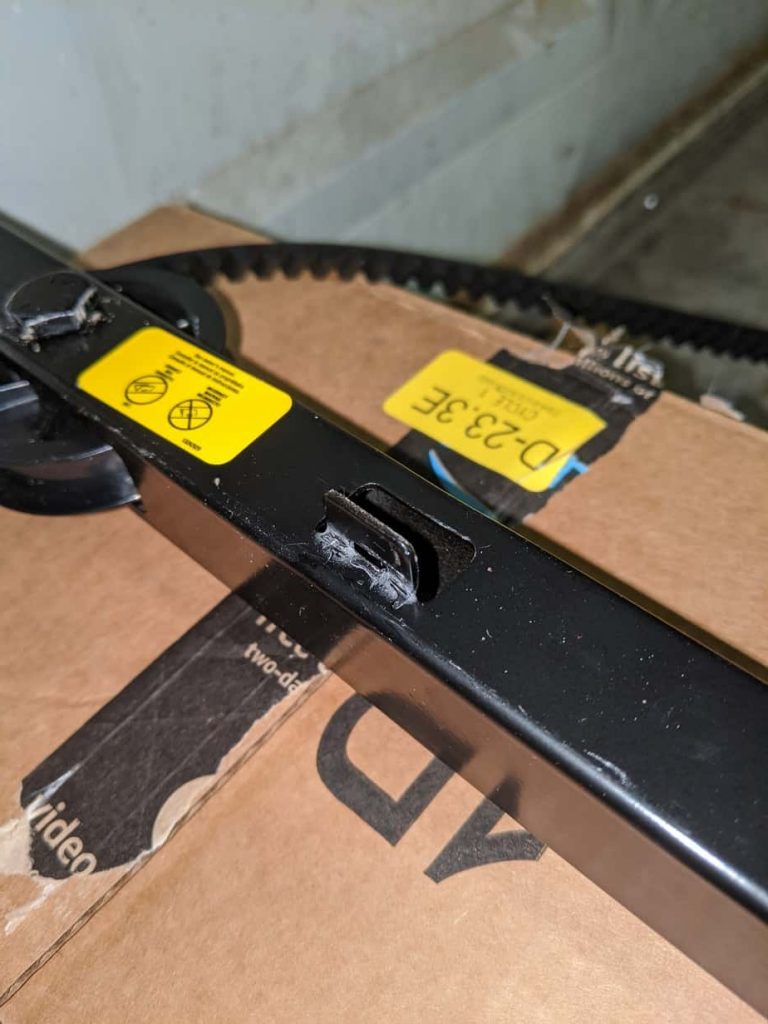
Find the bolt and nut seen below and listed in the instruction manual that will be used to securely fasten the last rail piece with the end connector. This bolt should be going through the last hole closest to the garage door opener.
At this point, you should have a fully connected track for your opener. All the rail pieces are slid into each other. The rails are securely connected to the garage door opener with screws and a bolt connects the rail connector to the track.
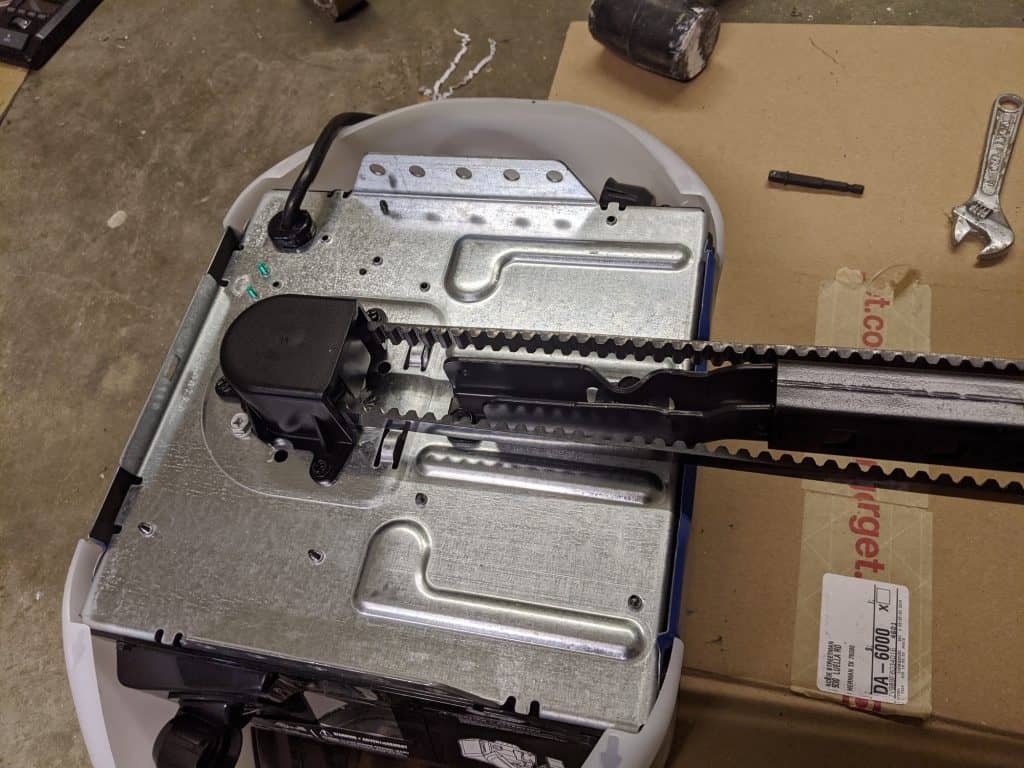
Installing the Belt and Trolley
Find the included trolley and slide it onto your track. Bring it all the way down, close to your garage door opener unit. Then put a screwdriver through the hole closest to the trolley. Therefore your trolly should be sitting between the garage door opener and the screwdriver.
Now take the belt and thread it through the hole in the track close to your actual garage door. You can see in the picture below the left side is towards my garage door. The belt goes through the track and starts to curve back towards it. Make sure the tab on the belt is facing towards the ground.
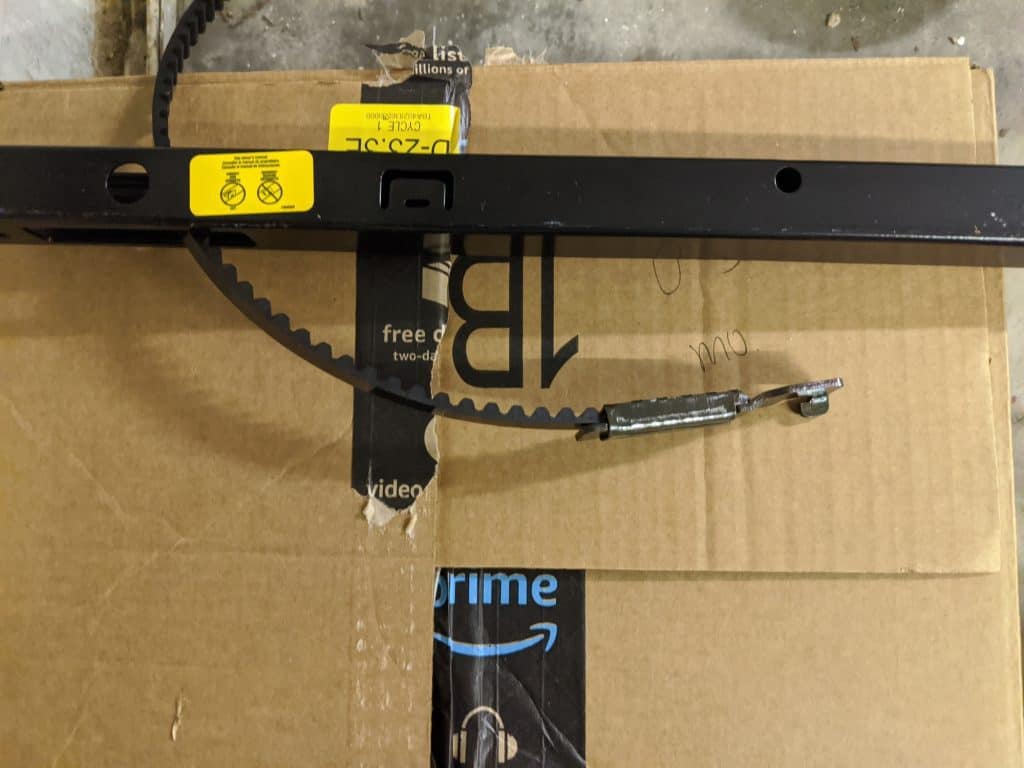
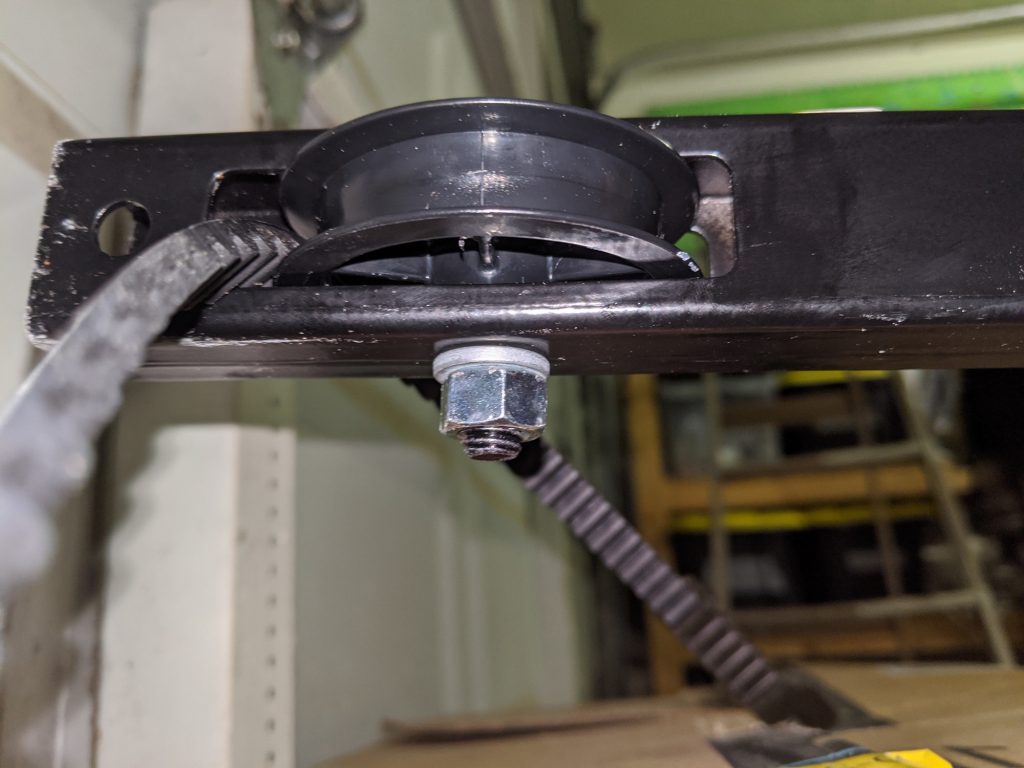
Insert the wheel into the track and use the included bolt, nut and lock washer to secure the wheel in place.
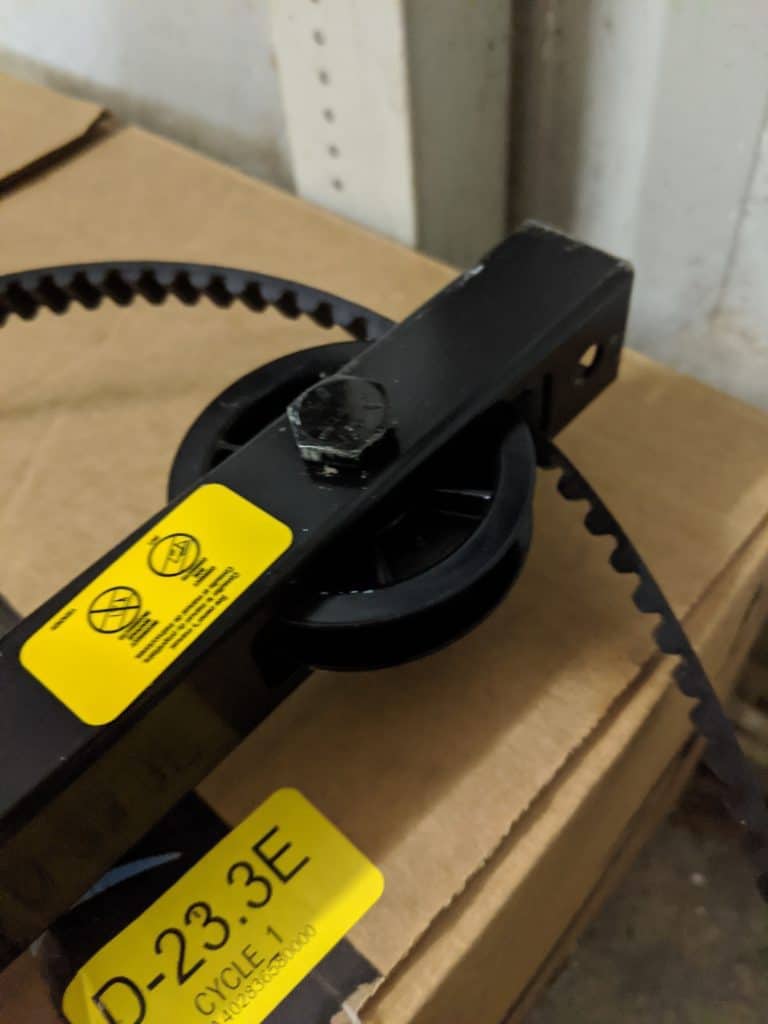
Next, take a screwdriver to fold the tab near the end of the beam up to be perpendicular to the beam. You can use a screwdriver or some pliers to bend the metal.
Securing the Belt
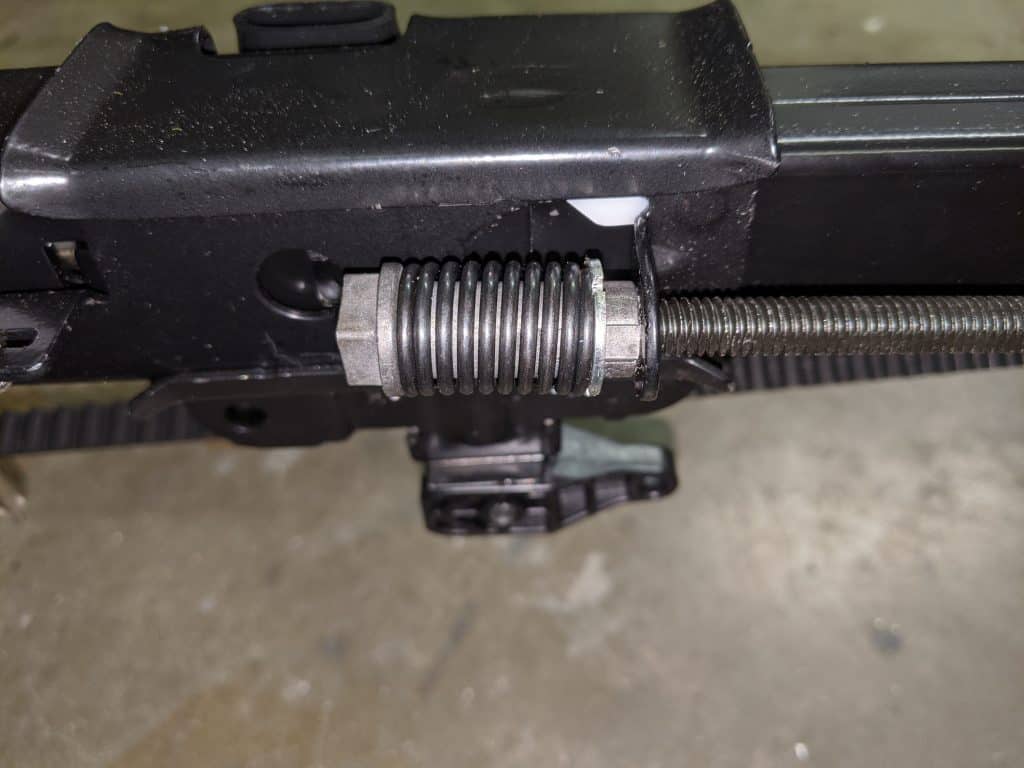
Now, find the threaded shaft with spring trolley nut. It will a black threaded shaft an eye hole on one side. Take that and pass it through the hole on the trolley. There is a flat side to it so it will only fit one way.
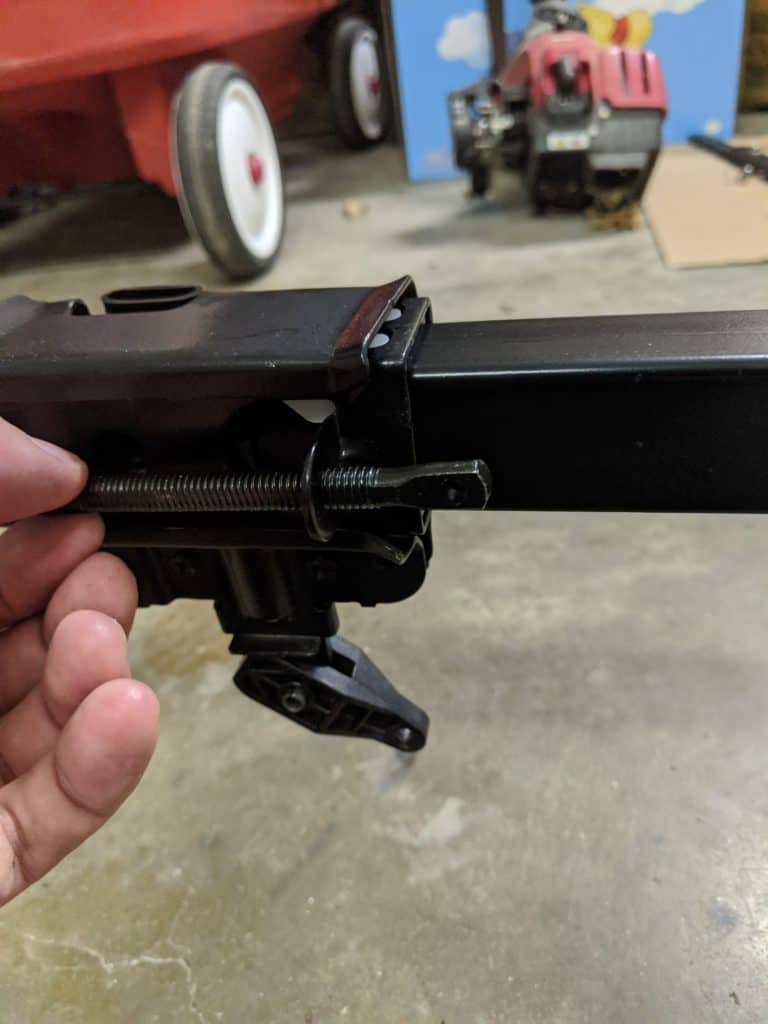
Next, attach the end of the belt hook to the bolt using the included chain link.
Now screw on the spring nut to the end of the bolt. You don’t need to have it super tight right now, you’ll be able to tighten it later.
Grab the other side of the belt and hook it into the corresponding slot on the trolley. So now the belt is loosely connected to both sides of the trolley. On one side it’s using the chain to connect to the bolt and on the other side, it uses a hook to connect.
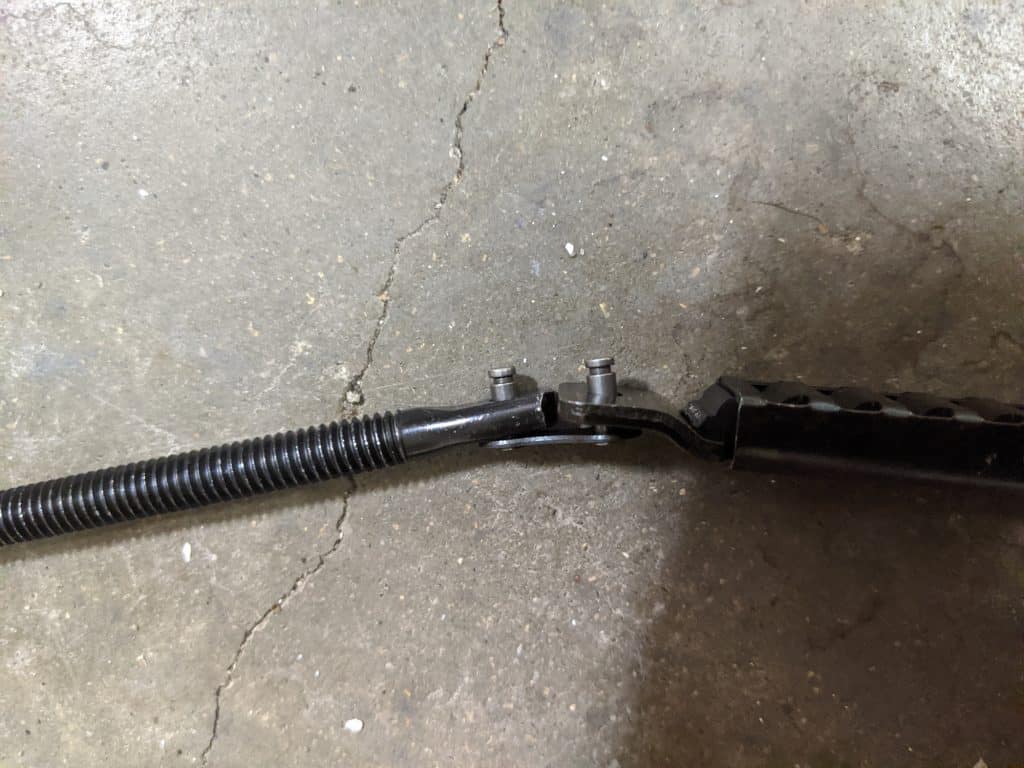
Now use pliers to hold the nut at the end of the spring in place and move the washer around with a flat head screwdriver. You are trying to move the washer around so that it releases the tension in the spring. Be patient, it can take a second to get a hold of this.
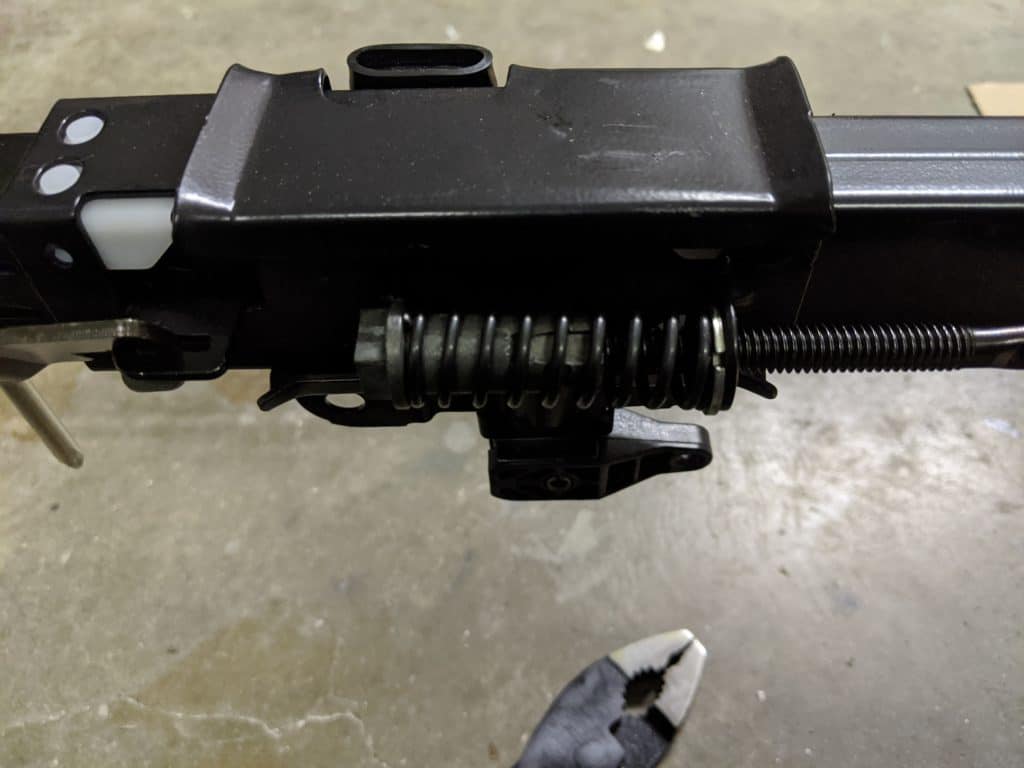
Finally, attach the cover over where the belt goes around the sprocket. This will help keep debris and other dust from getting in the sprocket.
The garage door opener is now assembled! Now it’s time to mount it to your ceiling and hook up the electronics.
Mounting the Garage Door Opener
So far, the assembly has been mostly about finding the right pieces and getting them connected the right way. Here’s where things will differ for every person depending on how their garage is set up. In general, what we need to do is attach the garage door to the ceiling and the track to the wall above the garage door. If you have existing hardware from an existing garage door opener (like me) then you’ll likely be able to reuse some of it.
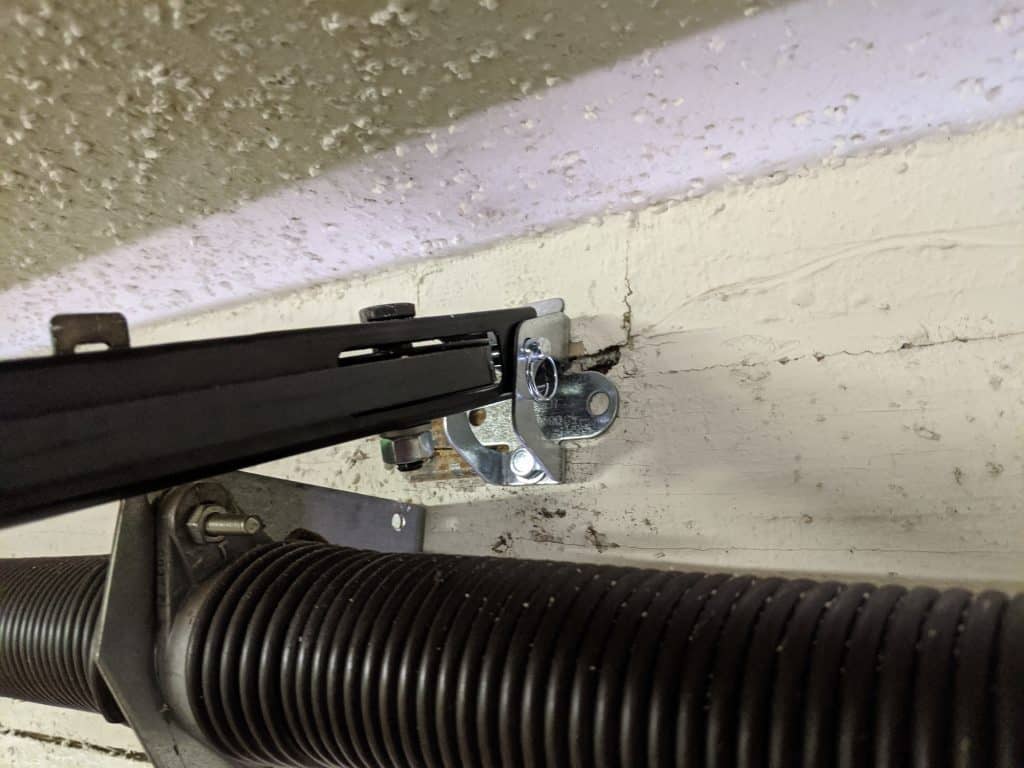
Attaching Above the Garage Door
First off, you’ll want to install the bracket above your garage door. You’ll want to put this in the middle of the door directly into a header board or stud. If you don’t have a stud right above the middle of your door, you can add a 2×4 between two studs and attach to that. The instruction booklet has a diagram showing this.
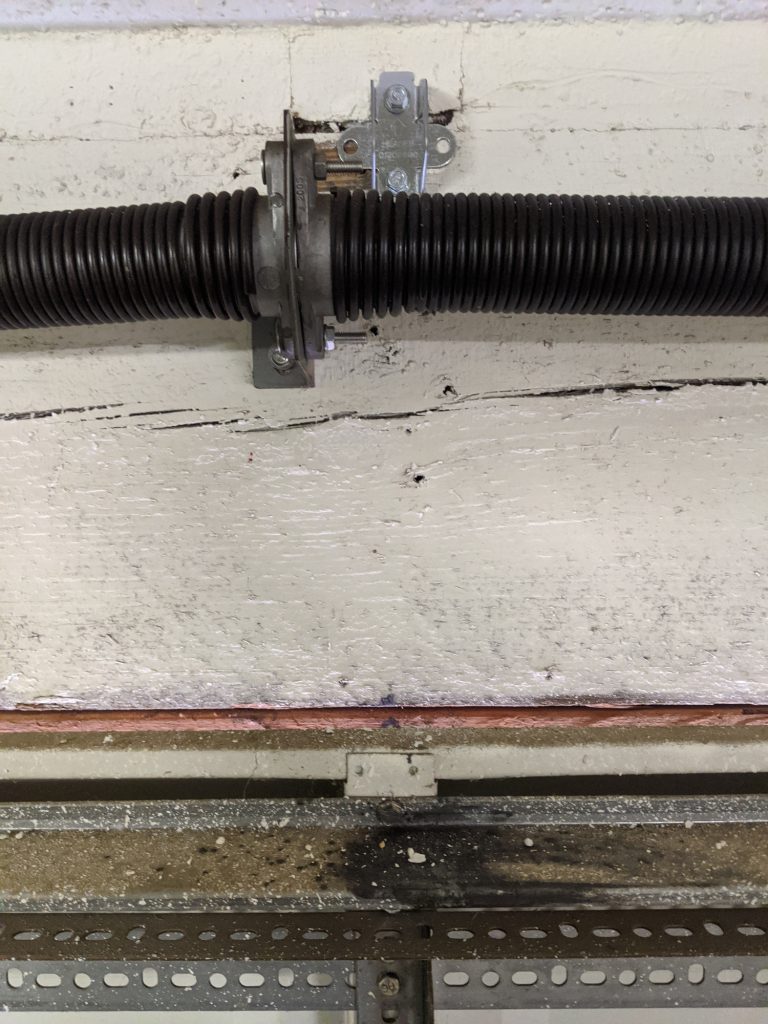
The track can then be lined up to the holes in the bracket. Put the pin through the bracket and secure it with the ring.
Now is a good time to put the garage door opener on a ladder to prop it up for installation.
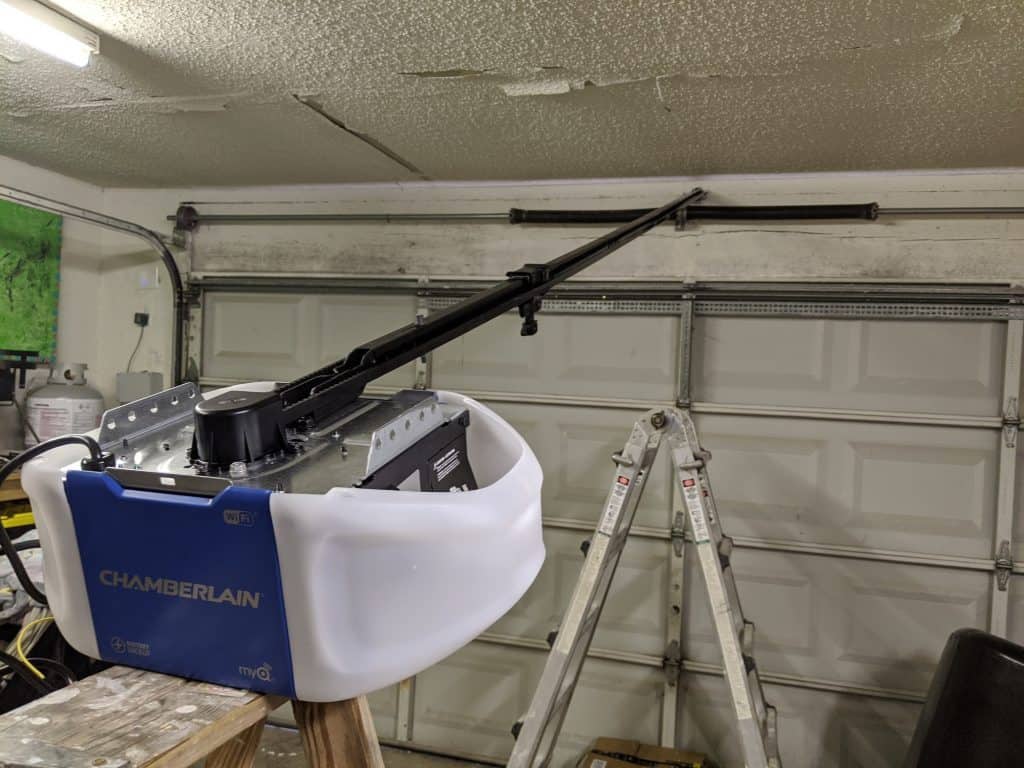
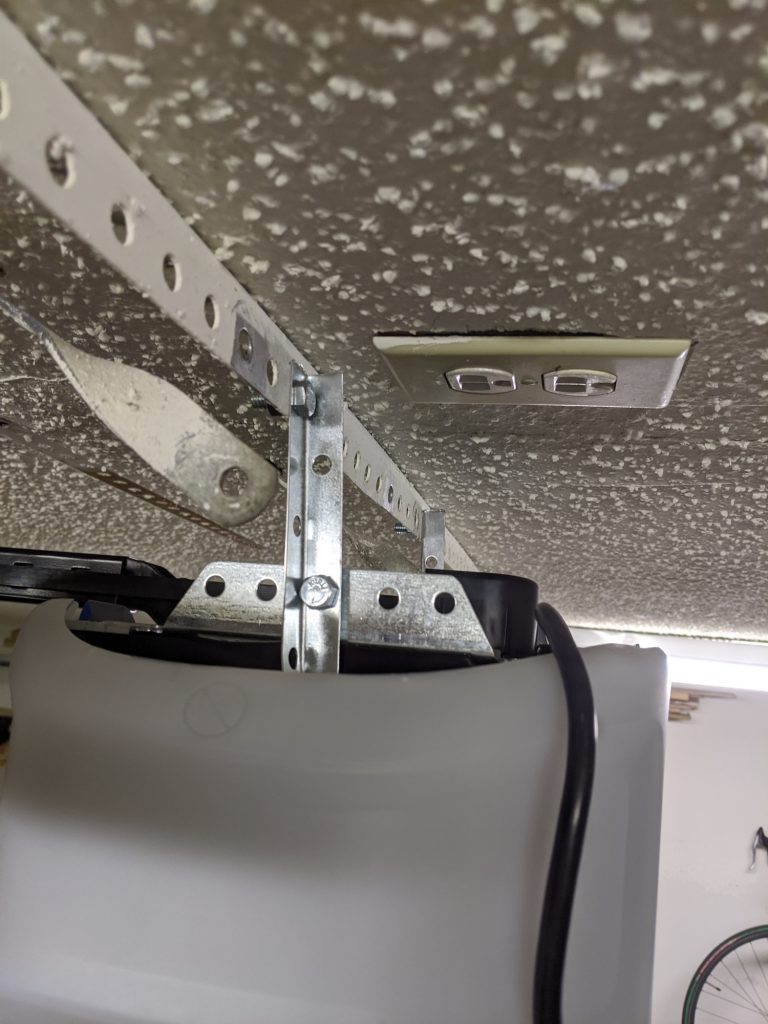
Attaching to the Ceiling
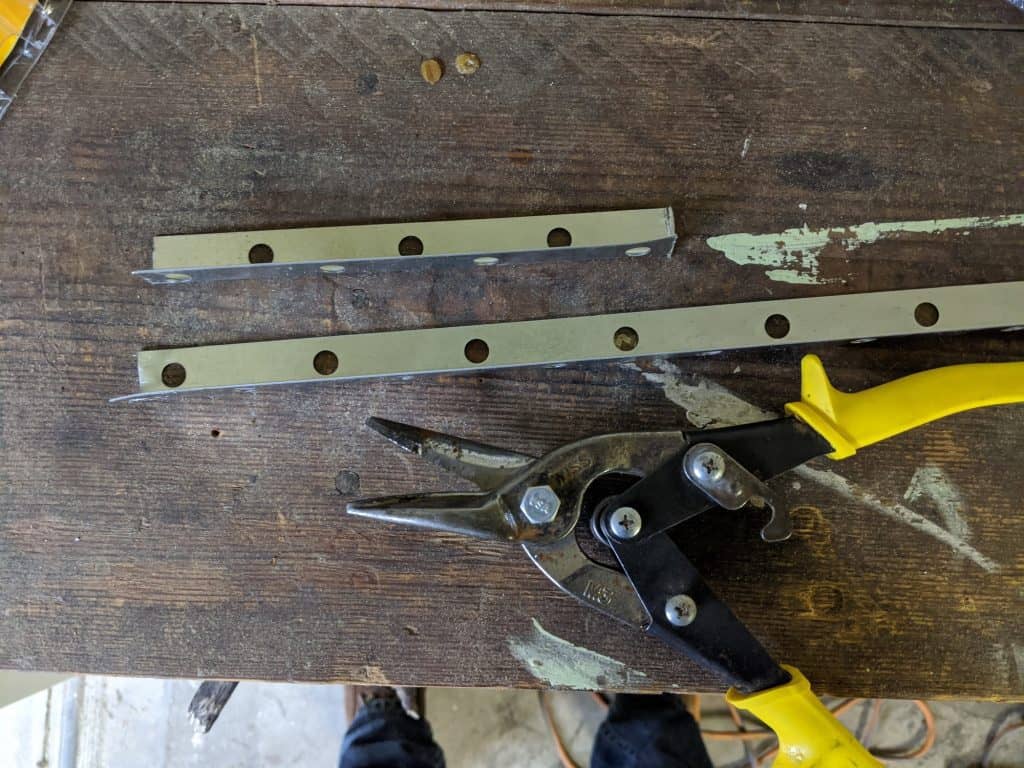
My existing garage door opener already had a metal piece attached to the ceiling joists. I cut down the metal pieces included with the opener to attach between the piece connected on the ceiling and the opener itself.
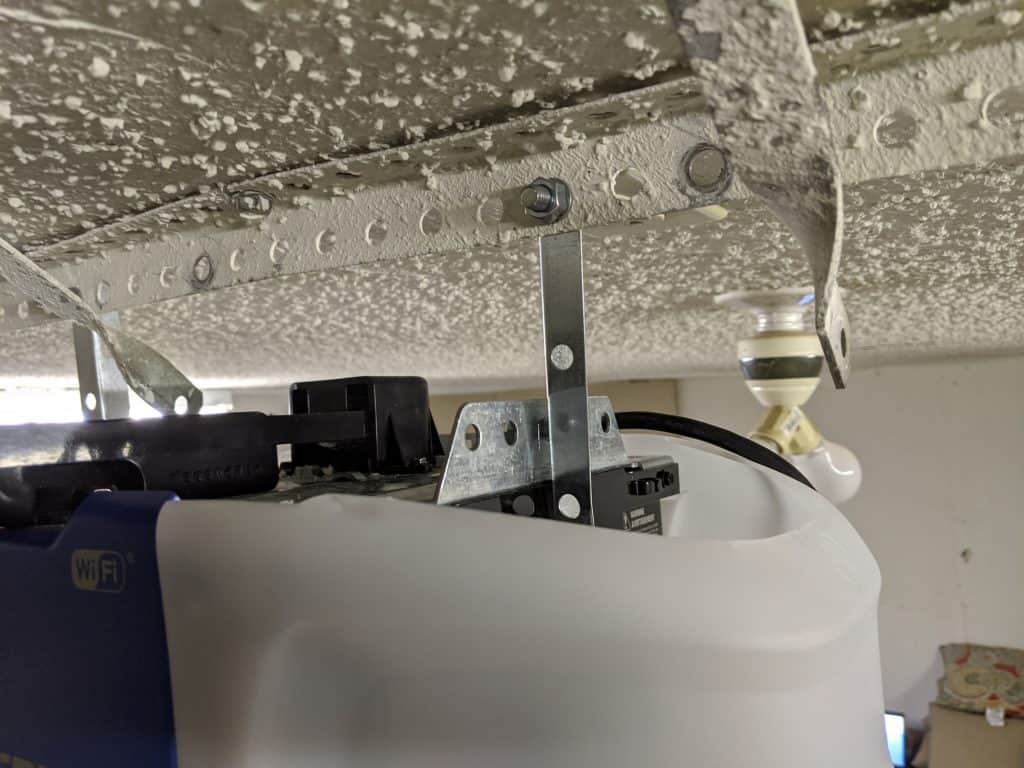
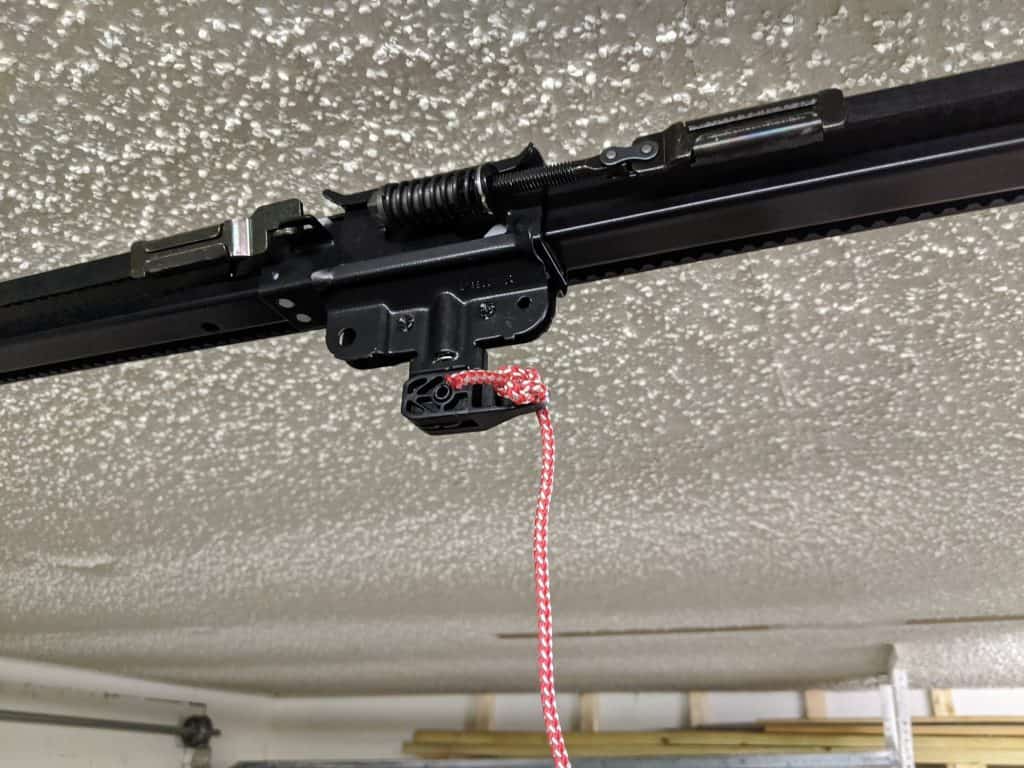
Now to install the pull string to the trolley. Just tie the included string onto the trolley. Use this if you ever need to open or close your garage door manually.
Attaching to the Door
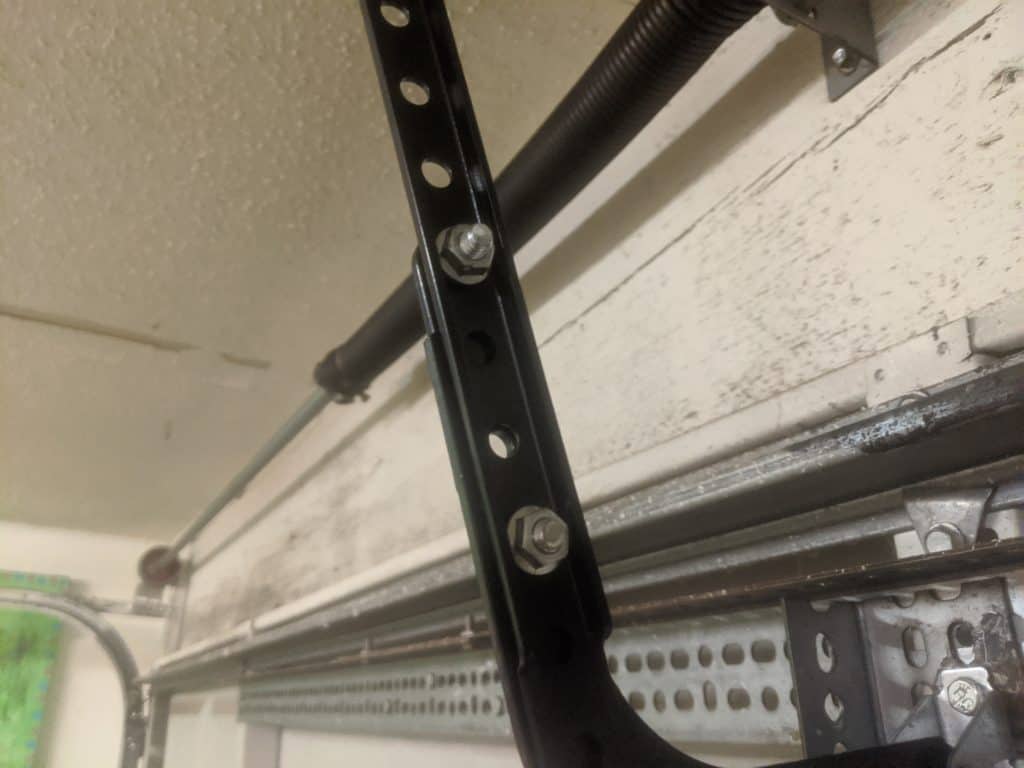
Depending on how your existing hardware is configured, you might also need to install a bracket on the garage door itself. This will be used to connect the garage door arm from the trolley to the door. Use the included bracket on the door and then use the pin and ring to secure the arm to it.

The arm will connect to another metal piece that connects to the garage door opener. You fasten the two metal pieces together using the included nuts and bolts. This connects to the trolley using another pin and ring.
Even though it looks like the opener is hooked up, we still need to install the sensors to actually use the door. The next section will walk you through getting that set up.
Setting up the Electronics and Programming
Safety Sensors
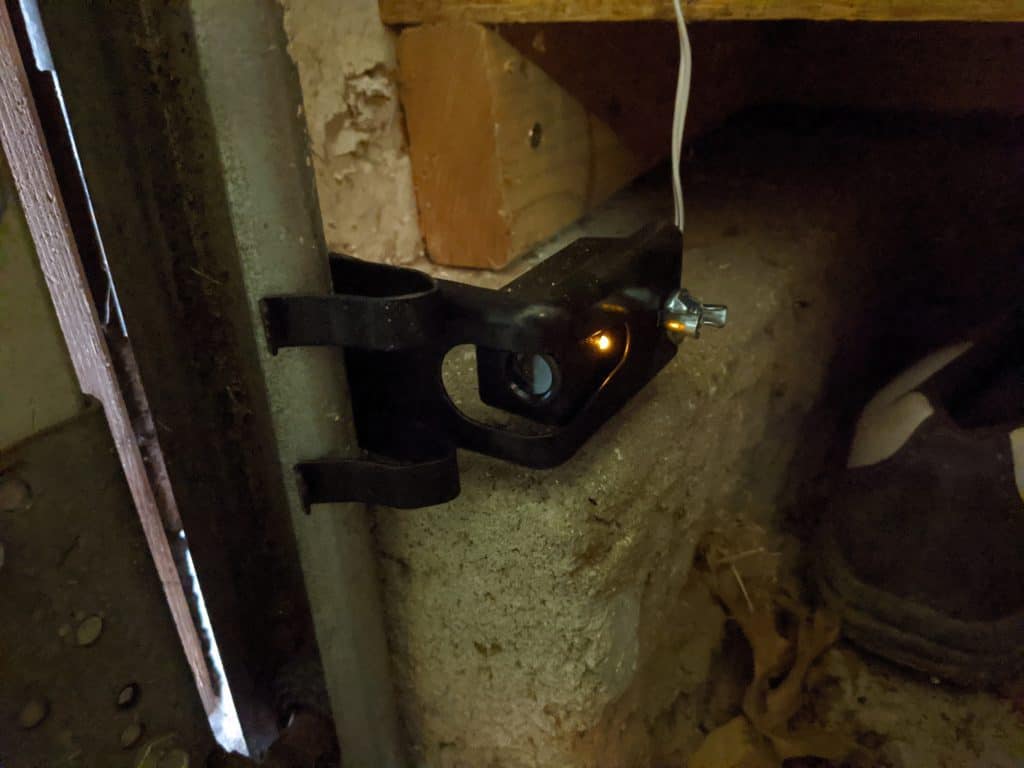
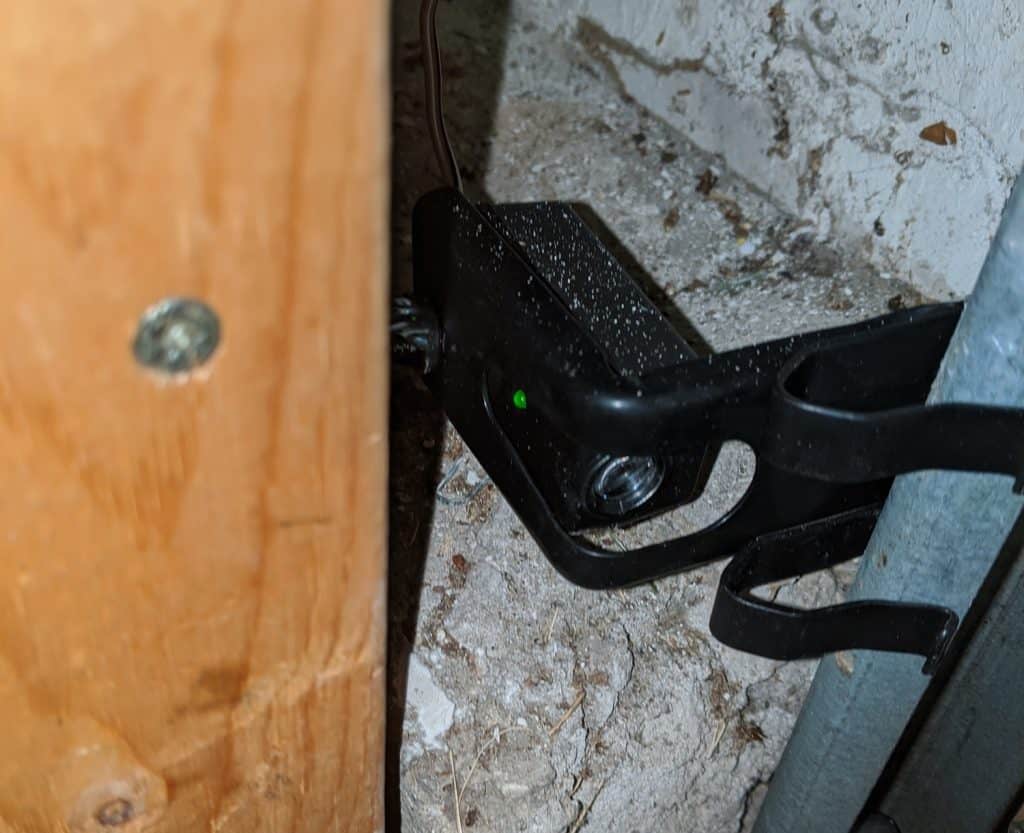
The Chamberlain B970 comes with sensors that detect if something is in the way of the garage door so it can safely stop the door as it’s moving. This consists of a pair of sensors on either side of the garage door that creates an invisible beam going the length of the door. For installation, start by getting the two sensor brackets and slide them around the edge of the door track about 6 inches from the ground. If you can’t attach them to the track, you can also attach directly to the wall.
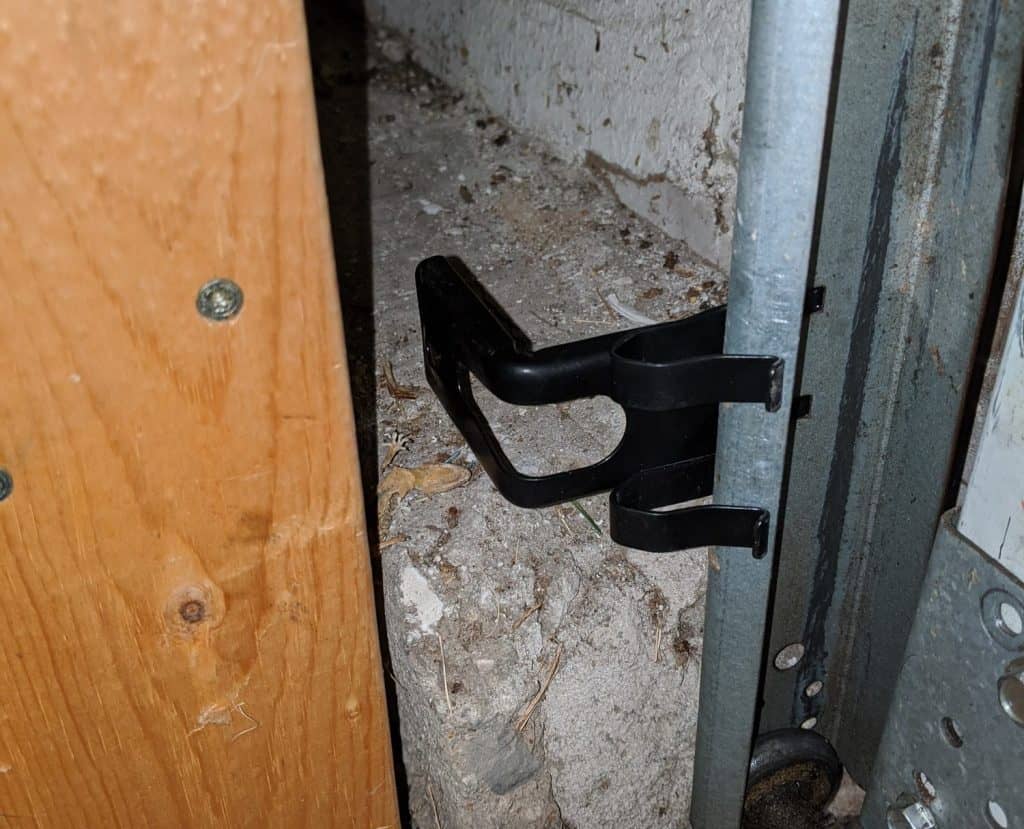
Then use the included wing nut to slide the sensor into place and fasten it.
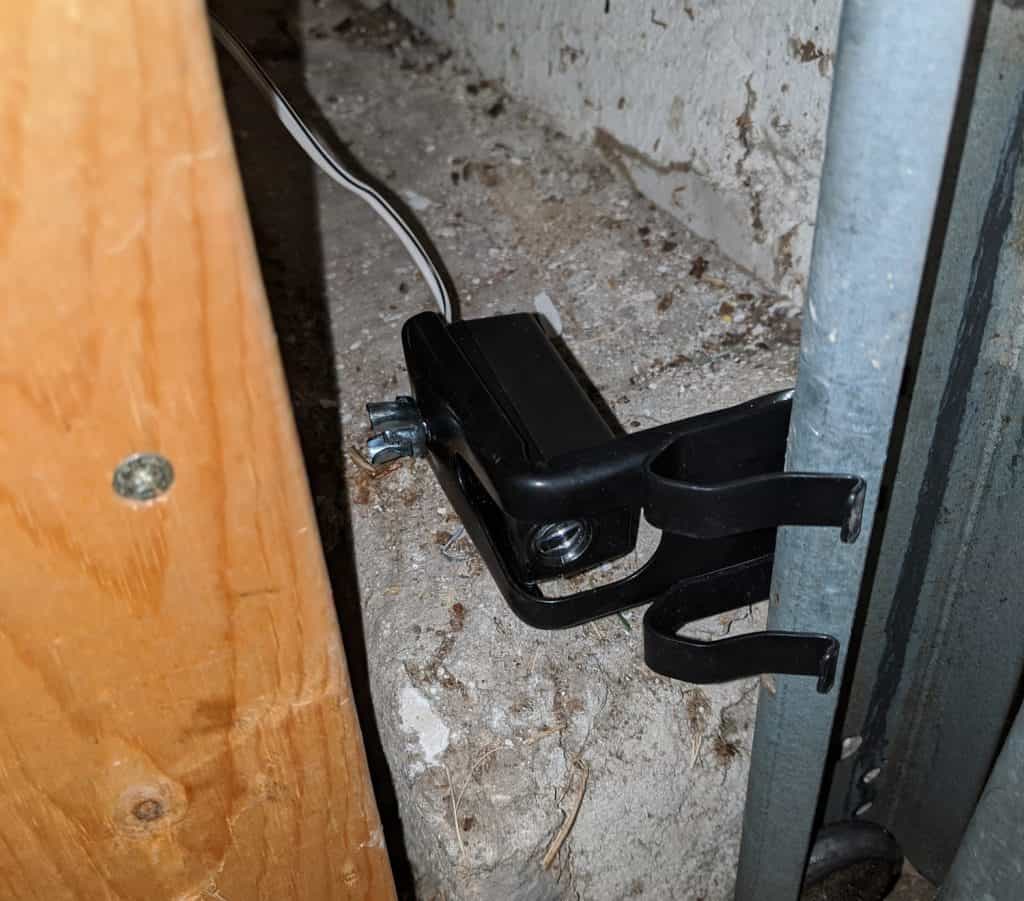
Route the wires up your garage wall and ceiling back to the Chamberlain B970. You can hide the wires behind your drywall, but I chose just to attach them to the wall. My garage already has plenty of things exposed on the walls so I kept it easy and just went that route.
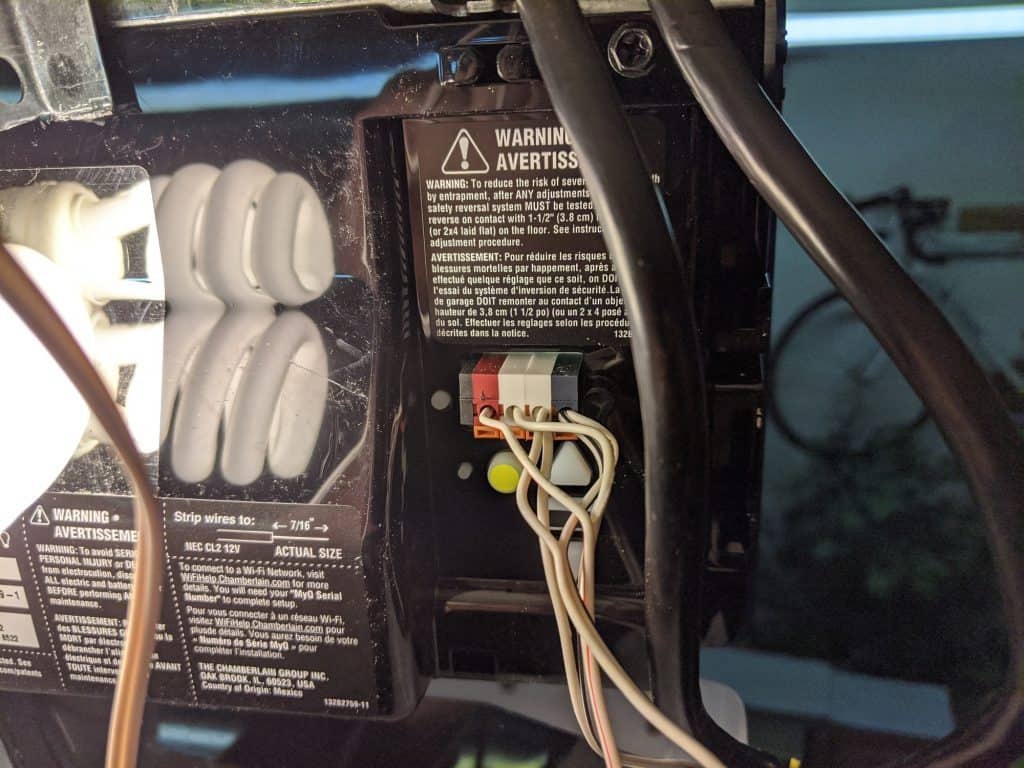
Once your wires are back to the opener, connect the similarly colored wires together.
Finally, push the wires into the rightmost terminals on your garage door opener. The wires with the black coloring on them should go into the black terminal.
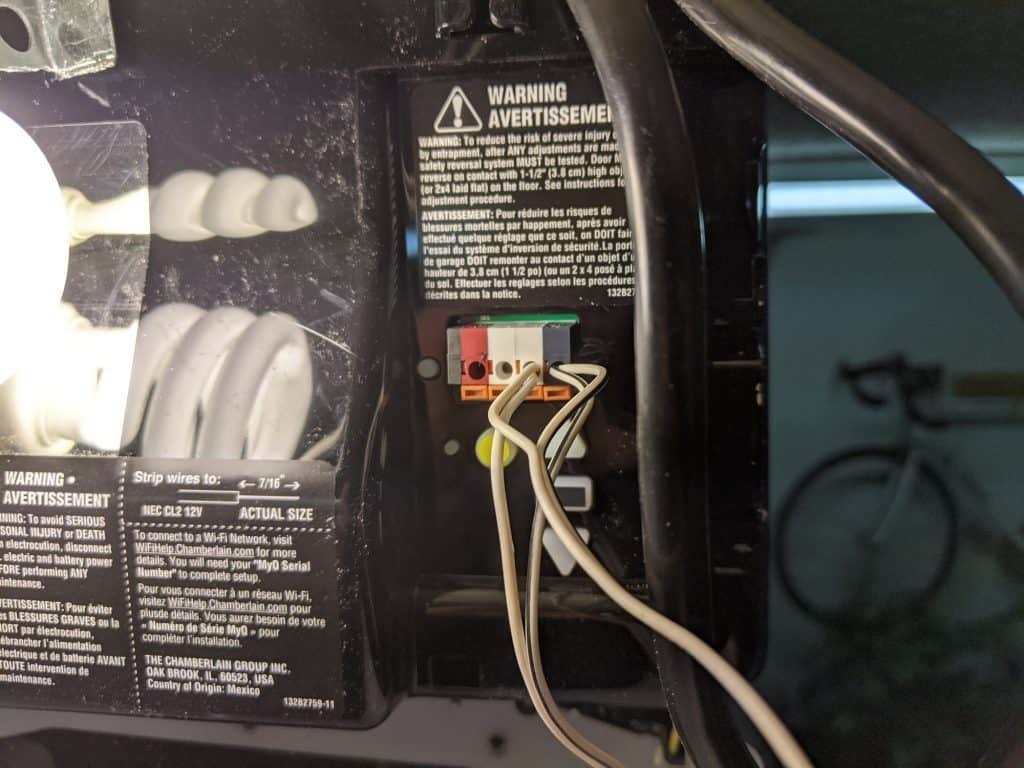
You should get green and amber LEDs shining on your sensors. If not, you might need to adjust the sensors so that they are the same height and can create the invisible beam. Also, check that for any loose wiring connections.
Indoor Garage Door Opener
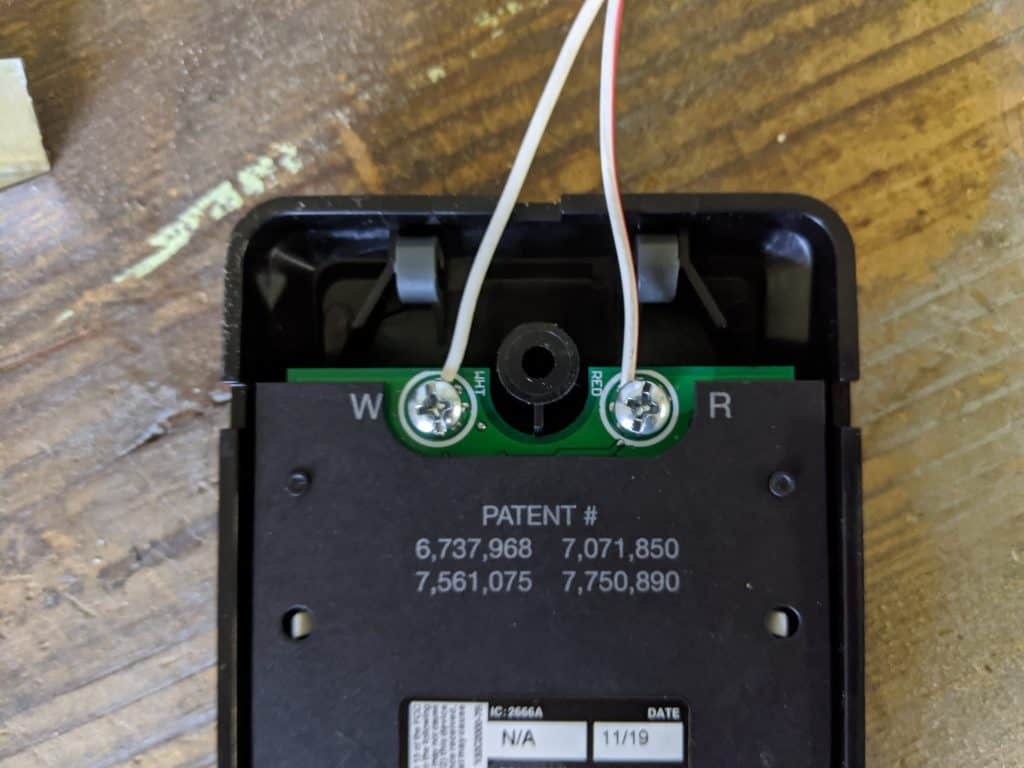
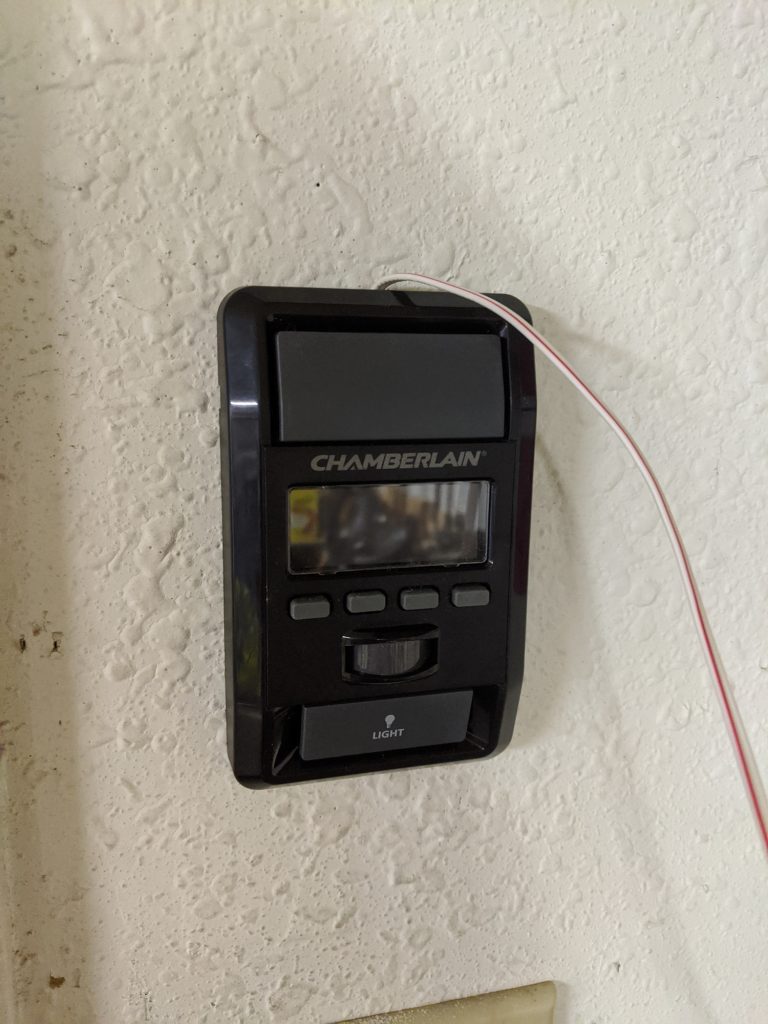
Next, we can connect the opener that will sit inside your garage. It features a button to open/close the garage and another to turn the bulbs on/off that are connected to the opener. It also displays the current temperature and has a motion sensor to turn the lights on whenever it detects motion.
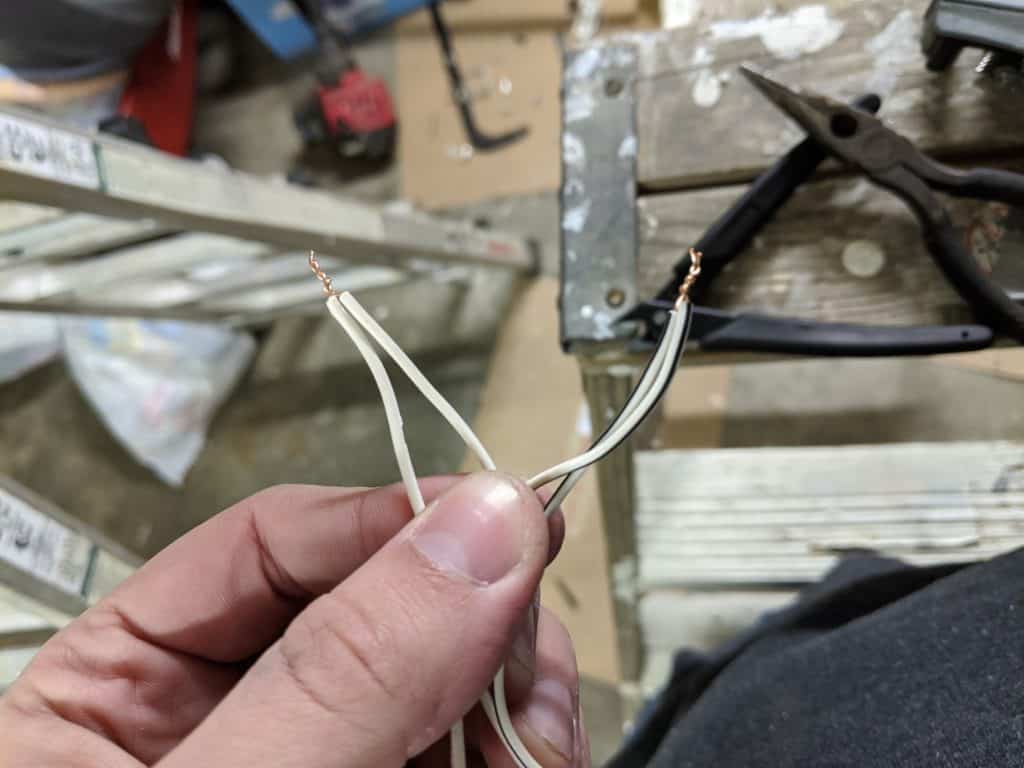
Start by striping the wires and connecting them to the screw terminals on the back of the opener. The screw terminal labeled “R” should have the wire with some red on it.
I used the included drywall anchor and screw to put the first screw into my wall where I wanted the opener to sit.
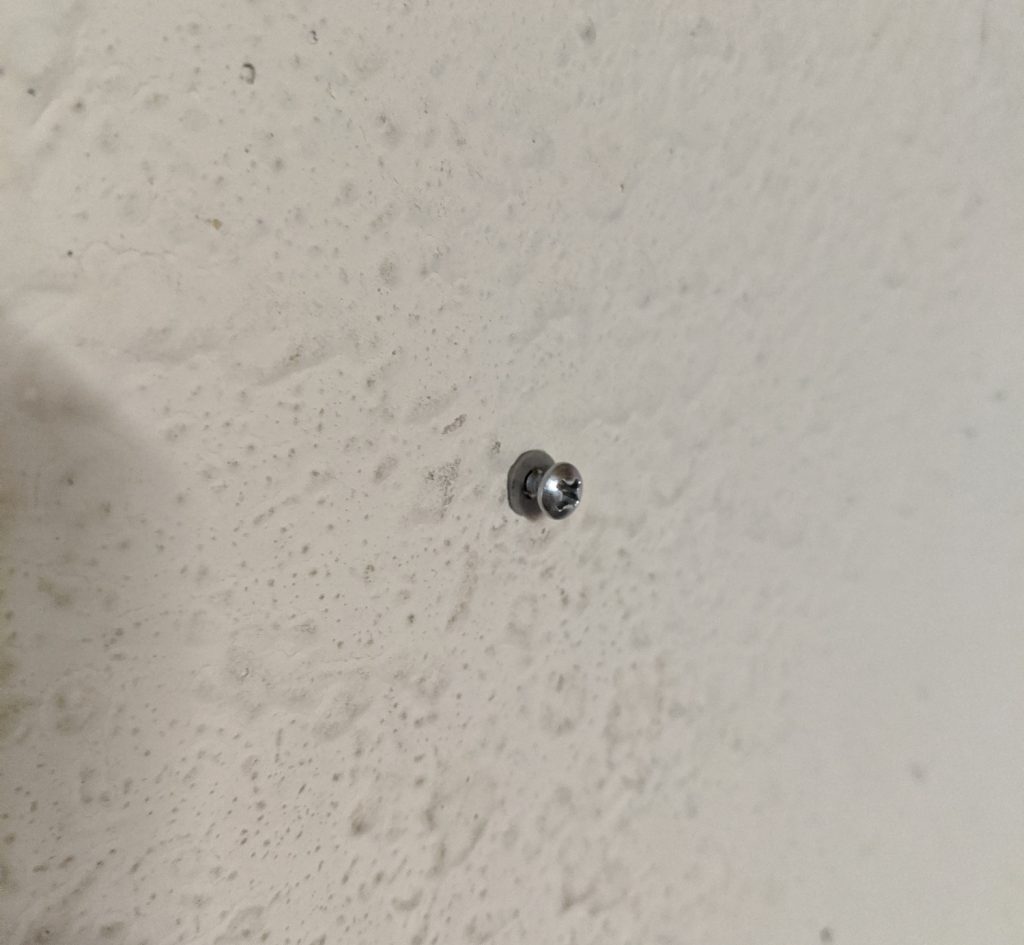
You can then hang the opener on it and mark where you need the second hole.
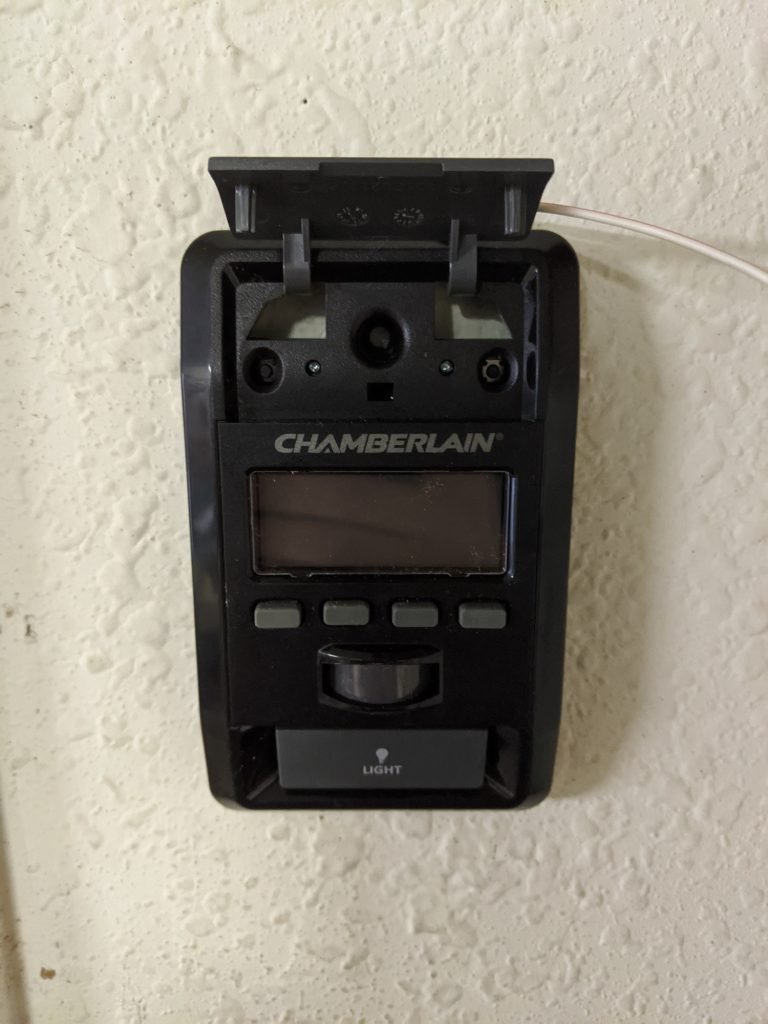
Now mount the wires up your wall, similar to the safety sensors going back to the opener itself. Connect the wires to the two leftmost terminals. The red terminal should have the red wire.
Testing and Calibrating
You’re probably a couple hours in at this point and now comes the time to test if it actually works. On the garage door opener itself, you’ll see a yellow button, two arrow buttons and a black button between the arrows. The black button is the “adjustment button”.If you haven’t put in a light bulb yet, now would be a good time as the opener will flash the bulb during programming to give feedback.
To program the height of your door do the following:
- Press and hold the adjustment button until the up button begins to flash.
- Press and hold the up button until the door is all the way open.
- Once the door is in a good “up” position, press and release the adjustment button. The light bulb should flash.
- Now press and hold the down arrow until the door is in a good down position.
- Press and hold the adjustment button. The light bulb should flash indicating the down position is programmed.
- Press the up button, the door should travel to the up position.
- Press the down button, the door should travel to the down position.
- The door has been programmed.
If the belt looks loose, now would be a good time to tighten it up. You should now be able to use the opener panel you installed to open and close the garage door.
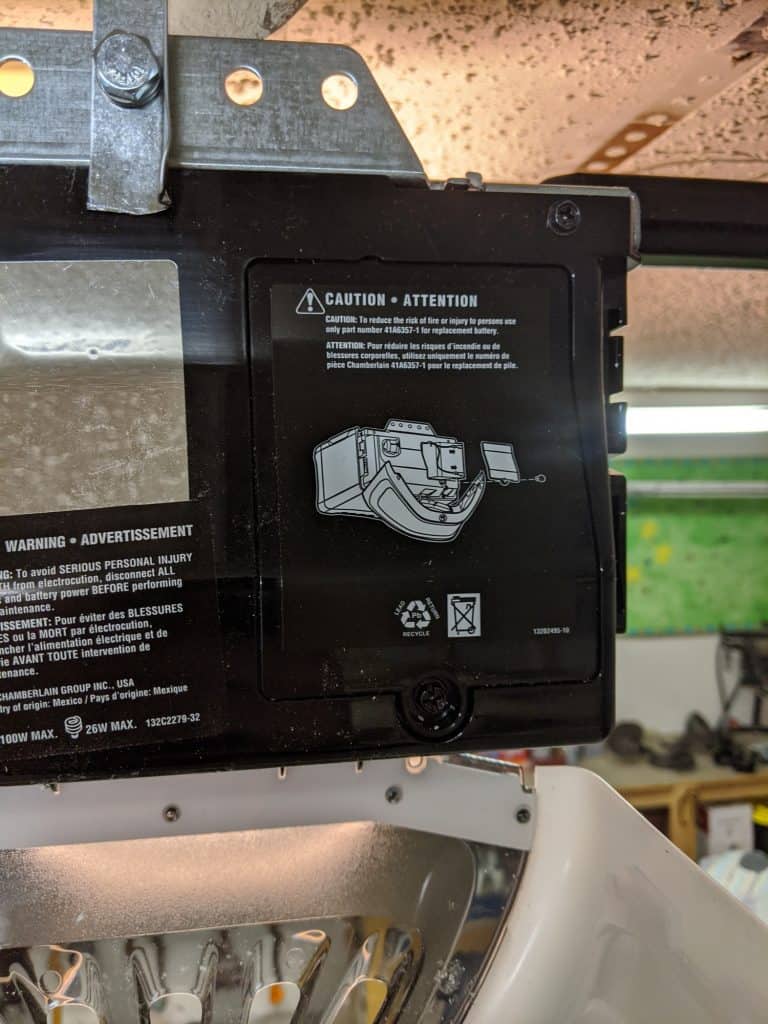
Battery and Outdoor Keypad
The Chamberlain B970 features a battery backup so if your house loses power you should still be able to use your garage door for some time. Installing the backup is really easy, you just remove the panel hiding the battery storage. Connect the battery wires to the correct terminals on the battery and slide it back in.

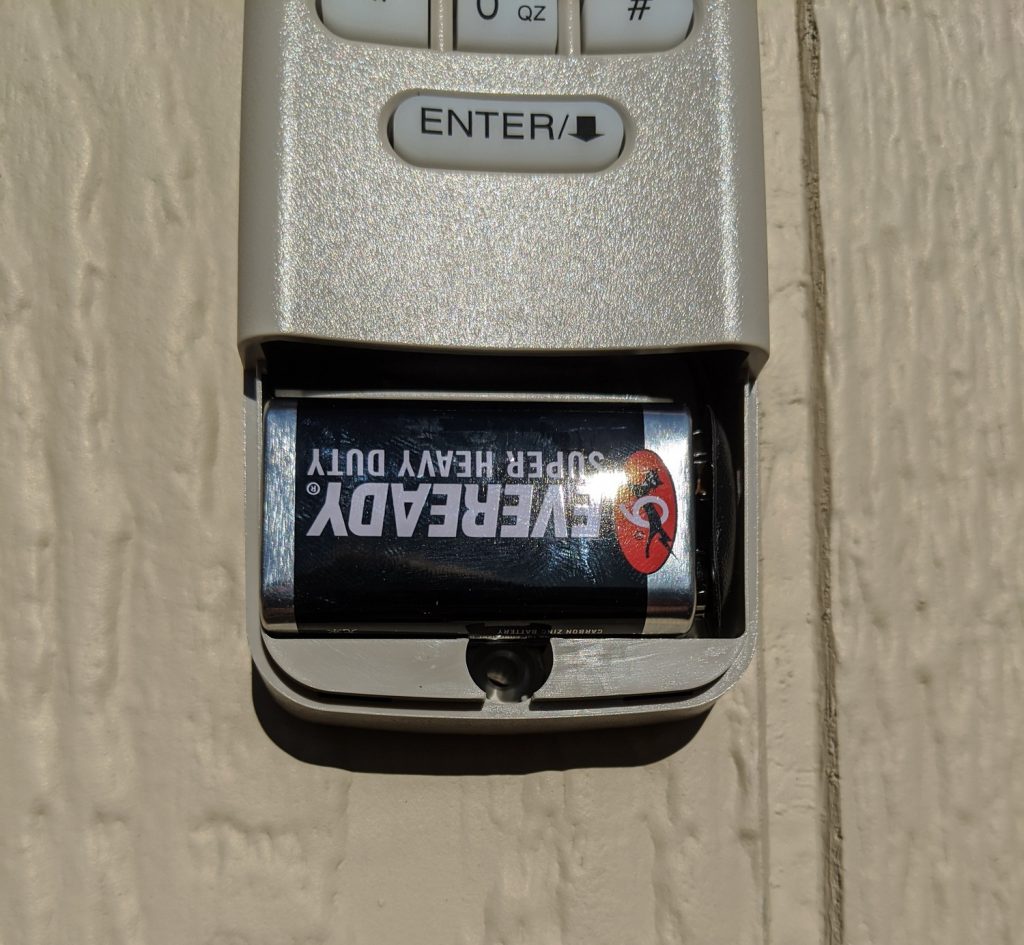
The Chamberlain B970 also comes with an outdoor keypad. This is really useful if you enter and exit through your garage regularly without using your car. I often bike to work and I don’t need to worry about buying an extra car opener for my bike, I can just use the outdoor keypad.
First, we’ll need to pair the remote with the opener. Insert the battery and follow the instructions to pair:
- Press and hold the “*” and “#” buttons until the keypad stops blinking
- Enter your 4-digit pin then press the “#” button
- Press the “ENTER” button once, then press the “0” button
- Press the “Learn” button on the garage door opener. This is a yellow button near the terminals we used to connect everything.
- Within 30 sections, enter your 4 digit pin again and hold the ENTER button until the garage door opener lights flash or two clicks are heard.
- Enter your pin again and press ENTER to test
Mounting it to a wall is done similarly to the other opener. Put in a single screw and mount the opener using it. While mounted with a single screw, mark the second screw hole for mounting.
MyQ App Integration
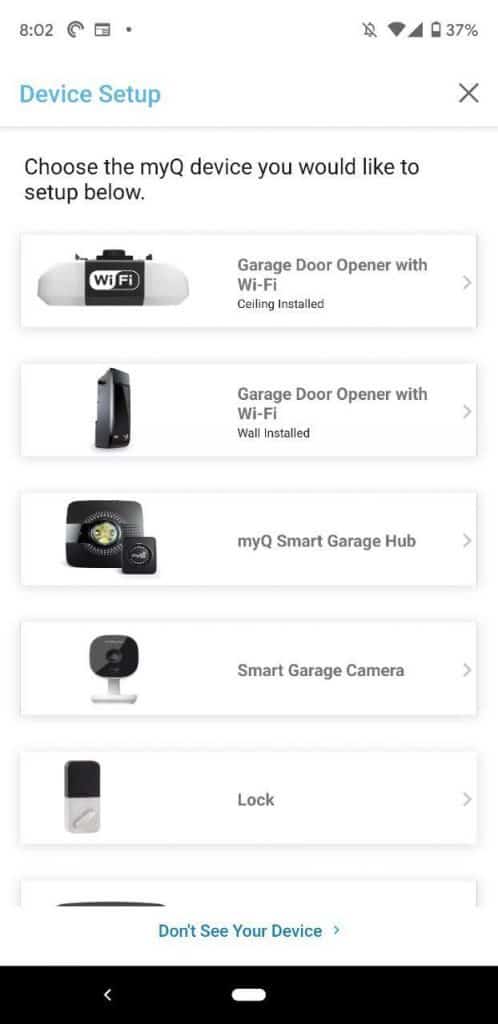
Connecting the garage door opener to your WiFi is very straightforward. First, download the myQ app. Once you open the app create an account (if you don’t have one) and click on the big plus sign to add a new device. Select “Garage Door Opener with Wi-Fi (Ceiling Installed)” for the device type.
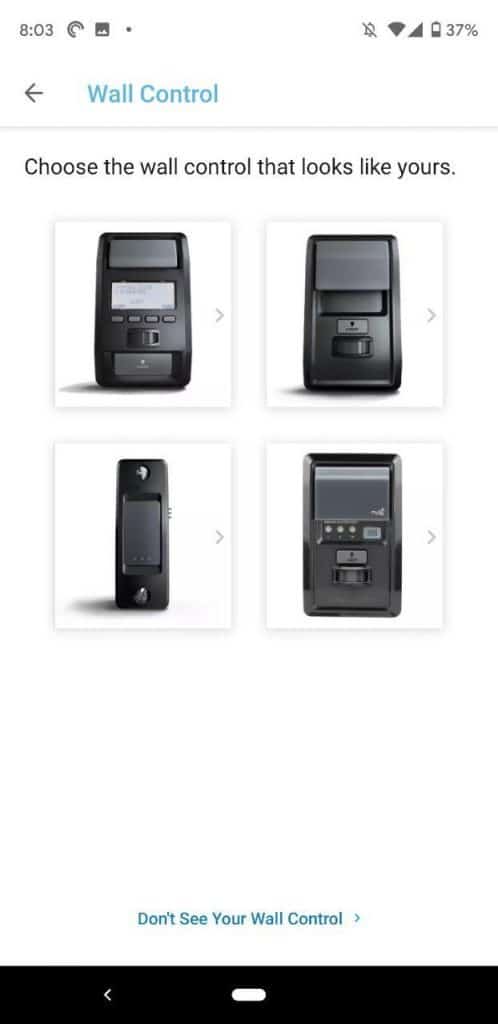
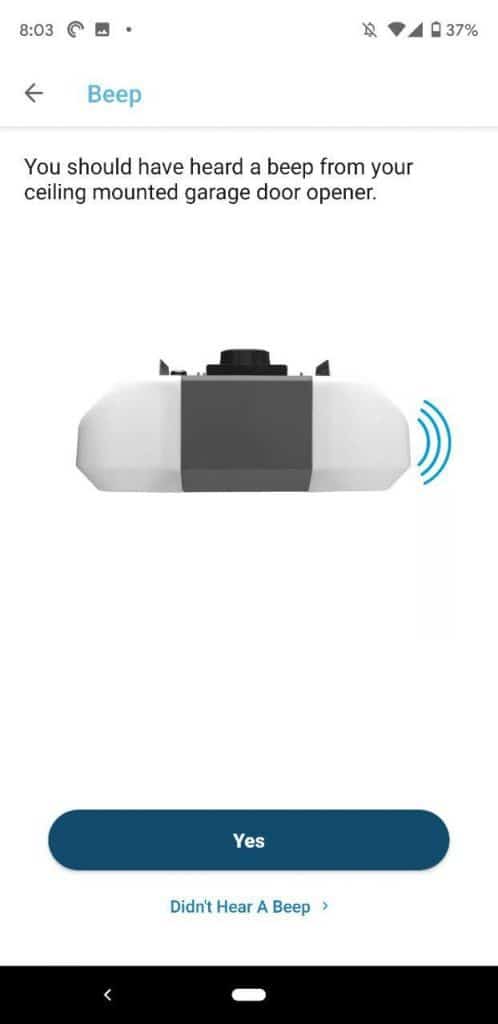
Next, click the picture that shows the wall control panel for the B970. After clicking it, it will give you instructions on how to enable WiFi on the opener.
Enable WiFi on the wall controller and wait to hear a beep from your garage door opener.
Keep following instructions in the app to choose the WiFi network for your garage door opener to connect to.
Integrating with Home Assistant
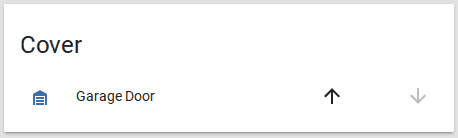
Adding the Chamberlain B970 to Home Assistant is pretty straightforward. Once your garage door opener has been set up with the MyQ app, you can use the MyQ Home Assistant integration in Home Assistant to add your garage door to your Home Assistant instance.
Using your MyQ username and password, create a new cover entry in your Home Assistant YAML configuration.
|
1 2 3 4 |
cover: - platform: myq username: YOUR_USERNAME password: YOUR_PASSWORD |
After restarting Home Assistant, you get a new entity in the user interface to control the garage door.
Now you will be able to create automations around your garage door. For my home, I have a few basic automations around the garage door. You can find the sources in my GitHub configuration.
- Automatically close the door at 9 PM. Message me at 9:05 PM if it failed to close. [YAML Automation]
- If opened after sunset, trigger a scene that turns on lighting throughout the house. Must mean we just came home and could use some light to navigate. [YAML Automation]
- When it opens, blink my office lamp on/off 6 times. Visual notification that someone is pulling in. [AppDaemon App]
What automations do you have using your garage door? Let me know in the comments or on social media!
Wrapping it Up
Thanks for reading my set up for the Chamberlain B970. I don’t typically blog in this style, but I thought I would try it out and help anyone out who’s trying to install it themselves. If you’re considering buying the Chamberlain B970 I definitely recommend it. The quiet belt is a nice improvement over my old garage door opener and it’s relatively easy to install. Take the instructions slowly and you should be able to handle it.
If you found the Chamberlain B970 set up tutorial helpful, and you’re interested in other product reviews, check out the following articles:
- Levoit LV-PUR131S WiFi Air Purifier Review
- Shelly RGBW2 LED Controller Review
- GE Z-Wave Plus Outdoor Smart Plug Review
Please consider supporting the blog by joining my mailing list, following the blog on social media or directly through Buy Me a Coffee. Thanks for reading!