
Want to control an LED light strip to add some accent or task lighting to a room? Have you read a few articles about doing it yourself and confused by all the options and costs involved? If you’re looking for a simple way to control an RGB LED strip, the Shelly RGBW2 could be the right product for you.
To start off, the Shelly RGBW2 allows you to fully control your LED strip without relying on the cloud. You can control the device directly using MQTT so that all data is local and changes happen fast. And you never have to worry about a cloud service being down or functionality being removed. If you want to just use an app and control the LED strip from anywhere, the RGBW2 supports that too.
For today’s review, I’ll be using a 12V Power Supply and 12V RGBW LED Strip. The RGBW2 works with “analog LED strips” or “dumb LED strips”, meaning that LEDs on the strips are not individually addressable. I’ll soon be installing these as under cabinet LED lighting in my kitchen, so make sure to subscribe to the email list or follow on twitter to see how that project goes!
Shelly RGBW2 Features
Like I mentioned in the opening of the article, the Shelly RGBW2 allows you to fully control the color, brightness, and effects locally over MQTT. Few companies are giving this sort of access to their devices and I really applaud Shelly for this feature. Allowing local control over MQTT allows users to reduce the latency of the device and improve security since all data remains on the local network.
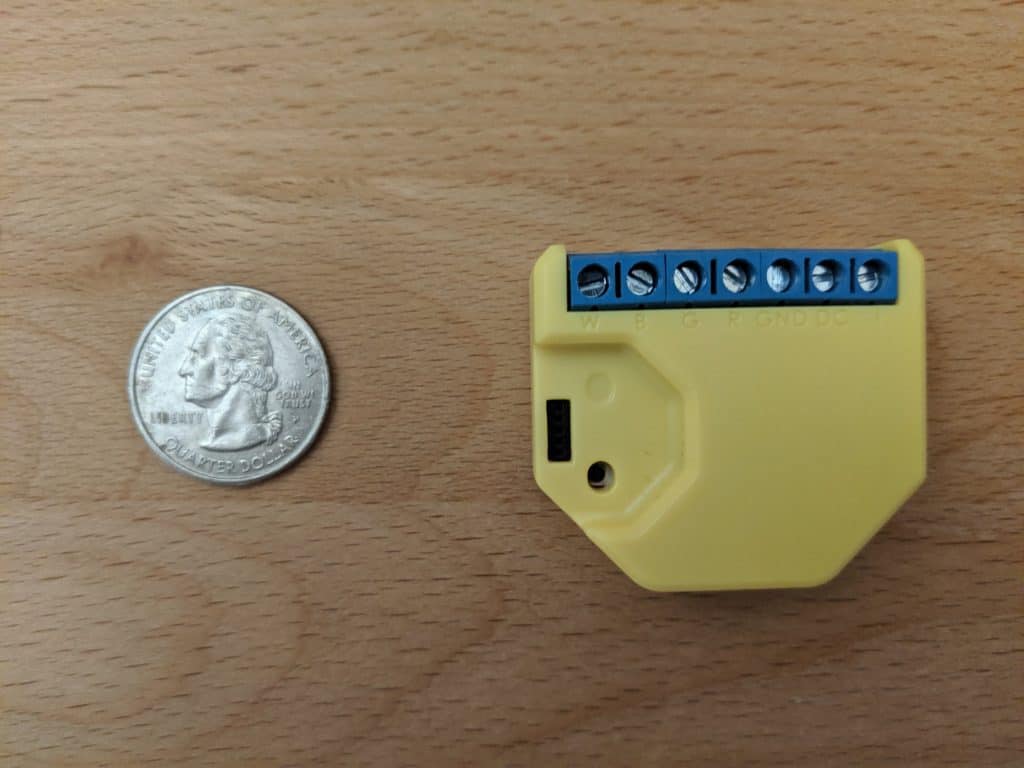
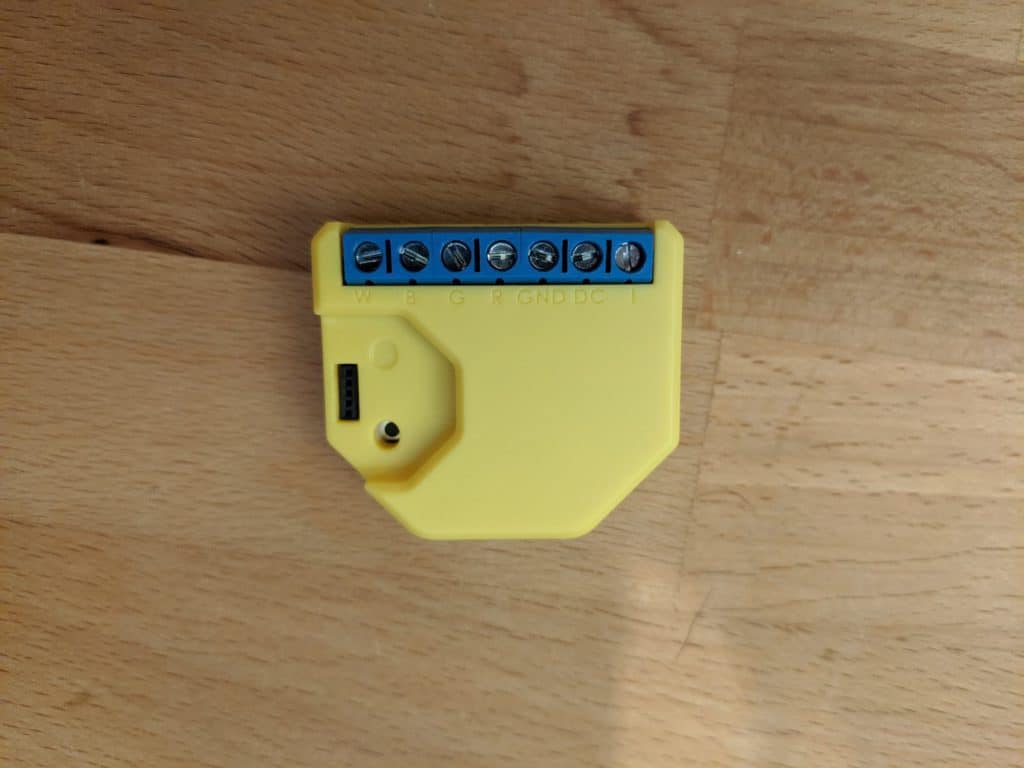
One thing you’ll notice off the bat with the Shelly is how small it is. Below I’m comparing the Shelly with a US Quarter.
Looking at the technical specs, the Shelly RGBW2 supports RGB and RGBW LED strips. It does not support individually addressable LEDs. So if you are looking to create animations (like my Music Visualizer project), you’ll have to look elsewhere. All the LEDs on the strip will be the same color. The Shelly supports 12V and 24V LED strips and requires a 2.4 GHz WiFi network for connectivity. With the RGBW2 you can control four colors (Red, Green, Blue, and White) to get your desired effect.
The Shelly supports a reset pin, so if you want local control of the strip you can wire in a switch to turn on and off the lights. It also exposes some pins to the ESP8266 within the Shelly, with those you could even reprogram the firmware running on the Shelly to be something custom.
You can control the Shelly through the Shelly mobile App. Or you can make use of the MQTT interface to integrate it with your own Home Automation platform. I’ll go over using Home Assistant in this review since that’s my Home Automation platform of choice.
The last thing I wanted to point out is the screw terminals used with the Shelly. I’m always a little hesitant when a device uses screw terminals for the connection points because some devices cheap-out and they can become kind of flimsy. The ones on the Shelly though seem like good quality and how they are situated in the plastic mold seem like they will stay in place.
Wiring Up the Shelly
Wiring up the device is pretty straightforward. The packaging contains some simple wiring diagrams to show how to wire up the Shelly RGBW2 to the power supply and LED strip. These schematics are also available on the Shelly Website.
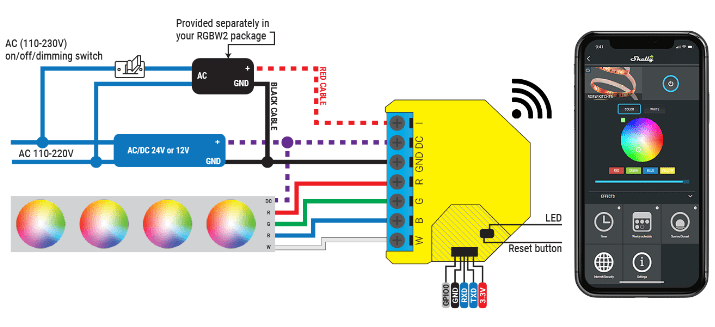
Seen above is the wiring diagram for a typical RGBW strip. You’ll need a 12V Power supply to convert the 110V AC coming from your wall outlet down to 12V to power the Shelly and LED strip. For my use case, I won’t be using a local on/off/dimming switch. Therefore, I’ve removed that part of the circuit. Lastly, I reused some of these Male/Female 3-pin connectors I used in another project to create some easy connection points between the RGBW2 and the LED strip. I simply cut one of the wires short in one of those connectors and used 2 so that I had 5 total pins.
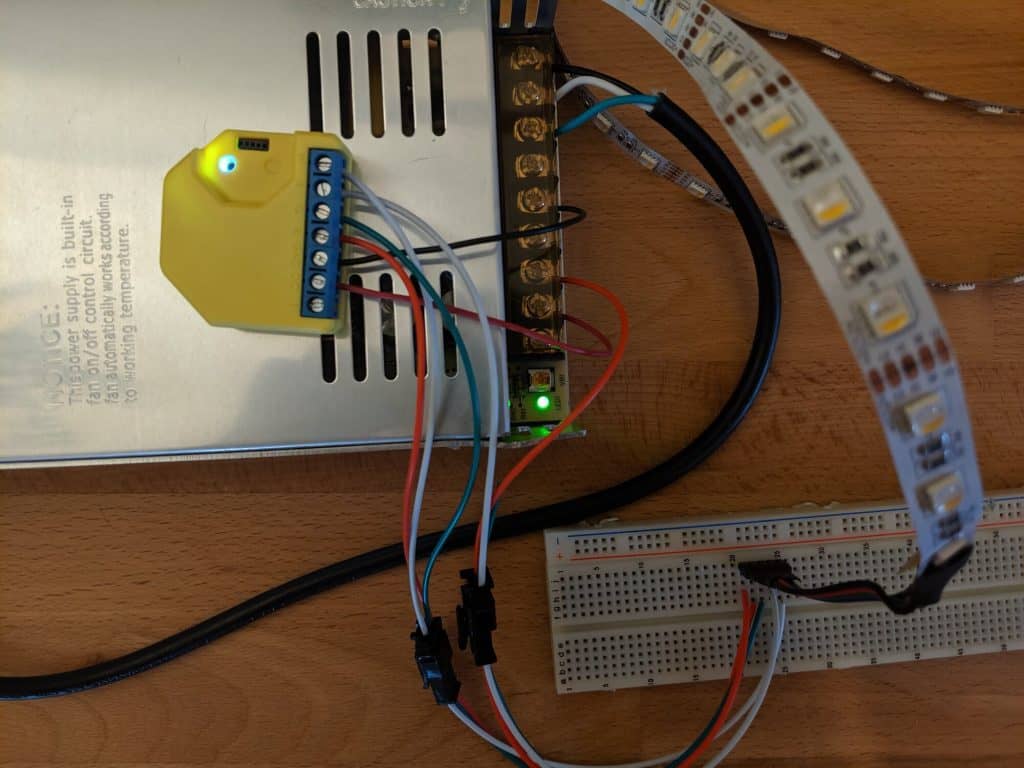
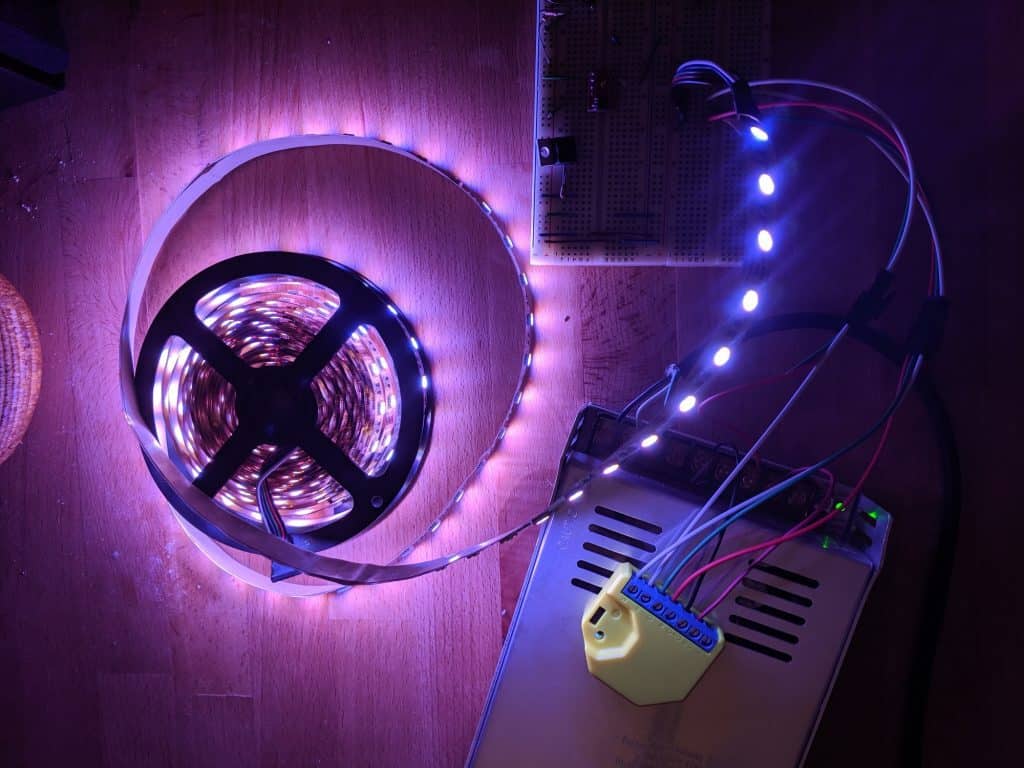
Above is from my desk while testing out the LED strip on a breadboard.
- At the top you can see the 110V AC cord going to the power supply.
- Notice 2 red wires coming from the power supply, that gives 12V DC to the Shelly RGBW2 and the LED strip. The black GND wire just goes to the RGBW2.
- The Red, Green, Blue and White terminals on the RGBW2 go from the device to the breadboard. The breadboard bridges the connection to the LED strip.
Enabling MQTT
After wiring up the Shelly it will automatically turn on and start up a new wireless network. To configure the Shelly RGBW2 you need to download the Shelly Cloud app.
After downloading and installing the app, use it to look for a new device. You will be prompted to give your WiFi credentials so that they can be shared with the Shelly RGBW2 and it can connect to your home network. Continue through the setup process and add your device to a room in the Shelly app. Within the app, you can also decide if you want to enable cloud connectivity. I decided to disable it since I will be controlling it locally through MQTT and Home Assistant.

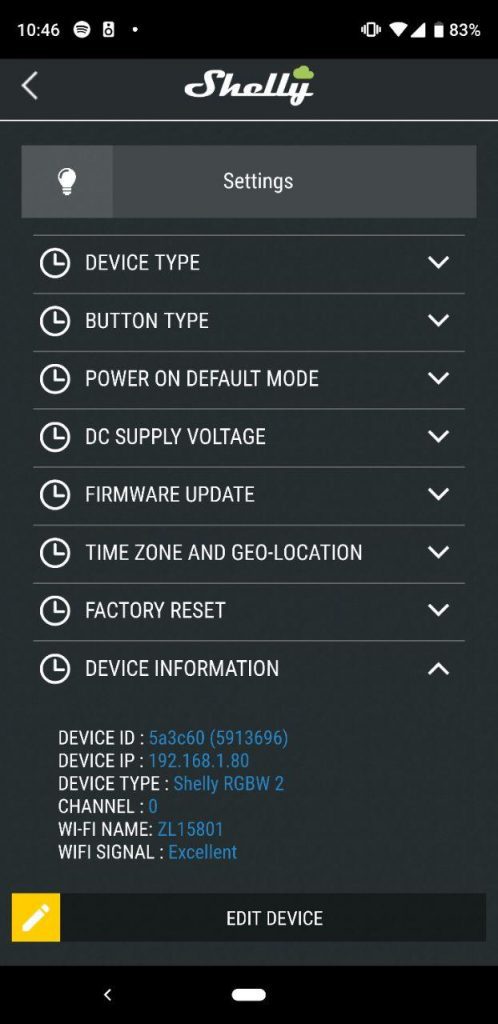
Once the Shelly is set up and you have control within the app, it’s time to enable MQTT. To do so, you need to go to the IP address of the Shelly RGBW2 in your browser. You can find out the IP address by looking at the list of connected devices in your router settings. Or you can look at the “Device Information” menu within the Shelly Cloud app under the device, it should have the IP address listed there.
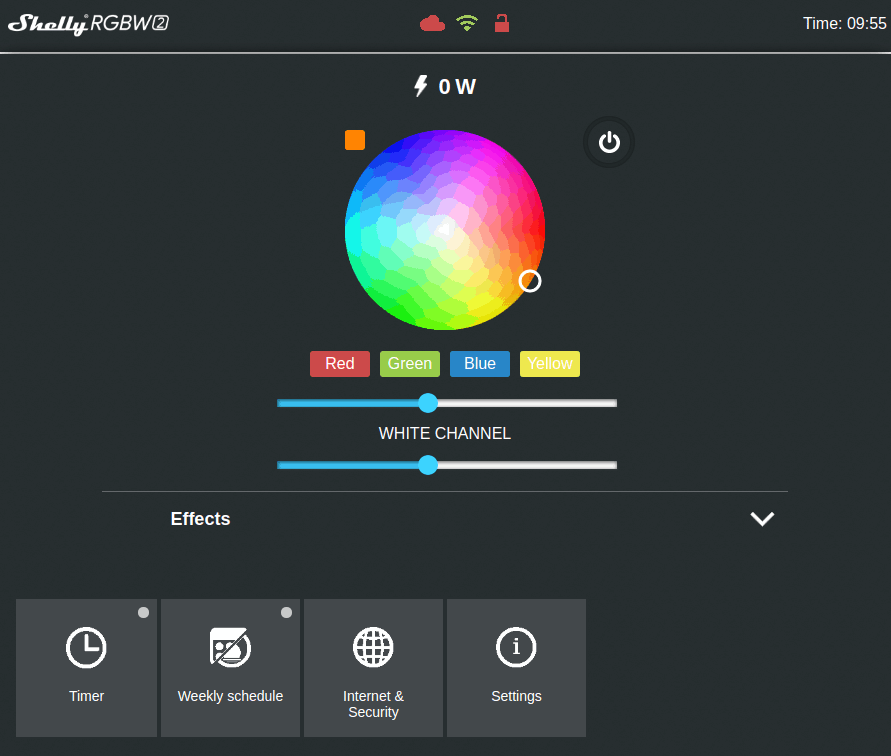
Accessing the Shelly IP address from the browser should give you a screen that looks something like this:
To enable MQTT go to the “Internet and Security” section and the “Advanced – Developer Settings” under that. Here you will see a checkbox for enabling MQTT. Click the checkbox and enter in your MQTT broker IP address, username, and password. I also recommend checking the “Retain” box.
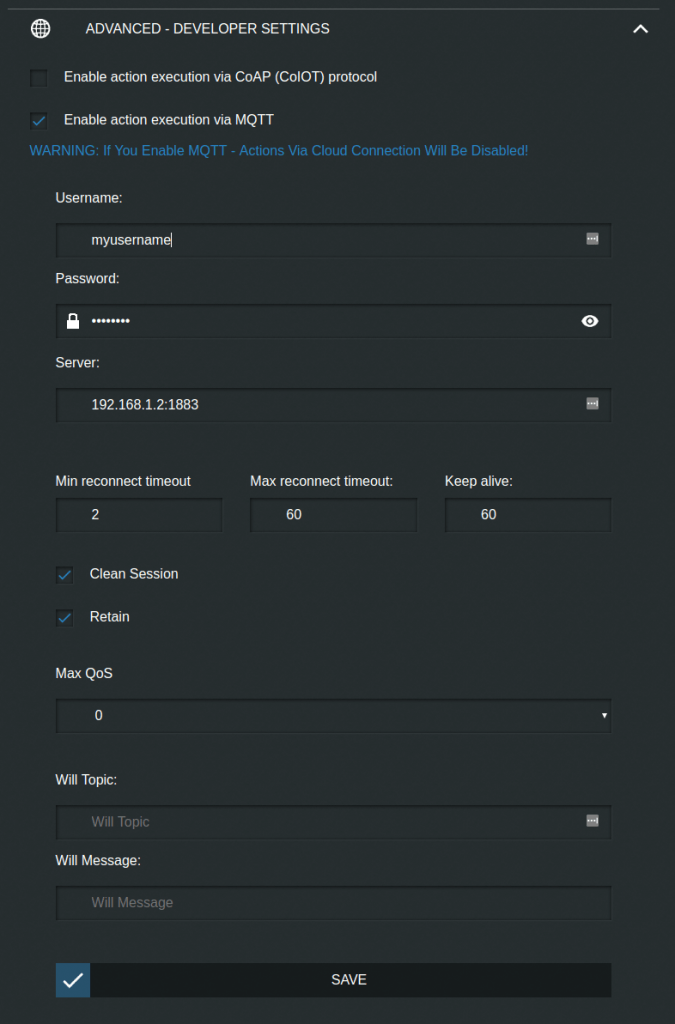
Once you’ve filled that out click “Save”. I also found I needed to click “Device Reboot” from the settings menu to reboot the Shelly and have MQTT enabled. Now that MQTT is enabled we can move on to the next section to integrate it with Home Assistant.
Home Assistant Integration
Now that your Shelly RGBW2 supports MQTT for local control of the LED strip, we can add the entry to Home Assistant. Rob from The Hook Up did the hard work of figuring out the YAML for us to use in our Home Assistant configuration. To use the Shelly with Home Assistant we just need to create a new MQTT Light using the Template Schema.
In order to access the Shelly, you also need to know it’s ID, which happens to be the last 6 characters of it’s MAC address. You can find this by looking at the connected devices on your router or by looking at the ID listed in the Shelly Cloud app.
Once you have the ID, copy the below JSON into your Home Assistant configuration to add your new light.
|
1 2 3 4 5 6 7 8 9 10 11 12 13 14 15 16 17 18 19 20 21 22 23 24 25 26 27 28 29 30 31 32 33 34 35 36 37 38 |
light: - platform: mqtt schema: template name: "LEDstrip MQTT" command_topic: "shellies/shellyrgbw2-2B9022/color/0/set" state_topic: "shellies/shellyrgbw2-2B9022/color/0/status" effect_list: - 0 - 1 - 2 - 3 - 4 - 5 - 6 command_on_template: > {"turn": "on" {%- if brightness is defined -%} , "gain": {{brightness | float | multiply(0.3922) | round(0)}} {%- endif -%} {%- if red is defined and green is defined and blue is defined -%} , "red": {{ red }}, "green": {{ green }}, "blue": {{ blue }} {%- endif -%} {%- if white_value is defined -%} , "white": {{ white_value }} {%- endif -%} {%- if effect is defined -%} , "effect": {{ effect }} {%- endif -%} } command_off_template: '{"turn":"off"}' state_template: "{% if value_json.ison %}on{% else %}off{% endif %}" brightness_template: "{{ value_json.gain | float | multiply(2.55) | round(0) }}" red_template: '{{ value_json.red }}' green_template: '{{ value_json.green }}' blue_template: '{{ value_json.blue }}' white_value_template: '{{ value_json.white }}' effect_template: '{{ value_json.effect }}' qos: 2 |
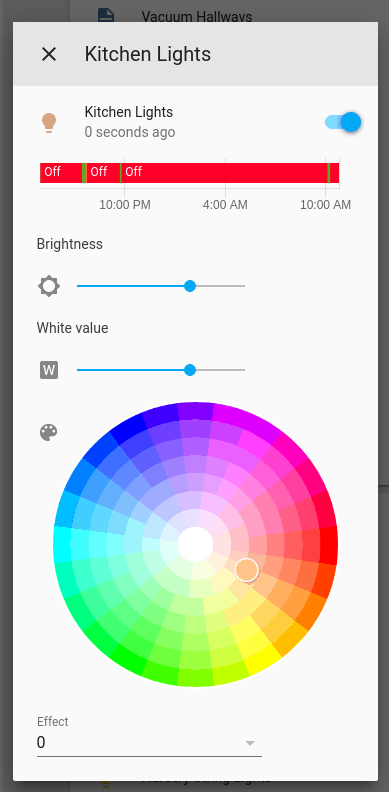
Restart Home Assistant and you should be able to access your new light.
Closing Thoughts
The Shelly RGBW2 is a super simple way to get started playing with RGBW LED strips. It allows you to control an LED strip through the cloud using its app, or you can stick to local communication using the built in MQTT APIs. They are pretty inexpensive and are super responsive. Next week I’ll be installing these in my kitchen to give some task lighting underneath my cabinets, stay tuned!
If you’re a fan of LED strip projects, you might be interested in some of my other articles:
If you found this review helpful, please consider supporting the blog by joining my mailing list, following the blog on social media or directly through Buy Me a Coffee. Thanks for reading!