
I want to add some DIY switches to my Home Assistant automation setup. These switches can control anything, such as lights, fans, blinds, etc… The switches are programmed using MicroPython using the ESP8266 NodeMCU board. Home Assistant will control them using the MQTT protocol. Check out some of my previous blog entries for getting an MQTT broker running with Home Assistant and MicroPython the ESP8266.
Why did I go with MicroPython over Arduino or ESPEasy? I wanted to use Python so that as my needs changed I had a flexible programming language I could use to quickly program a solution. Plus, I just like using Python and hadn’t played with MicroPython yet.
One thing I love about the ESP8266 is that MicroPython is really well supported and they’re pretty cheap. You can get a pack of 2 from Amazon.
Setting up Home Assistant
For this demo, we’re going to use Home Assistant to toggle the LED on the ESP8266 board. So first, we need to add a new switch to Home Assistant to tell it how to communicate with the MQTT switch.
Open up your Home Assistant config file and add the following MQTT switch:
|
1 2 3 4 5 6 7 8 9 10 11 12 |
switch: - platform: mqtt name: "Office LED" state_topic: "home/office/switch1" command_topic: "home/office/switch1/set" availability_topic: "home/office/switch1/available" payload_on: "on" payload_off: "off" payload_available: "online" payload_not_available: "offline" optimistic: false retain: true |
Some things you might want to change:
- Change the “name” attribute to match something descriptive about your switch. We’ll also use this when adding the switch to the UI
- Change the topic’s to better match the location of your switch
- You can also change the payload strings, these are the values that Home Assistant will use to communicate with the switch. The values above match the firmware I provide in this article, so if you decide to change it make sure you change them in both places.
I also decided to add the LED to my frontend lights group by updating my lights group with the following:
|
1 2 3 4 5 6 7 8 9 10 11 12 13 14 15 16 17 18 19 |
Lights: view: yes icon: mdi:lightbulb-on-outline entities: - group.garage - group.living_room - group.office Garage: entities: - switch.shop_lights_switch Living Room: entities: - light.living_room_dimmer Office: entities: - switch.office_led |
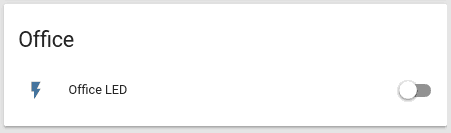
After adding the switch reboot Home Assistant. After rebooting you should have a new card in your UI for controlling the switch.
MicroPython Code
Now that Home Assistant knows about the switch we need to program the firmware onto our ESP8266. The board should already be running MicroPython, we can create an application that runs on boot by adding a boot.py and main.py to the filesystem. It will run these two files on startup and start communicating with the MQTT broker.
All my code is up on GitHub go there to download/clone/star the code. The first piece of code to look at is config.py file. This is just a python file that declares some global variables in a central place to make it easier for configuration. Change the topics if you decided to change them in Home Assistant and set your ESSID and password for your WiFi network. You also need to change the server to be the IP address where your MQTT broker is running. Note that this can be different than your Home Assistant IP address if they are running on separate hosts.
|
1 2 3 4 5 6 7 |
ESSID = "<ESSID>" PASSWORD = "<PASSWORD>" SERVER = "192.168.1.9" COMMAND_TOPIC = "home/office/switch1/set" STATE_TOPIC = "home/office/switch1" AVAILABILITY_TOPIC = "home/office/switch1/available" |
Now, let’s check out boot.py. This is pretty similar to the version in my article on installing MicroPython on an ESP8266. Now though, the configuration lives in a separate file to allow for better abstraction.
|
1 2 3 4 5 6 7 8 9 10 11 12 13 14 15 16 17 18 19 20 21 22 23 |
# This file is executed on every boot (including wake-boot from deepsleep) #import esp #esp.osdebug(None) import gc import webrepl import network from config import ESSID, PASSWORD webrepl.start() gc.collect() def connect(): sta_if = network.WLAN(network.STA_IF) if not sta_if.isconnected(): print('Connecting to network...') sta_if.active(True) sta_if.connect(ESSID, PASSWORD) while not sta_if.isconnected(): pass print('Network config:', sta_if.ifconfig()) connect() |
All this file is doing is reading the ESSID and password from the config file, starting up the WLAN and connecting to the network. After connecting, it prints out the IP address assigned.
After the boot.py file runs the main.py gets run. Below is a copy of the script:
|
1 2 3 4 5 6 7 8 9 10 11 12 13 14 15 16 17 18 19 20 21 22 23 24 25 26 27 28 29 30 31 32 33 34 35 36 37 38 39 40 41 42 43 44 45 46 |
from umqtt.simple import MQTTClient import machine import utime import ubinascii from config import SERVER, COMMAND_TOPIC, STATE_TOPIC, AVAILABILITY_TOPIC LED = machine.Pin(2, machine.Pin.OUT, value=1) CLIENT = None CLIENT_ID = ubinascii.hexlify(machine.unique_id()) def new_msg(topic, msg): print("Received {}".format(msg)) if msg == b"on": LED.value(0) CLIENT.publish(STATE_TOPIC, "on") elif msg == b"off": LED.value(1) CLIENT.publish(STATE_TOPIC, "off") def main(): global CLIENT CLIENT = MQTTClient(CLIENT_ID, SERVER) CLIENT.set_callback(new_msg) CLIENT.connect() CLIENT.subscribe(COMMAND_TOPIC) # Publish as available once connected CLIENT.publish(AVAILABILITY_TOPIC, "online") print("Connected to {}, subscribed to {} topic".format(SERVER, COMMAND_TOPIC)) try: while 1: CLIENT.wait_msg() finally: CLIENT.publish(AVAILABILITY_TOPIC, "offline") CLIENT.disconnect() main() |
Let’s break this down into separate parts. First, we import from the micropython libraries and the config.py file that contains our configuration values. We also set some global variables, including LED which initializes Pin 2 as an output and turns it off by default by setting the value to 1. The CLIENT global variable will hold our MQTT client object, but we’re not ready to initialize it yet. We also set the MQTT client identifier by using the unique_id for our device.
|
1 2 3 4 5 6 7 8 9 10 11 |
from umqtt.simple import MQTTClient import machine import utime import ubinascii from config import SERVER, COMMAND_TOPIC, STATE_TOPIC, AVAILABILITY_TOPIC LED = machine.Pin(2, machine.Pin.OUT, value=1) CLIENT = None CLIENT_ID = ubinascii.hexlify(machine.unique_id()) |
Now let’s look at the main() function. The global CLIENT statement allows us to modify the global variable in the function. The code creates a new MQTTClient object using the ID created in the previous section and the SERVER that was set in the config.py file. The code sets what is known as a “callback function” which will get called automatically whenever a message comes in on any subscribed topic. After subscribing to the topic the device connects to the MQTT broker by calling CLIENT.connect().
After connected, the device subscribes to the COMMAND_TOPIC. Home Assistant uses this topic to give commands to the device, so we need to subscribe to it to get updates on the status of the LED. Afterwards the string online is written to the AVAILABILITY_TOPIC. Home Assistant subscribes to this topic to know if the device is online or offline. By publishing the online message the UI in Home Assistant becomes active and allows the user to switch on/off the LED. After publishing, a message prints to the serial output for local debugging.
The end of main() is a try/finally block with a while 1 loop. The device will loop waiting for messages and calling the callback function. If any type of exception occurs on the device the finally code is executed which updates the AVAILABILITY_TOPIC to offline and disconnects from the broker.
|
1 2 3 4 5 6 7 8 9 10 11 12 13 14 15 16 17 18 19 |
def main(): global CLIENT CLIENT = MQTTClient(CLIENT_ID, SERVER) CLIENT.set_callback(new_msg) CLIENT.connect() CLIENT.subscribe(COMMAND_TOPIC) # Publish as available once connected CLIENT.publish(AVAILABILITY_TOPIC, "online") print("Connected to {}, subscribed to {} topic".format(SERVER, COMMAND_TOPIC)) try: while 1: CLIENT.wait_msg() finally: CLIENT.publish(AVAILABILITY_TOPIC, "offline") CLIENT.disconnect() |
Finally, let’s look at the callback code. This function is executed whenever a message published on the COMMAND_TOPIC from Home Assistant. The function starts with a debug message for the local serial connection. The function actually provides a topic and msg variable so you can determine which topic the message came in on. For our case, the device subscribes to only a single topic so the code knows that a command from Home Assistant has come in. We simply check the value of msg, if it is on we set the LED on by writing a 0 to the pin. After setting the pin the device publishes a message on the STATE_TOPIC. When Home Assistant sees this message it updates the UI to show that the LED did in fact turn on. An off message has the opposite results.
|
1 2 3 4 5 6 7 8 9 10 |
def new_msg(topic, msg): print("Received {}".format(msg)) if msg == b"on": LED.value(0) CLIENT.publish(STATE_TOPIC, "on") elif msg == b"off": LED.value(1) CLIENT.publish(STATE_TOPIC, "off") |
Loading the Scripts
If you haven’t read my last article on Running MicroPython on ESP8266 NodeMCU, go ahead and check that out now, you’ll need that to load MicroPython onto the device and enable the WebREPL. There are a few ways to load these python files onto the board, all require that the MicroPython firmware is currently running on the device.
One way is to upload the files using the WebREPL, I explored that last time and is a viable option to upload the python files.
Another way is to use a command line tool to do the upload. This is handy when working on a project and you want to continually edit files and upload to your board. Messing around with a GUI can be annoying when you are trying to iterate as fast as possible.
The tool I’m going to show today is mpfshell. It’s a simple shell based file explorer for ES8266 MicroPython devices that we can script to deploy our python scripts. You should be able to install it using pip:
|
1 |
sudo pip install mpfshell |
If you check out my GitHub repository I have included a mpfshell script called upload.mpf this contains the mpfshell commands to run. Make sure to change your serial device to whatever matches on your system. This script simply opens the connection, puts the three files we need onto the device and then prints out a listing of files.
|
1 2 3 4 5 |
open ttyUSB0 put boot.py put config.py put main.py ls |
To run the file through mpfshell use the -s option.
|
1 |
mpfshell -s upload.mpf |
A list of files gets printed to the screen once the Python files are done uploading.
Wrapping Up
So now you should feel comfortable getting a microcontroller running MicroPython to work with Home Assistant as a DIY switch over MQTT. Using MicroPython allows a lot of flexibility in what you want to achieve so try it out for your next project. Some other cool things to try out:
- Over the air updates. Uploading MicroPython firmware and Python files over the WiFi connection
- MQTT topic for an entire room, to turn off all lights on/off at once
- Running the microcontroller from a battery and putting the ESP8266 into deep sleep to conserve power
- Check out water sensors to make a DIY leak detection application