
Ever wanted to be alerted when an appliance has been on for too long? What about switch a device on and off from your phone or through an automation? This is the perfect application for a smart switch! Today I’m going to be looking at the Zooz Z-Wave Plus Power Switch (ZEN15) and integrating it with Home Assistant with notifications.
There are a ton of smart home switches on Amazon. I have invested in a Z-Wave Plus mesh network in my house, so I went searching for a great Z-Wave Plus switch that measures energy usage. Z-Wave communication is all local so you don’t need to rely on any cloud service being up or any companies taking your data. It also works at a lower frequency band (908 MHz) than WiFi. So it won’t cause congestion on your 2.4 GHz wireless spectrum at your home that your WiFi and Bluetooth devices already use. If you’re interested in Z-Wave Plus check out my article on Adding a Z-Wave Plus Dimmer Switch to Home Assistant.
I’ve got a bad habit of leaving my soldering iron on hours after I’m done using it. Not only is this dangerous if anyone (or my dogs) run into my desk and knocks it over, but it also ends up oxidizing the tip of the soldering iron and damaging it. I also want to continue using the switch that’s on the soldering iron. I don’t want to have to use my phone or Home Assistant any time I want to turn it on. Instead, I want to get a notification if I’ve left it on for a long time. After going through 3 soldering iron tips in the last month I figured it was time to solve this with automation!
Unboxing and Setup
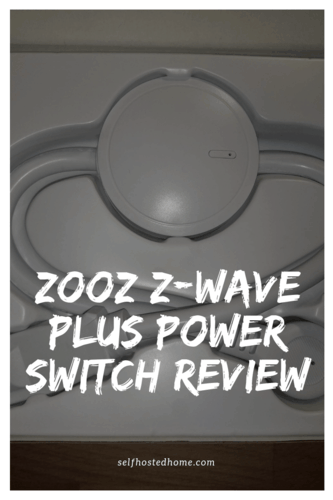
The Zooz Z-Wave Plus Power Switch is available on Amazon and can be found as a power cord switch or just as a smart plug in an outlet. Today, I’ll be looking at the power cord switch (the ZEN15 to be exact).

Device Features
One of the features I like about the switch is the physical button to toggle the switch. If your phone isn’t handy or you aren’t near a computer it can be a hassle to turn one of these smart switches on, with a physical local fallback you never run into that issue. Being a powered Z-Wave Plus device it also acts as a repeater for your Z-Wave mesh network, improving its health by adding another node to relay messages.
The main feature I was excited about in this switch is energy monitoring! This way I can tell if the appliance has been on for a long time by looking at how long it’s been using power. In a future article, I’ll detail how to save energy measurements over time so you can calculate how much an appliance is costing you.
Add to Your Network
It’s best to refer back to your Z-Wave Plus gateway device’s documentation to see how to include new devices to your network. I’m using the Aeotec Z-Stick Gen 5 and to connect the Zooz to my network all I had to do was:
- Press the button the Aeotec Z-Stick to start the pairing mode. The LED on the stick starts to blink slowly
- Plug in the Zooz Switch into the outlet. But not plug in the appliance yet.
- The Z-Stick should start to blink fast as it discovers the Zooz switch.
- The Z-Stick eventually goes back to blinking slowly. Press the button again to get out of pairing mode.
Now the device should be added to your Z-Wave network.
Home Assistant
There’s really not much to do to add the device to Home Assistant after you’ve had it join your Z-Wave network. You should see it show up as a node in the Z-Wave configuration menu.

Click “Node Information” to view more details about the new switch and its status.

Next, click the gear in the top right you can also rename the node. Like I mentioned earlier, mine will be monitoring my soldering iron so I renamed it accordingly.

You can repeat the same steps for all the entities of the switch as well. Renaming them in this menu propagates to the Home Assistant user interface.

Automation
I like to write my more complex automations using AppDaemon for Home Assistant. This allows me to develop the automations in Python rather creating YAML files. Which can become hard to read and maintain over time. To learn more about AppDaemon check out my article on Creating a Telegram Bot for Home Assistant or the AppDaemon documentation.
My automation sends me a message on Telegram whenever the appliance has been on for a set period of time. It gives a quick response button that allows me to kill the power to the device easily.

AppDaemon Configuration
The nice thing about AppDaemon is that you can write “Apps” that can be reused. My energy monitoring app could work with any appliance because the logic is separated out. The app takes five inputs:
- The Home Assistant sensor that monitors energy usage
- The Home Assistant switch to turn off
- The Telegram user id to notify
- The amount of time to wait before triggering a notification
- A descriptive name for the switch for the notification text
For example, when using this app for my soldering iron, I use the following inputs:
|
1 2 3 4 5 6 7 8 |
soldering_iron_on: module: appliance_on_notification class: ApplianceOnEventListener telegram_user: !secret zack_telegram_chat_id appliance_name: Soldering Iron power_sensor: sensor.office_soldering_iron_power power_switch: switch.office_soldering_iron_switch time_before_shutoff: 1200 |
AppDaemon App
The energy monitoring app is pretty simple, it starts a timer whenever it sees the power sensor go to something above zero. When the timer expires, it sends a telegram message alerting the user that the appliance has been left on for too long. The user can respond with a “Turn Off” or “Do Nothing” command. If the user presses “Turn Off”, the switch turns off and cuts power to the appliance.
You can see the code for this AppDaemon App and my Home Assistant Configuration on GitHub.
Summary
All in all, the Z-Wave Plus Power Switch is a great Z-Wave device that integrates nicely into Home Assistant. It had the two biggest features I wanted in a Z-Wave switch, a physical button to press and energy monitoring. In a future article, I will discuss more details about energy monitoring and how you can calculate your energy bill for an appliance. Subscribe and follow me on social media to see more!